
V-LUX 5 - Camera LEICA - Free user manual and instructions
Find the device manual for free V-LUX 5 LEICA in PDF.


| Product Type | Digital Camera |
| Model | V-LUX 5 |
| Brand | Leica |
| Sensor | 1-inch CMOS, 20.1 MP |
| Image Processor | Leica Maestro II |
| Lens | Leica DC Vario-Elmarit 9.1–146 mm f/2.8–4 ASPH (24–480 mm equivalent) |
| Optical Zoom | 16x |
| Digital Zoom | Up to 4x |
| Maximum Aperture | f/2.8–4 |
| Viewfinder | 2.36M-dot OLED electronic viewfinder |
| LCD Screen | 3.0-inch tilting touchscreen, 1.24M dots |
| Video Recording | 4K UHD (3840x2160) at 30p/25p, Full HD up to 60p |
| ISO Range | 125–12800 (expandable to 80–25600) |
| Shutter Speed | 30–1/4000 sec (mechanical), up to 1/16000 sec (electronic) |
| Continuous Shooting | Up to 12 fps |
| Built-in Flash | Yes |
| Connectivity | Wi-Fi, Bluetooth, USB 2.0, HDMI micro |
| Memory Card Slot | SD/SDHC/SDXC |
| Power Source | Rechargeable Li-ion battery (BP-DC12) |
| Battery Life | Approx. 360 shots (CIPA standard) |
| Dimensions (W x H x D) | 130 x 97 x 121 mm |
| Weight | Approx. 812 g (with battery and memory card) |
| Maintenance | Clean lens with soft cloth; store in dry environment |
| Safety | Avoid exposure to water, extreme temperatures, and strong magnetic fields |
| Spare Parts & Repairability | Contact Leica authorized service centers |
| General Information | Leica V-LUX 5 is a premium bridge camera with high-quality zoom lens and 4K video capabilities |
Frequently Asked Questions - V-LUX 5 LEICA
User questions about V-LUX 5 LEICA
0 question about this device. Answer the ones you know or ask your own.
Ask a new question about this device
Download the instructions for your Camera in PDF format for free! Find your manual V-LUX 5 - LEICA and take your electronic device back in hand. On this page are published all the documents necessary for the use of your device. V-LUX 5 by LEICA.
USER MANUAL V-LUX 5 LEICA
Finding the information you need
In this “Operating Instructions for Advanced Features”, you can find the information you need from the following pages.
| Search “Table of Content” | 4 - |
| Search the list of function names“Table of Content by Function” | 9 - |
| Search “Names and functions of main parts” | 14 - |
| Search “List of monitor/viewfinder displays” | 247 - |
| Search the list of on-screen messages“Message displays” | 254 - |
| Search the menu list | 169 - |
| Search “Q&A Troubleshooting” | 256 - |
| See the next page for details on how to use this manual. | |
Icons in picture/recording mode
Recording mode: A A P A S M □ SCN COL
The menus and functions offered in picture/recording modes, in which the icons are displayed in black, can be selected and executed.
C (Custom mode) The functions offered in custom mode may vary depending on the selected picture/recording mode.
About the icons in the text
MENU The menu can be selected or configured via the [MENU/SET] button.

Helpful hints for operation and recording.
(→00) Indicates the reference page.
How to configure a menu item:
Example: Changing the [Quality] setting to [.] in the [Rec] menu
MENU → iRec] → [Quality] → [ ] .
- The directional arrows (▲, ▼, ◀) are used for illustration purposes.
- Dial and lever movements are illustrated with the following icons:
| Turn the front dial at the front to the left/right |  |
| Turn the rear dial at the back to the left/right |  |
| Move the zoom lever left/right |  |
Finding the information you need ..... 2
How to use this manual....3
Table of Content by Function ...... 9
General information
General information......11
Scope of delivery 13
Replacement parts/Accessories.....13
Names and functions of main parts .... 14
Preparation
Attaching the Lens Cap/Shoulder Strap 16
Attaching the Lens Cap ....16
Attaching the Shoulder Strap....17
Charging the Battery 18
Inserting the battery....19
Charging the battery 20
Inserting and removing the memory card 24
About the Memory Card 25
Formatting the Memory Card (initialization)....26
Estimated recording capacity (number of pictures/recording time)......26
Attaching the Lens Hood 28
Opening out the monitor 30
Setting the Date and Time......31
Basics
Handling the camera correctly ..... 33
Basic operation....34
[EVF] button (Taking pictures via the viewfinder)......34
Zoom Lever (Use Zoom)......35
[Zoom Compose Assist] button (Using the Zoom Compose Assist function) ....36
Shutter button (Taking pictures)......37
Video button (recording video)......38
Mode dial (recording mode selection)......38
Front Dial/Rear Dial 39
Control ring 41
Cursor button / [MENU/SET] button (Selecting/setting items)....42
[DISP] button (Switching the display information)......42
Touch screen (touch functions)......45
Taking pictures using the touch function....46
Menu Settings 48
Accessing frequently used menu items (Quick Menu) 50
Configuring the Quick Menu ....51
Assigning frequently used button functions (Function buttons) 52
Using the function buttons during recording....53
Using the function buttons during playback....55
Entering text....56
Recording mode
Taking pictures with automatic settings
(Snapshot Modes)......57
[Snapshot Mode] menu....59
Taking pictures with custom color saturation, focus and brightness settings 61
Taking pictures with automatic aperture value and shutter speed settings
(Program AE Mode).... 62
Taking pictures with manual settings for aperture value and shutter speed 63
Taking pictures with only the aperture value set manually (Aperture-Priority AE Mode)....63
Taking pictures with only the shutter speed set manually (Shutter-Priority AE Mode)....64
Taking pictures with manual settings for aperture value and shutter speed (Manual Exposure Mode)....65
Checking the effects of the aperture value and shutter speed (Preview Mode)....67
Setting the aperture value / shutter speed for suitable exposure (One Push AE) ......68
Recording panorama pictures (Panorama Shot Mode)....69
Taking scene pictures (Scene Guide Mode) 72
Taking pictures with creative effects (Creative Control Mode)....75
Recording video by setting the aperture/ shutter speed/ISO sensitivity (Creative Video Mode) 81
Recording slow motion video ([High Speed Video])....82
Pan or zoom while recording with the camera in a fixed position ([4K Live Cropping])....83
Configuring custom recording settings (Custom Mode)....85
Configuring custom recording settings ([Cust.Set Mem.]).85
Recording with profiles 86
Focus, Brightness (Exposure) and Color Settings
Taking Pictures with Auto Focus.....87
Selecting a Focus Mode
(AFS, AFF, AFC)......88
Switching [AF Mode]....90
Changing the position and size of the AF area....96
Setting the AF area position with the touch pad....99
Optimizing the focus and brightness for a touched position ....100
Taking close-up pictures (Macro recording) 101
Taking pictures with Manual Focus....102
Taking pictures by locking the focus and/or exposure (AF/AE Lock) 105
Taking pictures with Exposure Compensation....106
Setting the ISO Sensitivity ..... 107
Adjusting the White Balance ..... 109
4K Photo and Drive Settings
Selecting a Drive Mode......113
Burst function 114
Recording with the 4K Photo function and selecting pictures to save....116
Recording with the 4K Photo function ..... 116
Selecting pictures from 4K burst file and saving 119
Notes on the 4K Photo function....124
Adjusting the focus after recording ([Post Focus]/[Focus Stacking])....127
Recording using [Post Focus]......127
Select the focus point and save the picture ([Post Focus])....129
Select the focus range to combine and create a single picture ([Focus Stacking]). 130
Notes on the [Post Focus]/ [Focus Stacking]....131
Taking pictures with Time Lapse Shot/Stop Motion Animation......132
Taking pictures automatically at set intervals [Time Lapse Shot]....132
Creating stop motion animation [Stop Motion Animation]......135
Taking pictures with self-timer ..... 137
Taking pictures while adjusting a setting automatically (Bracket Recording)....138
Exposure Bracket 139
Aperture Bracket....140
Focus Bracket....140
Stabilizer, Zoom and Flash
Correcting jitter 141
Using Zoom 143
Zoom types and use 143
Using the zoom by performing touch operations (Touch zoom)....146
Taking pictures with flash....147
Setting the flash functions......148
Changing the firing mode (Manual flash)....148
Changing Flash Mode....149
Setting the 2nd curtain sync ....151
Adjusting the flash output ....152
Synchronizing the flash output with the camera during Exposure Compensation....152
Recording video
Recording Video/4K Video 153
Setting the resolution and the frame rate ....155
Adjusting the focus while recording video ([Continuous AF])....156
Taking stills while recording video....157
Recording Snap Movies 158
Playing Back and Editing Pictures
Viewing your pictures......161
Viewing video 162
Capturing stills from video 163
Switching the playback method .... 164
Zooming in and viewing "Playback Zoom"......164
Viewing a list of pictures "Multi Playback" 165
Viewing pictures by their recording date "Calendar Playback" 165
Viewing group pictures 166
Deleting pictures....168
Using Menu Functions
Menu list 169
[Rec] 170
[Motion Picture]......185
[Custom]....189
[Setup] 204
[My Menu]......214
[Playback]....215
Wi-Fi/Bluetooth
The Wi-Fi®/Bluetooth® function..... 232
Connecting the camera to a smartphone 233
Installing the smartphone/tablet app "Leica FOTOS" 233
Connection....234
Connecting with other devices
4K video 237
Storing 4K video ......237
Viewing on a TV screen....238
Recording while monitoring camera images....239
HDTV Link (HDMI)......240
Copying the recorded image data to a computer....241
Copying stills and video 241
Storing recorded stills and video in the recorder 243
Printing 244
Printing with date and text 246
Others
List of monitor/viewfinder displays....247
Message displays 254
Q&A Troubleshooting....256
Restrictions on use and additional notes 264
Leica service addresses......272

Recording
Recording
[Zoom Compose Assist]....36
Recording mode 38
[Preview]......67
Panorama Shot Mode....69
Macro recording....101
[Time Lapse Shot]......132
[Stop Motion Animation]......135
Bracket recording 138
[Silent Mode]....181
[Multi Exp.]....184
4K Photo
[4K PHOTO].... 116
[Post Focus] recording....127
Focus (AF/MF)
Auto Focus 87
Focus mode....88, 102
AF Mode 90
[AF Sensitivity(Photo)]......89
Adjusting the AF area position....96
Manual Focus....102
AF/AE Lock....105
Drive
Drive Mode 113
Burst function....114
[Self Timer] 137
Exposure
[Touch AE] 47
[One Push AE]....68
AF/AE Lock....105
Exposure Compensation 106
ISO sensitivity....107
Exposure Bracket 139
[Metering Mode]......177
Picture Quality and Color Tone
White Balance 109
[Picture Size] 171
[Quality] 171
[Photo Style] 173
[Filter Settings]......175
[Color Space]......177
[Highlight Shadow]......178
[i.Dynamic]....179
[i.Resolution]....179
[Long Shtr NR]....180
[Diffraction Compensation] 181
[HDR]....183
Flash
[Flash Mode]....149
2nd curtain synchro 151
[Flash Adjust.] 152
Monitoring
Recording while monitoring camera images....239

Recording Video
Recording Video
Creative Video Mode 81
[High Speed Video]......82
[4K Live Cropping]......83
[Rec Quality]....155
Taking stills while recording video 157
[Snap Movie]......158
Audio
[Sound Rec Level Adj.] 186
[Sound Rec Level Limiter] 187
[Wind Noise Canceller]....187
[Wind Cut]....187
Screen settings
[Sound Rec Level Disp.] 186
[Monochrome Live View] 196
[Center Marker]....197
[Zebra Pattern]....198

Setup/Custom
Basic settings
[Format] 26
[Clock Set] 31
Diopter adjustment 34
Quick Menu 50
[Beep]....206
[Economy]......207
[Reset] (initialization) 213
Customization
Function buttons....52
Custom Mode 85
[Custom] menu 189

Playback
Playback
Picture playback 161
Viewing video 162
Playback Zoom....164
Multi Playback 165
Delete 168
[Auto Review] 195
[Slide Show]......216
[Rotate]/[Rotate Disp.] 228, 230
Edit
[Post Focus]....129
[Focus Stacking]....130
[Title Edit]......219
[RAW Processing]......220
[4K PHOTO Bulk Saving] 222
[Light Composition]......223
[Sequence Composition] 224
[Clear Retouch]......225
[Text Stamp]......226
[Resize]......227
[Cropping]....228
Image settings
[Protect] 218
[Rating] 218

Wi-Fi/Bluetooth
Leica FOTOS
Leica FOTOS....233

Connecting with other devices
PC
Copying the recorded image data to a computer....241
TV
Playing back pictures on a TV screen .....238
[HDTV Link] 240
Recorder
Dubbing 243
Printer
PictBridge 244
General information
Camera handling
Protect the camera against vibration, impact or pressure.
Avoid using the camera under the following conditions, which may damage the lens, monitor, viewfinder, or camera body.
This may also cause the camera to malfunction or prevent recording.
- Dropping or hitting the camera against a hard surface
- Using excessive force when handling the lens or monitor
The camera is not dust resistant, splash resistant, or waterproof.
Avoid using the camera in places with excessive dust or sand, or where water can come into contact with the camera.
Avoid using the camera under the following conditions, which present a risk that sand, water, or foreign material may enter the camera through the lens or openings around buttons. The following conditions are particularly hazardous to the camera and may result in irreparable damage:
• In extremely dusty or sandy places
- In the rain or close to the sea, where the camera could be exposed to high humidity or splash water
If sand, dust, or liquids such as water droplets adhere to the monitor, wipe them off with a dry soft cloth.
Not doing so may cause the monitor to respond incorrectly to touch operations.
●ondensation (When the lens, the monitor, or viewfinder, is fogged up)
Condensation may occur when the camera is exposed to sudden changes in temperature or humidity. Avoid these conditions, which may make the lens, monitor, or viewfinder dirty, cause mold, or damage the camera.
Turn off the camera and wait about two hours before using it if condensation occurs.
Once the camera adjusts to the surrounding temperature, the fogging will clear naturally.
Always take test shots
Take some test pictures/video recordings before an important event (e.g. wedding) to make sure all picture and sound settings function correctly.
No compensation for missed shots
Leica Camera AG shall not accept any liability for missed shots due to technical or memory card malfunctions.
Copyright
Unauthorized use of recordings that contain works with copyright for purposes other than personal use is prohibited under copyright law. The use of some such works may also be prohibited for personal use.
Please also read the section "Restrictions on use and additional notes" ( 264)
Scope of delivery
Before using your camera for the first time, please check that the accessories supplied are complete.
| Rechargeable battery pack Battery charger/AC adaptor | |
| USB cable Shoulder strap | |
| Lens cap Lens cap string | |
| Hot shoe cover Lens hood | |
| Short instructions |
Replacement parts/Accessories
Please visit the Leica Camera AG website for information on the extensive range of Leica replacement parts/accessories:
www.leica-camera.com
Only the accessories specified and described in this manual or by Leica Camera AG must be used with the camera (battery, AC adaptor, etc.). These accessories should only be used with this product. Third-party accessories may result in malfunctions or damage to the product.
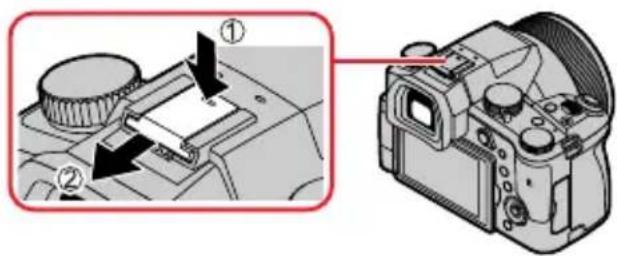
■Removing the Hot Shoe Cover
Remove the hot shoe cover by pulling it in the direction indicated by arrow ② while pressing it in the direction indicated by arrow ①
Notes:
• Memory cards are optional.
- The battery pack is referred to as "battery pack" or "battery" in this manual.
- SD, SDHC and SDXC memory cards are also referred to as "cards" in this manual.
- Depending on the country or area where the camera was purchased, the items and their shape may differ from the descriptions and illustrations in these instructions.
• Always keep small parts in a safe place out of the reach of children.
- Please dispose of all packaging appropriately.
Names and functions of main parts
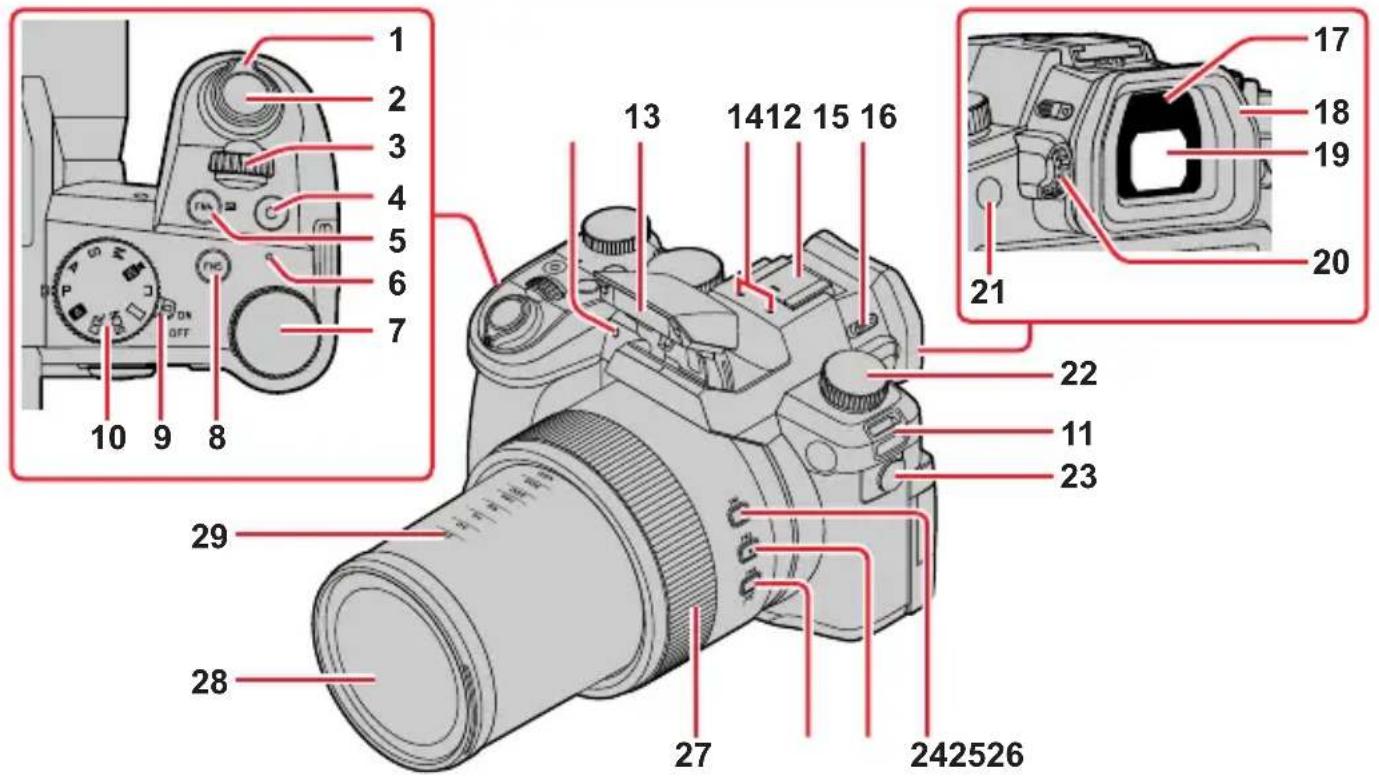
1 Zoom lever ( 35, 143, 195)
2 Shutter button ( 37)
3 Front dial ( 39)
4 Video button ( 38, 153)
5 [FN4] button ( 52) /
[+] (Exposure Compensation) button
(→106)
6 Battery charge indicator ( 21) / WIRELESS connection lamp ( 206)
7 Rear dial ( 39)
8 [FN5] button ( 52)
9 Camera [ON/OFF] switch ( 31)
10 Mode dial ( 38)
11 Shoulder strap eyelet ( 17)
12 Self-timer indicator ( 137) /
AF Assist Lamp ( 33, 191)
13 Flash ( 147)
14 Stereo microphone ( 33, 186)
Be careful not to cover the microphone with your finger. Doing so may make sound difficult to record.
15 Hot shoe (Hot shoe cover)
Keep the hot shoe cover out of reach of children to prevent swallowing.
16 Flash open lever ( 147)
17 Eye sensor ( 34)
18 Eyecup ( 265)
19 Viewfinder ( 34, 247)
20 Diopter adjustment dial ( 34)
21 [FN8] button ( 52) /
[EVF] button ( 34)
22 Drive mode dial ( 113)
23 Microphone jack
Do not use the Stereo microphone cables with the length of 3 m (9.8 feet) or more.
24 [FN1] button ( 52)
25 [FN2] button ( 52)
26 [FN3] button ( 52) /
[☐] ([Zoom Compose Assist]) button
(→36)
27 Control ring ( 41)
28 Lens
29 Focal distance indication (as with a 35 mm film camera)
Values assume an aspect ratio of [3:2]. (Check the focal length value displayed when recording video.)
Names and functions of main parts
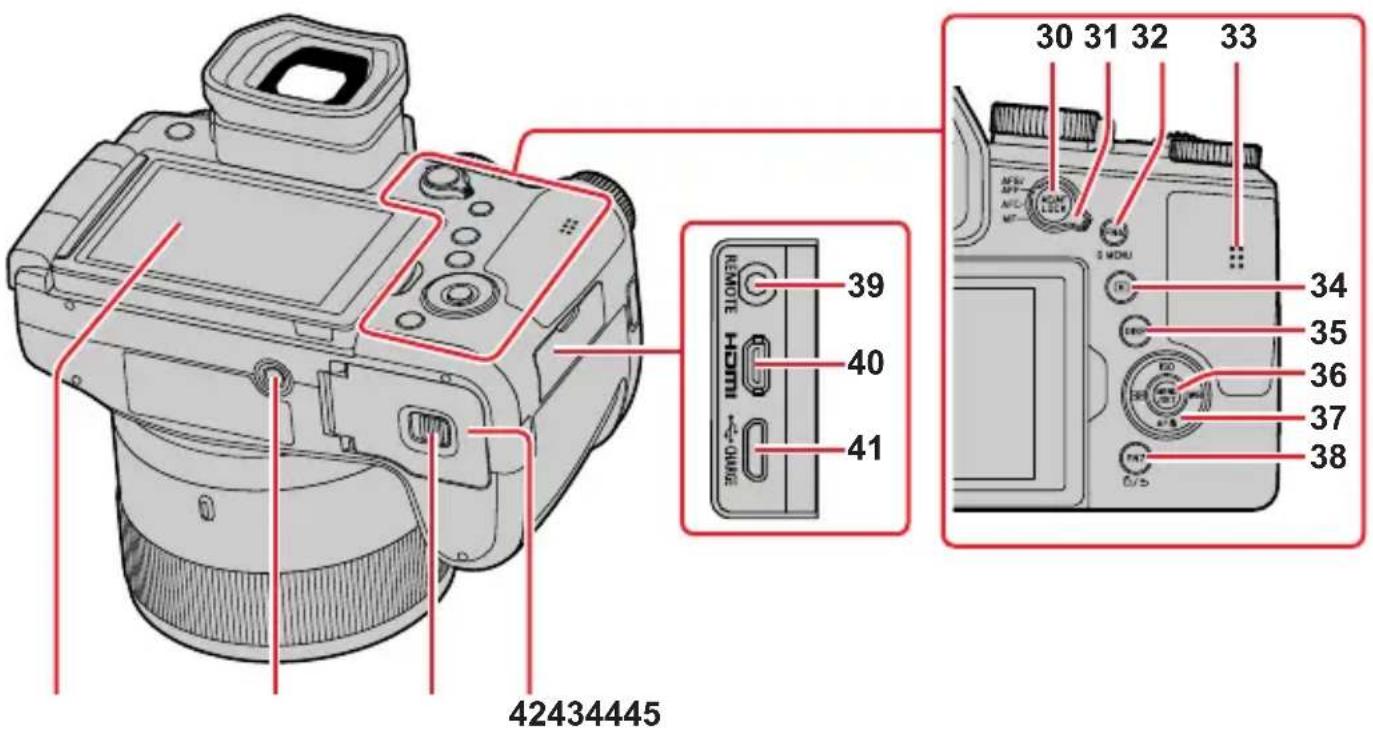
30 [AE/AF LOCK] button ( 105)
31 Focus mode lever ( 87, 88, 102)
32 [FN6] button (→52) /
[Q MENU] button ( 50)
33 Speaker ( 33, 206)
34 [▶(Playback) button (→161)
35 [DISP] button ( 42)
36 [MENU/SET] button ( 42, 48)
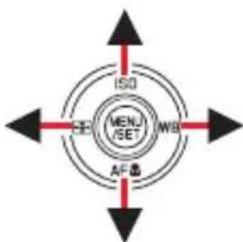
37 Cursor button ( 42)
[ISO] (ISO sensitivity) (▲) (→107)
[WB] (White balance) (▶) (→109)
[AF] ([Macro Mode]) (▼) (→101)
[⊕] ([AF Mode]) (◀) (→90)
38 [FN7] button ( 52) /
[台] (Delete) button (→168) /
[5] (Cancel) button (→49)
39 [REMOTE] jack
40 [HDMI] jack ( 238)
41 [USB/CHARGE] jack ( 20, 241, 244)
42 Card/Battery door ( 19, 24)
43 Release lever ( 19, 24)
44 Tripod mount ( 267)
Do not attach this unit to tripods that have screws with a length of 5.5 mm (0.22 inches) or longer. Doing so could damage the camera and result in an insecure connection.
45 Touch screen ( 45) / monitor ( 247)
Function buttons [FN9] to [FN13] are touch icons.
They can be displayed by touching the [Fn] tab on the recording screen.
Attaching the Lens Cap/Shoulder Strap
Attaching the Lens Cap
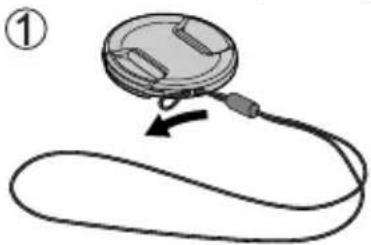
Cover the lens with the lens cap to protect it when you are not taking pictures. We recommend attaching the lens cap to the camera using the lens cap string to prevent loss of the lens cap.
- Do not hang or swing around the camera with the lens cap string.
- Make sure to detach the lens cap when turning this unit on.
- Be careful that the lens cap string does not become entangled with the shoulder strap.
1 Use the lens cap string (supplied) to attach the lens cap to the camera
natural_image
Diagram of a camera lens connected to a curved cable, showing motion direction (no text or symbols)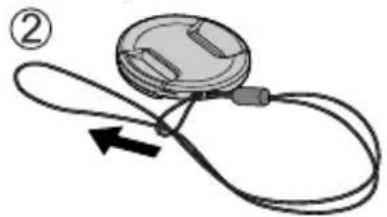
natural_image
Diagram of a medical or surgical device with a curved tube and circular component, no text or symbols present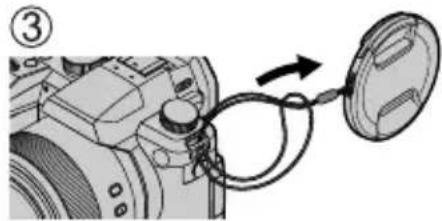
natural_image
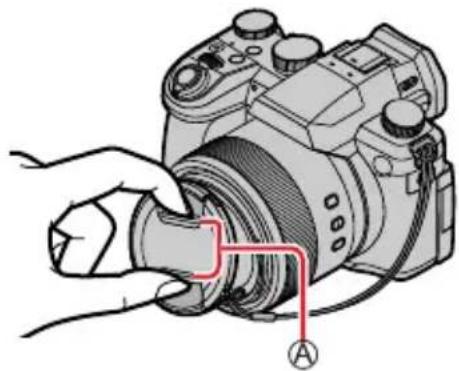
Diagram of a camera module with cable and lens, no text or symbols present2 Attaching the lens cap
Ⓐ Pinch here to attach or detach the cap.
natural_image
Illustration of a hand inserting a camera into a cable, with no visible text or symbolsKeep the lens cap string out of reach of children to prevent swallowing.
Attaching the Shoulder Strap
We recommend attaching the shoulder strap when using the camera to prevent it from dropping.
1 Pass the shoulder strap through the shoulder strap eyelet
Ⓐ Shoulder strap eyelet
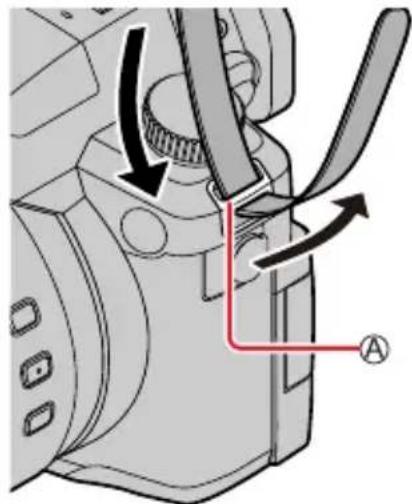
2 Pass the shoulder strap through the stopper and fasten the shoulder strap
⑧ Pull the shoulder strap 2 cm (0.8 inches) or more.
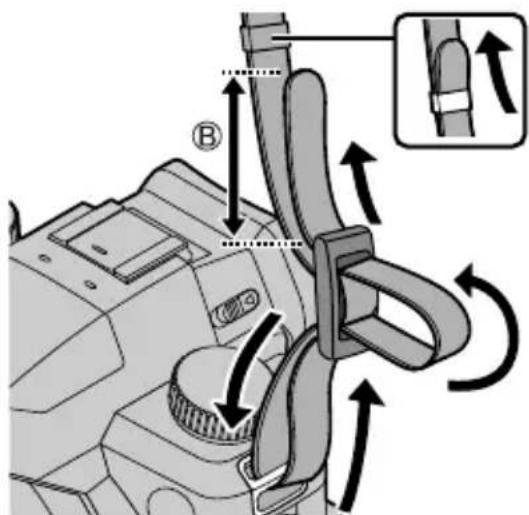
3 Pull on the shoulder strap to check that it is fastened securely
- Perform steps1 to 3 and then attach the other side of the shoulder strap.
- Use the shoulder strap around your shoulder.
- Do not wrap the strap around your neck. It may result in injury or accident.
- Keep the shoulder strap out of the reach of children as it poses a choking hazard.
Charging the Battery
Always use the dedicated AC adaptor (supplied), USB cable (supplied), and battery for this camera.
• Always charge before first use! (battery is shipped uncharged)
- Charge the battery while it is in the camera.
| Camera status Charge | |
| Off Yes | |
| On No | |
Batteries to be used with this camera
Third-party batteries that look similar to the Leica battery BP-DC12 are available in some markets. Some of these third-party products may not comply with safety standards and may pose a fire or explosion hazard. Leica Camera AG shall not accept liability for damages or accidents caused by the use of third-party batteries. We urgently recommend using only genuine BP-DC12 Leica batteries.
Inserting the battery
Insert the battery into the camera for charging.
1 Slide the release lever to the [OPEN] position and open the card/battery compartment
Ⓐ Release lever
2 Inserting the battery
- Insert the battery fully and lock it in place by closing and locking the battery compartment.
3 Close the card/battery compartment and then slide the release lever to the [LOCK] position
⑧ Ensure the correct polarization of the battery.
© Lever
Removing the battery
Move the lever in the card/battery compartment in the direction of the arrow.
![[OPEN] [LOCK] A B C](/content/2026/05/882858/images/1af2fe69c43712e8cffad108442ab1c041d93c2a0cbc5a2158cd6405fde5687a.jpg)
Use only the Leica battery BP-DC12.
Leica Camera AG cannot guarantee the quality of any third-party battery.
To remove the battery, turn the camera off and wait until the Leica indicator on the screen goes off. (Failure to wait may cause the camera to malfunction and may damage the card or recorded data.)
Remove battery from camera after use.
Charging the battery
We recommend charging the battery in ambient temperatures between +10 °C and +30 °C (+50 °F to +86 °F) and with the battery at the same temperature.
Insert the battery into the camera.
Make sure that the camera is turned off when inserting the battery.
The battery can be charged via a mains power outlet or via PC.
Ⓐ USB cable (supplied)
⑧ AC adaptor (supplied)
© To the mains power socket
D Computer
Getting ready: Turn on the computer.
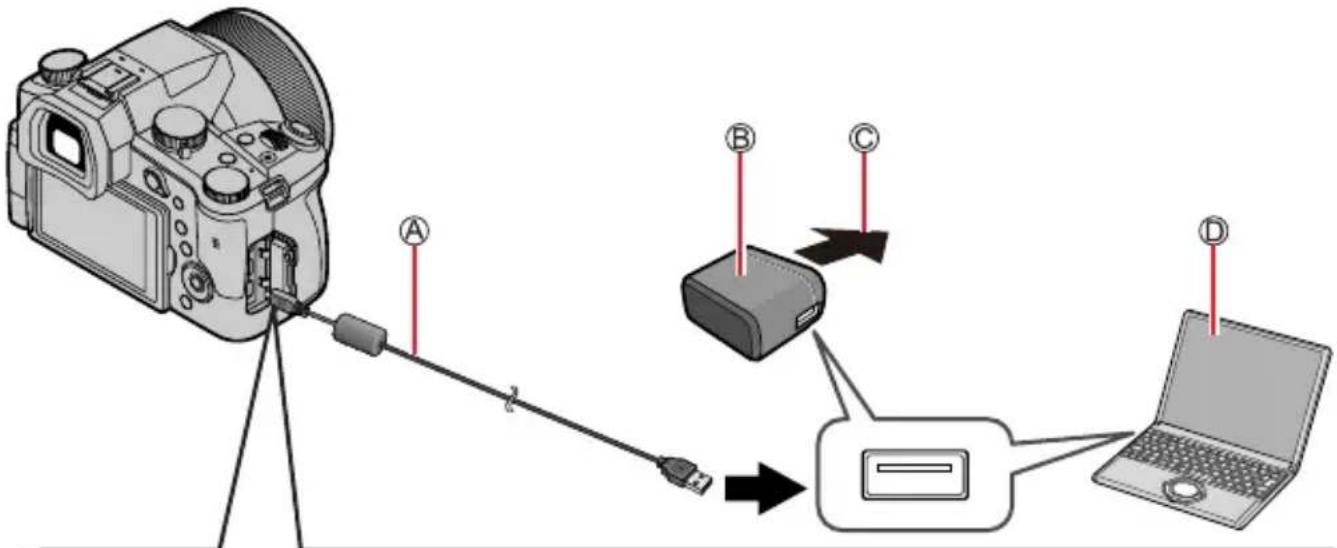
When charging the camera, connect the USB cable (supplied) to the [USB/CHARGE] jack.
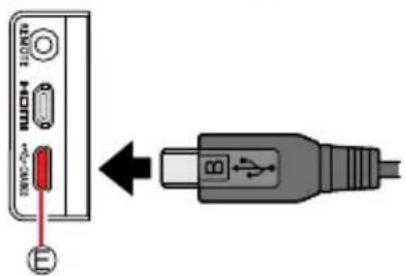
© [USB/CHARGE] jack
• This terminal is located at the bottom when the camera is in an upright position.
• Always check the direction of the jack, and hold the plug straight to insert or remove it. (If the cable is inserted in the wrong direction, the jack could become deformed and cause faulty operation.)
Also, do not insert into the wrong jack. Doing so may cause damage to this unit.
The charging process may be interrupted when the PC switches to Sleep mode.
If a notebook computer that is not connected to an electrical outlet is connected to the camera, the battery of the notebook computer will be depleted. Do not leave the camera and notebook connected for a long period of time.
Always connect the USB cable to the USB connector on your computer. Do not connect the USB cable to the USB connector of the monitor, keyboard, printer, or USB hub.
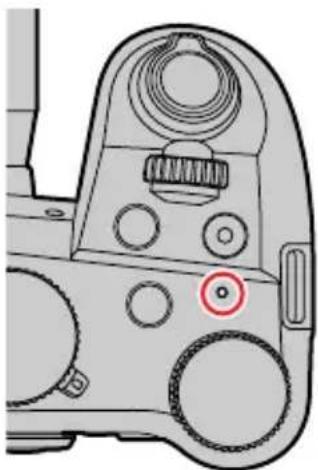
Charging indicators
natural_image
Technical diagram of a mechanical device with no visible text or symbolsCharge indicator (Red)
On: Charging in progress
Off:Chargingcomplete
(Disconnect the camera from the USB jack of your PC when charging is complete.)
Flashing:Chargingerror
(Refer to (→256) for troubleshooting instructions.)
Notes on charging time
When using the AC adaptor (supplied)
Charging time Approx. 180 min.
- The charging time indicated above is the time required for charging in case when the battery is completely used up. Charging times may vary depending on the discharge state of the battery and other conditions. Charging may take longer in extreme temperatures or if the battery has not been used for a long period of time.
- The time required for charging through the computer varies depending on the power supply capacity of the computer.
Do not use any other USB cables except the supplied one. Doing so may cause malfunction of the camera.
Do not use any other AC adaptors except the supplied one.
Do not use a USB extension cable.
The AC adaptor (supplied) and the USB cable (supplied) are dedicated accessories of this camera. Do not use them for other devices.
Remove the battery after use. (The battery will be exhausted if left for a long period of time after being charged.)
If there is any trouble related to the electrical outlet (i.e. power failure), charging may not complete properly. Disconnect the USB cable (supplied) and reconnect it to the camera.
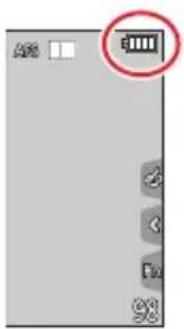
Remaining battery charge
natural_image
Pure electrical circuit lines without any symbols| 75% or more | |
| 74% to 50% | |
| 49% to 25% | |
| 24% or less | |
 Flashing red Flashing red | Low battery• Recharge the battery or replace it with a fully charged battery. |
- The battery level indicated on the screen is approximate. The exact level varies depending on the environment and the operating conditions.
Charging the Battery
Estimated number of recordable pictures and operating time
The number of recordable stills is based on CIPA (Camera & Imaging Products Association) standards.
When an SDHC memory card and the supplied battery are used.
■Recording stills (using the monitor)
| Number of recordable pictures Approx. 440 pictures |
| Recording time Approx. 220 min. |
Recording stills (using the viewfinder (EVF))
The values in parentheses apply when [EVF Display Speed] is set to [ECO 30fps].
| Number of recordable pictures Approx. 290 pictures (Approx. 430 pictures) |
| Recording time Approx. 145 min. |
video recording (using the monitor)
| [Rec Quality] [FHD/28M/60p] [4K/100M/30p] | ||
| Available recording time Approx. | 130 min. Approx. 120 min. | |
| Actual available recording time* | Approx. 65 min. Approx. | 60 min. |
* The actual recording time when repeating actions such as turning the camera on/off and starting/ stopping recording.
Picture review (via the monitor)
| Playback time Approx. 350 min. |
The operating times and number of recordable pictures will differ depending on environmental and operating conditions.
For example, in the following cases, the operating times shorten and the number of recordable pictures is reduced.
• In low-temperature environments, e.g. on ski slopes
- With repeated use of flash and zoom
The battery may be reaching the end of its life span if the charge depletes comparatively quickly.
Please purchase a new battery.
Inserting and removing the memory card
• Make sure that the camera is turned off.
1 Slide the release lever to the [OPEN] position and open the card/battery compartment
Ⓐ Release lever
2 Insert the memory card fully
⑧ Do not touch the terminal
- Check the orientation of the card. - Insert the card all the way firmly until it clicks audibly into place.
3 Close the card/battery compartment and slide the release lever to the [LOCK] position
■Removing the memory card
Press down gently on the center of the card.
![LEICA V-LUX 5 - Close the card/battery compartment and slide the release lever to the [LOCK] position - 1](/content/2026/05/882858/images/165c598ea5cfb59c5faee82b246f1b03a84484c17347f8f44e2d414eeb7ed0b5.jpg)
Keep the memory card out of reach of children to prevent swallowing.
To remove the card, turn the camera off and wait until the Leica indicator on the screen goes off. (Failure to wait may cause the camera to malfunction and may damage the card or recorded data.)
About the Memory Card
The following SD standard cards can be used.
| Type of Card Capacity Notes | ||
| SD Memory Cards 512 MB – 2 GB | This camera is compatible with UHS-I UHS Speed Class 3 standard SDHC/SDXC memory cards. | |
| SDHC Memory Cards 4 GB – 32 GB | ||
| SDXC Memory Cards 48 GB – 128 GB | ||
About video/4K photo recording and speed class ratings
Use a card that meets the following ratings of the SD Speed Class or UHS Speed Class. - SD Speed Class and UHS Speed Class are the speed standards regarding continuous writing. Confirm the SD speed by checking the card label or other card related materials.
| [Rec Quality] Speed class Label example | ||
| [FHD]/[HD] Class 4 or higher | CLASS4 4 | |
| [4K]/[High Speed Video] UHS Speed Class 3 | 3 | |
| When recording in 4K Photo / [Post Focus] | UHS Speed Class 3 | 3 |
Accessing the memory card
The card access indicator lights up in red when pictures are being recorded on the memory card.
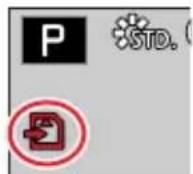
Do not turn off the camera or remove the memory card while the camera is accessing the card (for data read/writes, deletions or formatting). Do not subject the camera to vibrations, impact, or static electricity. The card or the data on the card may be damaged, and the camera may no longer operate normally. If operation fails due to vibration, impact or static electricity, perform the operation again.
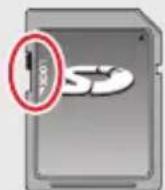
The memory card is locked against read/write operations, as well as deletion or formatting when the lever on the card is set to "LOCK".
We recommend copying your pictures/videos to your computer regularly, as electromagnetic waves, static electricity or other faults may damage the data stored on a memory card.
Formatting the Memory Card (initialization)
Please format memory cards before use in this camera.
Data cannot be recovered after formatting. When reformatting a previously used card, make sure to create a backup of any information on the card you wish to keep.
MENU → [Setup] → [Format]
The formatting process requires a sufficiently charged battery.
Do not turn off the camera or perform other operations during formatting.
Please format any memory card to be used with this camera even if it was previously formatted on a computer or in another device.
Estimated recording capacity (number of pictures/recording time)
The number of pictures you can take and the recording time vary depending on the memory card size and type, as well as recording conditions.
Still image capacity
With [Aspect Ratio] at [3:2] and [Quality] at [.]
| [Picture Size] 16 GB 32 GB 64 GB 128 GB | |||||
| L (20M) 1450 | 2910 | 5810 | 11510 | ||
| EX M (10M) | 2650 | 5310 | 10510 | 20810 | |
| EX S (5M) | 4600 | 9220 | 17640 | 34940 | |
With [Aspect Ratio] at [3:2] and [Quality] at [RAV]
| [Picture Size] 16 GB 32 GB 64 GB 128 GB | |||||
| L (20M) 450 | 920 | 1840 | 3650 | ||
| EX M (10M) | 530 | 1070 | 2140 | 4250 | |
| EX S (5M) | 580 | 1170 | 2340 | 4630 | |
"9999+" will be displayed, once the number of images surpasses 9999.
Recording time capacity (Video)
- Recordable time refers to the total video time recorded. ([h], [m] and [s] stands for "hour", "minute" and "second".)
| [Rec Quality] 16 GB 32 GB 64 GB 128 GB | ||||
| [4K/100M/30p][4K/100M/24p] | 20m00s | 41m00s 1h25m 2h45m | ||
| [FHD/28M/60p] 1h10m | 2h25m | 5h00m 9h55m | ||
| [FHD/20M/30p] 1h35m | 3h15m | 6h40m 13h15m | ||
| [HD/10M/30p] 3h05m | 6h20m | 12h45m | 25h20m | |
MP4 video recording with a [Rec Quality] of [FHD] or [HD]:
Max. continuous video recording time is 29 minutes.
Once the file size of a video recording exceeds 4GB, it is split into smaller video files for playback. (You can continue to record video without interruption.)
MP4 video recording with a [Rec Quality] of [4K]:
Max. continuous video recording time is 29 minutes.
Once the file size of a video recording exceeds 4GB, it is split into smaller video files for playback when an SDHC memory card is used. (You can continue to record video without interruption.)
Video recordings with file sizes greater than 4GB can be created if an SDXC memory card is in use.
The maximum continuous recording time is displayed on the screen.
Attaching the Lens Hood
When recording into strong backlight, irregular reflection may occur within the lens. Attaching the lens hood will reduce unwanted reflections and improve contrast.
- Avoid mechanical pressure on the lens hood that might cause deformation.
• Make sure that the camera is turned off. - Fold in the flash unit before attaching the lens hood.
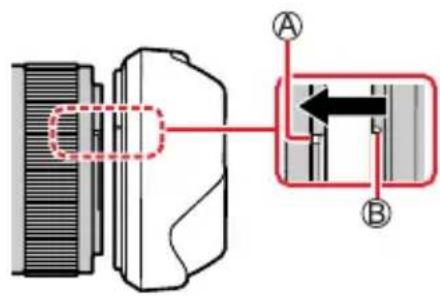
1 Align the index point on the lens hood with the index point on the lens with a slight offset as shown in the illustration
Ⓐ Index point on the lens
⑧ Alignment point on the lens hood
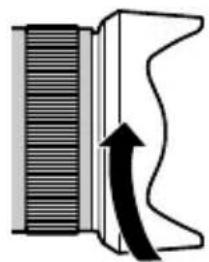
2 Turn the lens hood in clockwise direction
3 Keep turning the lens hood (there will be a little resistance at the locking point) until it audibly clicks into place. Make sure the index point on the lens hood is aligned with the index point on the camera
© Rotate the lens hood until the index points are aligned.
- Make sure the lens hood is secured properly and its reflection does not fall on images.

natural_image
Diagram of a mechanical component with a curved arrow indicating motion or force (no text or symbols)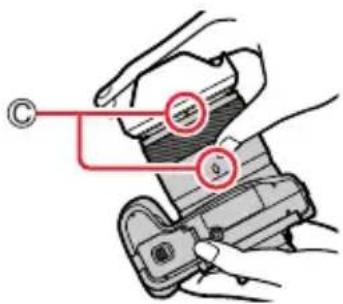
Attaching the Lens Hood
Attaching the lens hood with the flash unit in use would impede the light of the flash and cause parts of the image taken to be darker than the rest (vignetting). We therefore recommend removing the lens hood before using the flash.
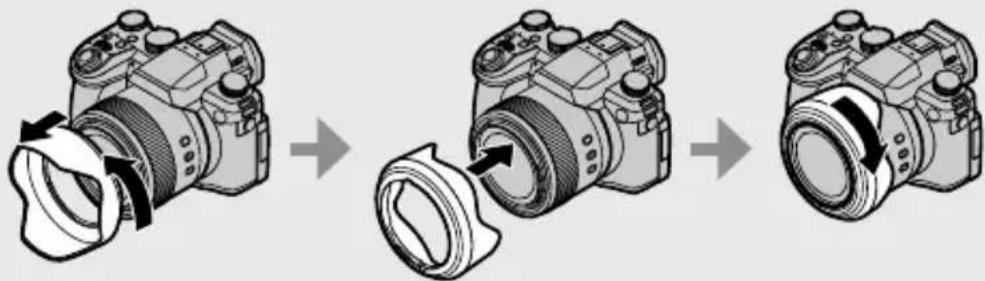
Storing the lens hood
natural_image
Three-step diagram showing a camera being folded into a lens, with no text or symbols present.Opening out the monitor
1 Place your finger in the cleft on the right side of the monitor and open the monitor toward the left (maximum 180^ )
2 The monitor can be rotated 180^ upward to a horizontal position
3 Return the monitor to its original position
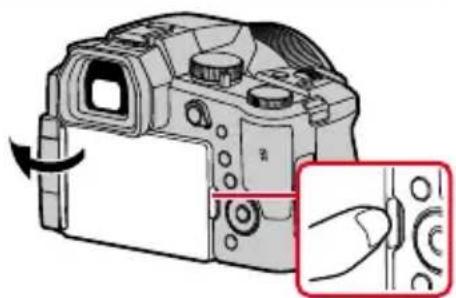
natural_image
Diagram of a DSLR camera showing the left side with a hand adjusting the button (no text or symbols present)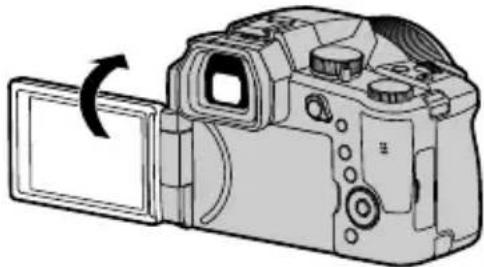
natural_image
Diagram of a DSLR camera with an open screen and scroll, showing no text or symbols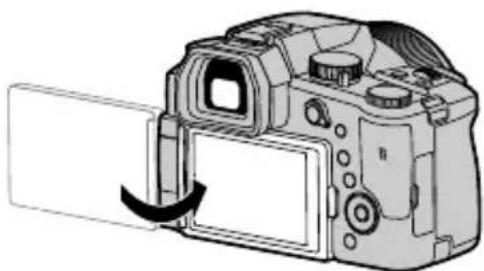
natural_image
Diagram of a DSLR camera with an open lid and scroll wheel (no text or symbols)- Only rotate the monitor after opening it wide enough, and be careful not to use excessive force. Doing so may cause damage to this unit.
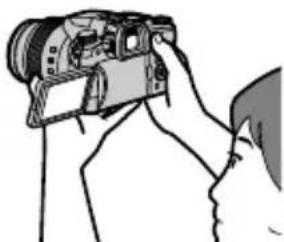
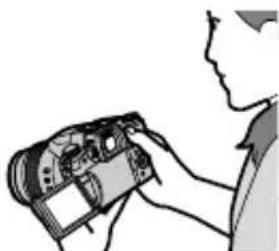
Free angle shooting
The monitor can be adjusted to any angle for convenient shooting.
High angle shooting Low angle shooting
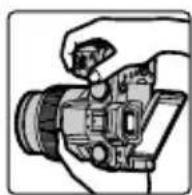
natural_image
Line drawing of a person holding a camera (no text or symbols)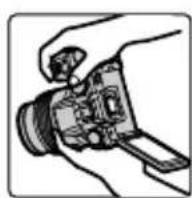
natural_image
Line drawing of a person holding a camera (no text or symbols)When not using the monitor it is recommended that you close it with the screen facing inward to prevent dirt and scratches.
Setting the Date and Time
The clock is not set when the camera leaves the factory.
1 Set the main [ON/OFF] switch of the camera to [ON]
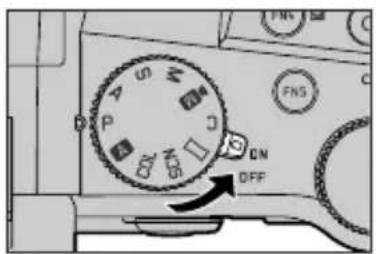
2 Press [MENU/SET] while the message is displayed
3 Press ▲ to select your language, and press [MENU/SET] to confirm your selection
• The message [Please set the clock] appears.
4 Press [MENU/SET]
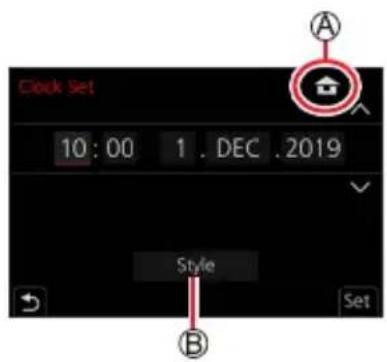
5 Press ◀▶ select the relevant menu item (year, month, day, hour, minute), and press ▲▶ confirm the setting
Ⓐ: Home time
↗: Destination time
⑧ Style
© Display sequence
(D) Time display format
Selecting a display sequence or time display format
Select [Style] and press [MENU/SET] to display the setting screen for display sequence and time display format.
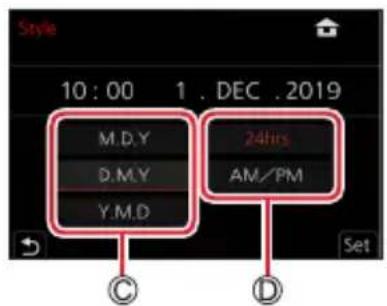
6 Press [MENU/SET]
Setting the Date and Time
7 Press [MENU/SET] when the message [The clock setting has been completed.] appears on screen
8 Press [MENU/SET] when the message [Please set the home area] appears
9 Press ◀▶ select your time zone and press [MENU/SET]
⑤ Time zone by city or region
⑤ Current time
© GMT time offset (Greenwich Mean Time)
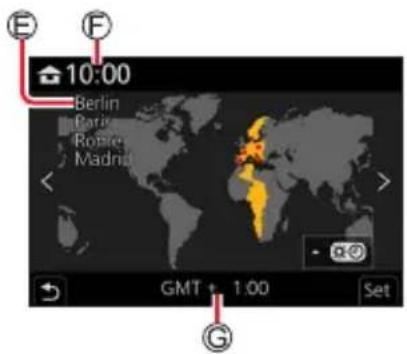
Changing time settings
Perform steps 5 and 6 by selecting [Setup] menu → [Clock Set].
- For details about how to set the menu (→48)
Handling the camera correctly
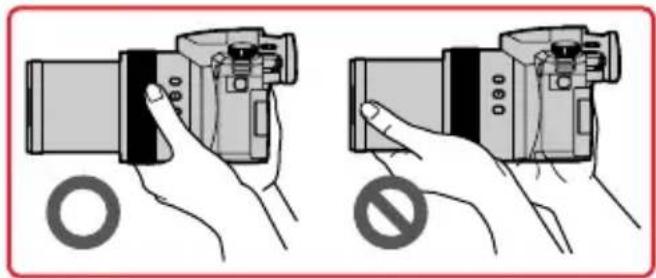
Hold the camera gently with both hands keeping your arms close to your body while standing with your feet slightly apart.
- Do not block the flash, AF Assist Lamp, microphone or speaker with your fingers or other objects.
- Keep the camera as steady as possible when pressing the shutter button.
- Make sure your footing is stable and there is no danger of colliding with another person or object in the vicinity while taking pictures.
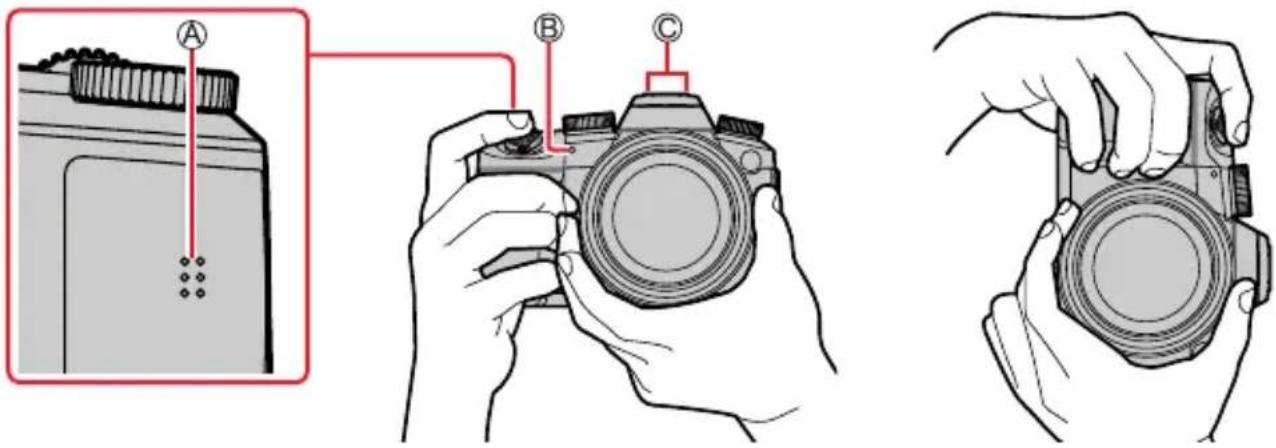
Ⓐ Speaker
B AF Assist Lamp
© Microphone
natural_image
Illustration of two hands holding a digital camera with a circular ring and a prohibition symbol (no text or symbols on the devices themselves)- Keep your fingers away from the lens barrel while focusing as the retracting lens could trap your fingers.
Orientation detection
Stills taken with the camera held vertically can be displayed in portrait orientation in review mode. (Only with [Rotate Disp.] set to [ON].)
- Orientation detection may not function correctly if pictures are taken with the camera pointing straight up or down.
• Video files, 4K burst files recorded with the 4K Photo function and pictures recorded in [Post Focus] mode cannot be displayed in portrait orientation.
natural_image
Close-up of a sunflower with yellow blossoms and green leaves, no text or symbols visibleBasic operation
[EVF] button (Taking pictures via the viewfinder)
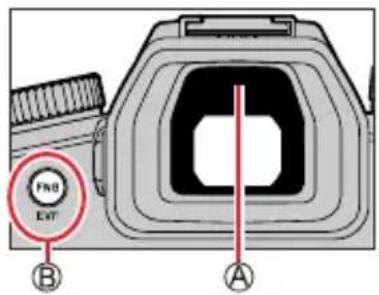
1 Press the [EVF] button
Ⓐ Eye Sensor
® [EVF] button
You can toggle between viewfinder and monitor display.
Automatic switchover from viewfinder to monitor display*
![LEICA V-LUX 5 - Press the [EVF] button - 2](/content/2026/05/882858/images/a7049bdae9bc6d6d442155c18b3fab2aa67c0ae7331e189174fd6b3fe645b323.jpg)
natural_image
Diagram of a DSLR camera with an icon indicating a play button and red arrow pointing to the screen (no text or symbols present)Viewfinder display*
![LEICA V-LUX 5 - Press the [EVF] button - 3](/content/2026/05/882858/images/83d81e55f37e19c2e0f545a30e713280f9a22c8684b82931f5d8b65bc734a693.jpg)
natural_image
Front view of a DSLR camera with no visible text or symbols on the body (pure diagram)Monitor display
![LEICA V-LUX 5 - Press the [EVF] button - 4](/content/2026/05/882858/images/f652378b47918646f69171a1da304e7807fa4a28f77c0efdf6cf3d0947d5e27b.jpg)
natural_image
Diagram of a DSLR camera with red arrows pointing to the front panel (no text or symbols present)* When [Eye Sensor AF] in the [Custom] ([Focus / Release Shutter]) menu is set to [ON], the camera adjusts the focus automatically. Even when [Eye Sensor AF] is set and the camera automatically adjusts the focus, a beep will not sound.
Automatic switchover between viewfinder and monitor
The eye sensor automatically switches the display to viewfinder when your eye or an object approaches the viewfinder. When the eye or object moves away from the viewfinder, the camera returns to monitor display.
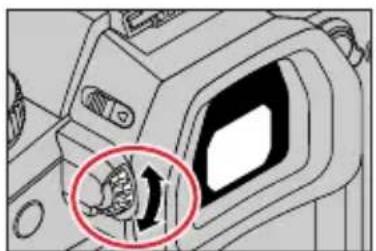
■iopter adjustment
Turn the diopter adjustment dial until you see clearly through the viewfinder.
natural_image
Interior view of a vehicle showing a door with a hand inserting a gear into the seat (no text or symbols visible)If [EVF Display Speed] is set to [ECO 30fps] when the viewfinder is used, the camera can be operated for a longer period since battery drainage is reduced.
The eye sensor may respond to the frame of your eyeglasses, the way you hold the camera or to a strong light source.
During video playback or Slide Show, the eye sensor does not operate.
Zoom Lever (Use Zoom)
You can adjust the area of a picture to be taken using the zoom or control ring.
• The zoom function is also accessible via the touch panel. (→146)
- For details about zoom types and use, see (→143).
| Zoom lever | Control ring* |
1 Move the zoom lever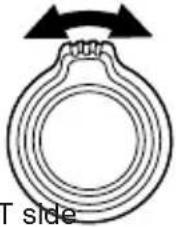 W side * W side * | 1 Turn the control ring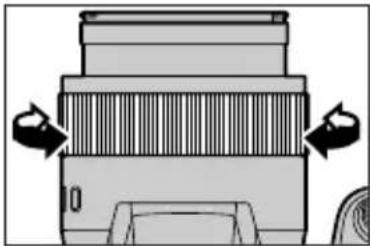 * You can perform zoom operations by assigning [Zoom] or [Step Zoom] to the control ring. (→41) * You can perform zoom operations by assigning [Zoom] or [Step Zoom] to the control ring. (→41) |
| T side: Telephoto, enlarge the subjectW side: Wide-angle, capture a wider areaTurning angle is large: Zoom speed is highTurning angle is small: Zoom speed is low | Clockwise: Telephoto, enlarge the subjectCounterclockwise: Wide-angle, capture a wider area |
Do not touch the lens barrel during zooming.
Adjust the focus after adjusting the zoom.
The camera may make a rattling noise and vibrate when the zoom lever or control ring is operated. This is not a malfunction.
[Zoom Compose Assist] button
(Using the Zoom Compose Assist function)
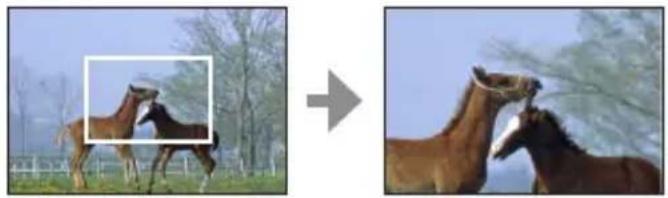
If you lose the subject while zoomed in, you can make it easier to find the subject again by temporarily decreasing the zoom magnification.
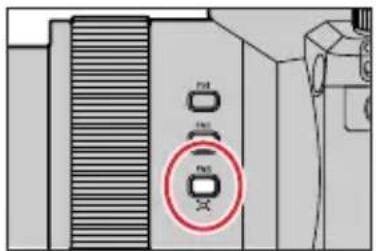
If you lose the subject while zoomed in:
1 Press and hold [☐] ([Zoom Compose Assist]) button
- As you zoom out, a frame indicating the original zoom magnification (angle of view) will appear in the center of the screen. (You cannot change the position of the frame.)
![LEICA V-LUX 5 - Press and hold [☐] ([Zoom Compose Assist]) button - 1](/content/2026/05/882858/images/2ce141cd5805676be9163ec33ea255e3982d566f3dd84a49e33781be4b58bc3b.jpg)
natural_image
Two horses in a grassy field, one moving right and the other looking up; no text or symbols present.When you find the subject:
2 Align the frame with the subject and release your finger from the button
- The camera will return to the original zoom magnification (angle of view).
natural_image
Two horses in a grassy field, one highlighted with an inset box, showing a change from the original image (no text or symbols present)Setting how much the camera zooms out
MENU → ⚫ [Custom] → Ⓞ [Operation] → [Zoom Compose Assist]
Settings: [L] / [S]
[L]
The camera zooms out more.
(The camera zooms out farther toward the W side than with the [S] setting.)
[S] The
camera zooms out less.
While using [Zoom Compose Assist], you cannot perform any other zoom operations.
[Zoom Compose Assist] is not available during recording, or when the camera is set to a function that does not allow zoom operations.
Shutter button (Taking pictures)
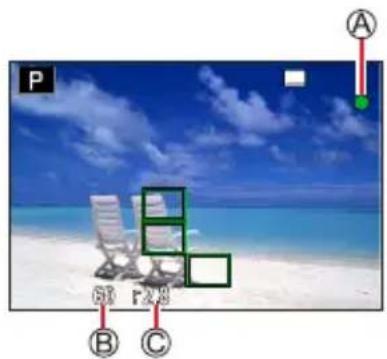
1 Press the shutter button halfway (first pressure point) to focus on the subject
Ⓐ Focus display
( When focus is aligned: illuminated
When focus is not aligned: flashing)
⑧ Shutter speed
© Aperture value
- The aperture value and shutter speed are displayed. (If the aperture value and shutter speed are shown in red and flashing, you do not have the appropriate exposure, unless you are using the flash.)
2 Press the shutter button fully (second pressure point) and take the picture
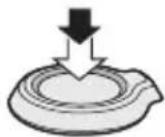
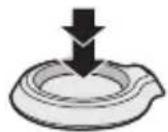
When [Focus/Release Priority] is set to [FOCUS], a picture can only be taken if the image is focused correctly.
When [Monitor Display Speed] or [EVF Display Speed] (or both) is set to [ECO 30fps], Digital Zoom is not available.
Even during menu operation or picture playback, if you press the shutter button halfway, you can instantly set the camera ready for recording.
Focus range
Focus range is displayed when operating the zoom
Ⓐ Focus range
The focus range may change gradually depending on the zoom position.
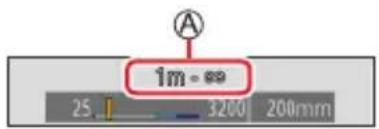
When the shutter button is pressed to the first pressure point, the focus range will appear in red as long as the image is not in focus.
Video button (recording video)
1 Press the video button to start recording
• Immediately release the video button after pressing it.
2 Press the video button again to end recording
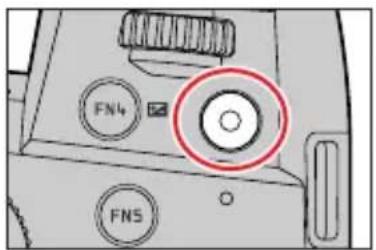
Mode dial (recording mode selection)
1 Set to the desired recording mode • Turn the mode dial slowly to select the desired mode.
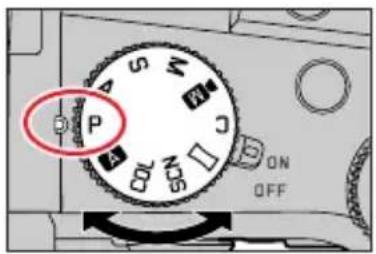
| A | Snapshot Mode (→57) |
| Snapshot Plus Mode (→57) | |
| P | Program AE Mode (→62) |
| A | Aperture-Priority AE Mode (→63) |
| S | Shutter-Priority AE Mode (→64) |
| M | Manual Exposure Mode (→65) |
| ▶M | Creative Video Mode (→81) |
| C | Custom Mode (→85) |
| Panorama Shot Mode (→69) | |
| SCN | Scene Guide Mode (→72) |
| COL | Creative Control Mode (→75) |
Front Dial/Rear Dial
Rotating:
Selection of items or setting of values is performed during the various settings.
Ⓐ Front dial
⑧ Rear dial
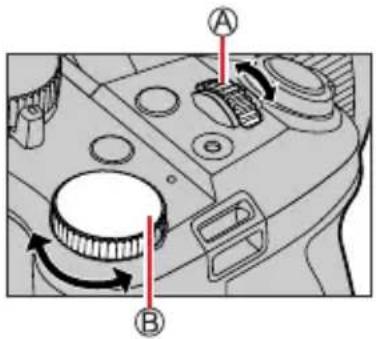
Allows you to set the aperture, shutter speed and other settings when in [P] / [A] / [S] / [M] mode.
| Mode dial Front dial Rear dial | ||
| P | Program Shift Program Shift | |
| A | Aperture value Aperture value | |
| S | Shutter speed Shutter speed | |
| M | Aperture value Shutter speed | |

Temporarily changing the operation of the front/rear dials ([Dial Operation Switch])
Preparation
Assign [Dial Operation Switch] to the function button ( 52)
- [Dial Operation Switch] is assigned to [FN5] when the camera leaves the factory.
1 Press the function button
- A guide will be displayed showing the items temporarily assigned to the front/rear dials.
- If no operations are performed, the guide will disappear in a few seconds.
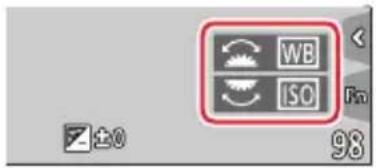
2 Turn the front/rear dials while the guide is displayed
3 Press [MENU/SET] to confirm the setting
- You can also perform the same operation by pressing the shutter button halfway.
You can set the items to be assigned temporarily to the front/rear dials in [Dial Operation Switch Setup] in [Dial Set.] in the [Custom] ([Operation]) menu. (→40)
Basic operation
Setting the operation methods of the front dial and rear dial
| MENU → Custom → [Operation] → [Dial Set.] | |
| [Assign Dial (F/SS)] Assigns the operations of the dials in Manual Exposure Mode.[IMAGE]:Assigns the aperture value to the front dial and the shutter speed to the rear dial.[IMAGE]Assigns the shutter speed to the front dial and the aperture value to the rear dial. | |
| [Rotation (F/SS)] Changes the rotation direction of the dials for aperture value and shutter speed adjustments.[IMAGE] | |
| [Exposure Comp.] Assigns Exposure Compensation to the front dial or the rear dial so that you can directly adjust it.[IMAGE] (Front Dial) / [IMAGE] (Rear Dial) / [OFF] | |
| [Dial Operation Switch Setup] Sets the items to be assigned temporarily to the front/rear dials when you press the function button to which [Dial Operation Switch] is assigned.[IMAGE] ([Front Dial Operation]) / [IMAGE] ([Rear Dial Operation])Items that can be set are as follows.– [Photo Style] – [i.Resolution]– [Filter Effect] – [Flash Mode]– [Aspect Ratio] – [Flash Adjust.]– [4K PHOTO] – [Sensitivity]– [Highlight Shadow] – [White Balance]– [i.Dynamic] – [AF Mode]• [Highlight Shadow] uses both dials. |
Control ring
You can use the control ring to change the settings for recording.
| Mode dial | Control ring *1 |
| A | Step Zoom |
| P | |
| A | |
| S | |
| M | |
| ▶M | |
| □ | Picture effects change |
| SCN | Step Zoom |
| COL | Picture effects change |
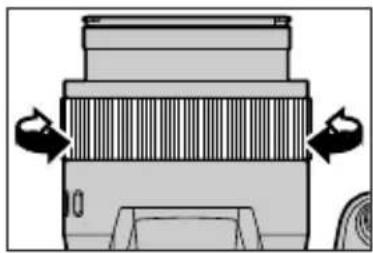
natural_image
Diagram of a camera lens assembly with directional arrows indicating rotation (no text or labels)*1 Focus adjustment is assigned to the control ring when Manual Focus is selected.
Changing the function assigned to the control ring
| MENU → [Custom] → [Operation] → [Control Ring] | ||
| • [Normal] ^2 • [Zoom]• [Step Zoom]• [Exposure Comp.]• [Sensitivity]• [White Balance] | • [AF Mode]• [Photo Style]• [Filter Effect]• [Aspect Ratio]• [Highlight Shadow]• [i.Dynamic] | • [i.Resolution]• [Flash Mode]• [Flash Adjust.]• [Not Set] ^3 |
*2Select[Normal] to return the settings to their default setting.
*3Select[Not Set] if you won't be using the control ring.
An assigned function will apply for all recording modes. However, some assigned functions may not work in specific recording modes.
Cursor button / [MENU/SET] button (Selecting/setting items)
Pressing the cursor button:
Selects menu items/value settings, etc.
Pressing [MENU/SET]:
Confirms settings, etc.
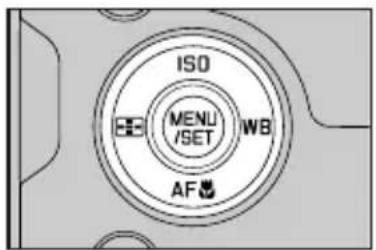
[DISP] button (Switching the display information)
1 Press [DISP] button to toggle between displays
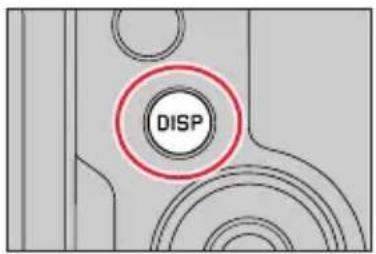
During recording
You can toggle between viewfinder/monitor display.
MENU → ⚫ [Custom] → [Monitor / Display] → [EVF/Monitor Disp. Set] → [EVF Disp. Set] or [Monitor Disp. Set]
| [1] viewfinder style) | Scales down images slightly for a better view of the image composition. |
| [2] (monitor style) | Scales images to fill the screen for a better view of the image details. |
Live View Finder style display layout (Example of viewfinder style display)
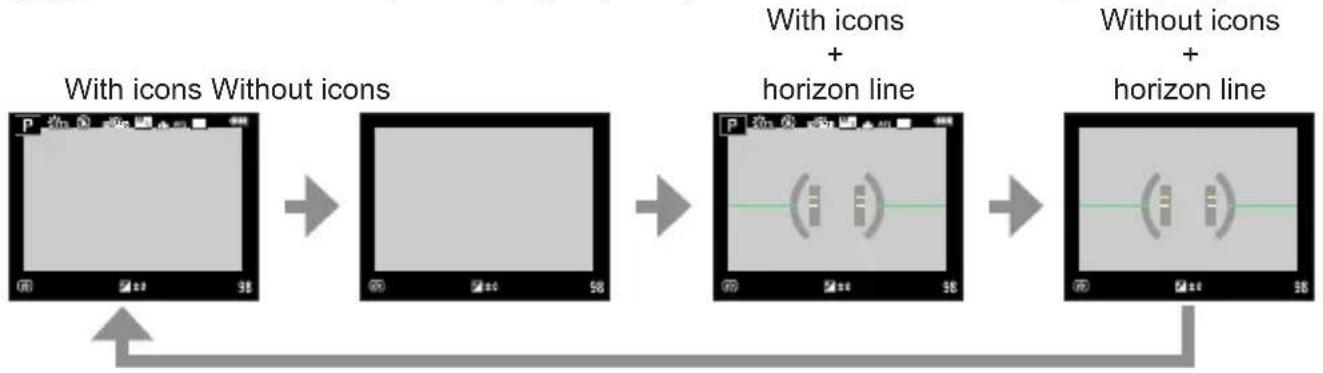
flowchart
graph LR
    A["With icons Without icons"] --> B["Image with icon"]
    B --> C["With icons + horizon line"]
    C --> D["Without icons + horizon line"]
    D --> E["Output image with icon and bar symbol"]
Basic operation
Monitor style display layout (Example of monitor style display)
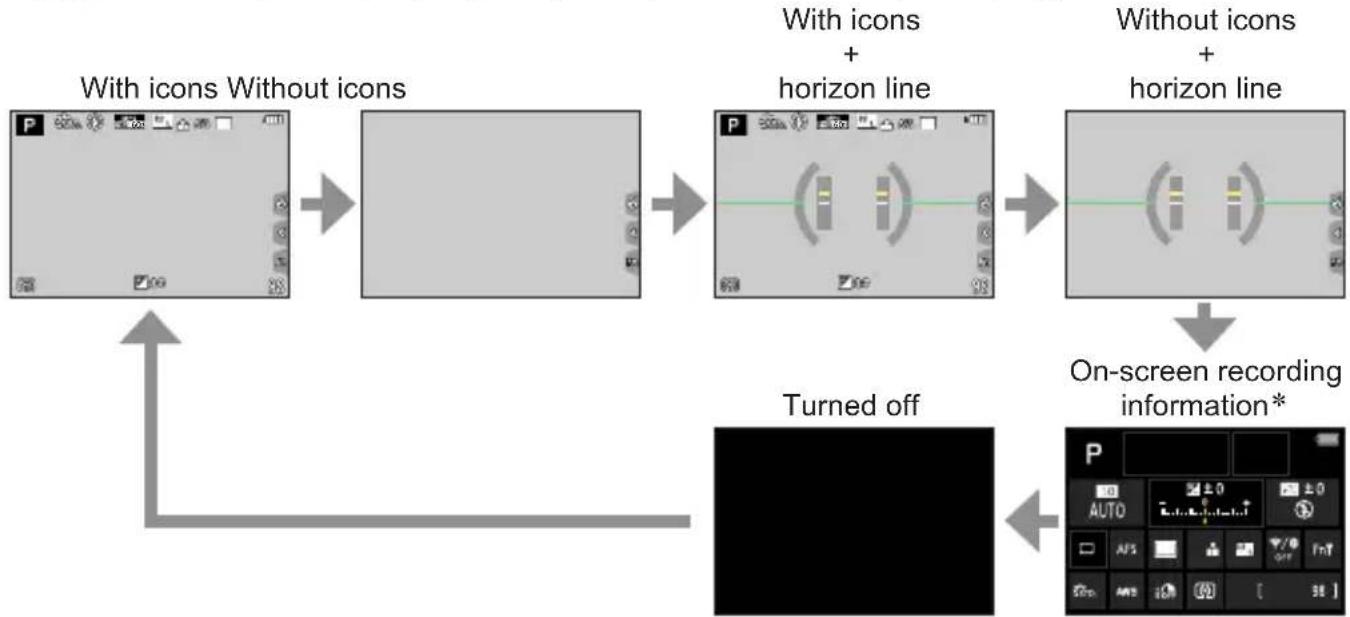
flowchart
graph TD
    A["With icons Without icons"] --> B["Virtual Display"]
    B --> C["With icons + horizon line"]
    C --> D["Without icons + horizon line"]
    D --> E["On-screen recording information*"]
    F["Turned off"] --> A
    F --> E
* This screen is displayed only when [Monitor Info. Disp.] in the [Custom] ([Monitor / Display]) menu is set to [ON]. Settings can be adjusted directly by touching each of the items displayed on the screen.
With [Fn Button Set] in the [Custom] ([Operation]) menu, you can assign [EVF/Monitor Disp. Style] to a function button. Each time you press the assigned function button, the display style will toggle between monitor and viewfinder ([☐]/[☐]).
Using the horizon line
The yellow line indicates the current angle. Correct the camera angle until it matches the white line.
Tilting up or down
• In this case, it is facing upward.
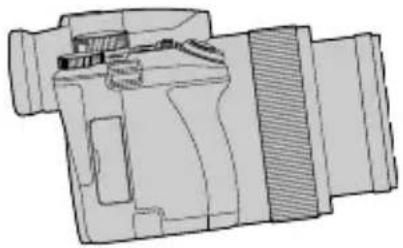
natural_image
Technical line drawing of a mechanical component with no visible text or symbols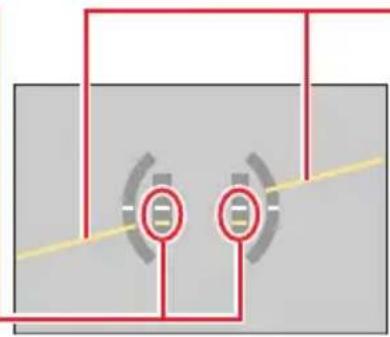
natural_image
Pure diagram of two circular components connected by lines, no text or symbols presentTilting left or right
• In this case, the right side has dropped.
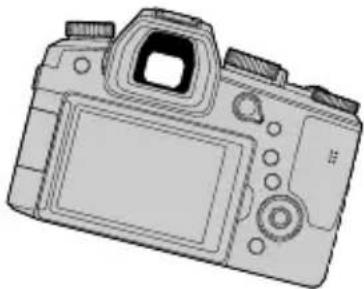
natural_image
Line drawing of a DSLR camera with front panel and control buttons (no text or symbols)- The horizon line will be displayed in green when the camera angle is near or at horizontal level.
A margin of error of approx. ±1 degree remains.
The horizon line may not be displayed correctly and the direction detect function may not work properly if the camera is pointed straight up or straight down.
During playback
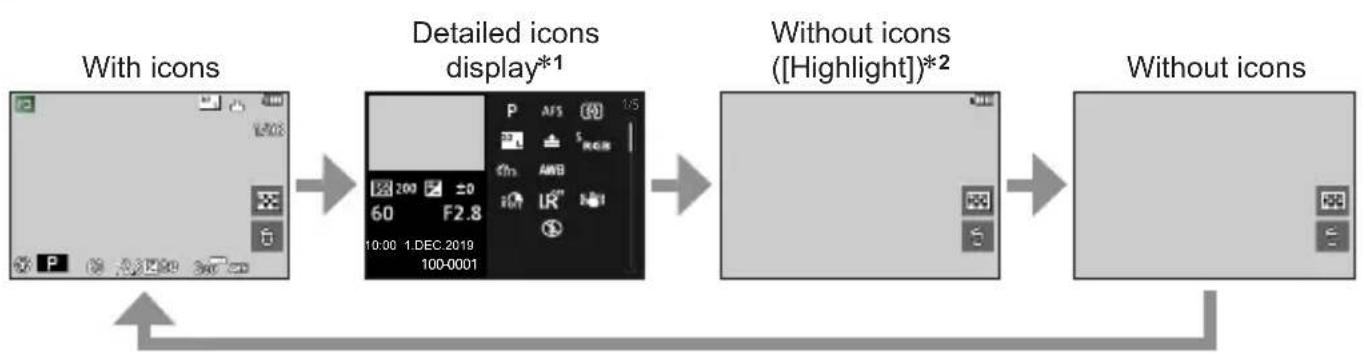
flowchart
graph LR
    A["With icons"] --> B["Detailed icons display*1"]
    B --> C["Without icons ([Highlight"])*2]
    C --> D["Without icons"]
*1 Press ▲ ▼ switch between the following display modes:
– Detailed icons display
- Histogram display
– Photo style, highlight shadow display
- White balance display
– Lens information display
*2 This screen is available only if [Highlight] is set to [ON] in the [Custom] ([Monitor / Display]) menu.
Touch screen (touch functions)
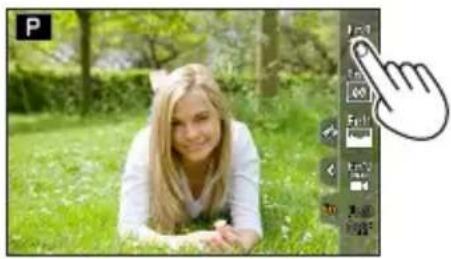
Touch
Brief touch of the desired screen area/menu icon.
natural_image
Woman lying on grass in a park, with a finger pointing at the image editing panel (no text or symbols on the photo itself)Drag
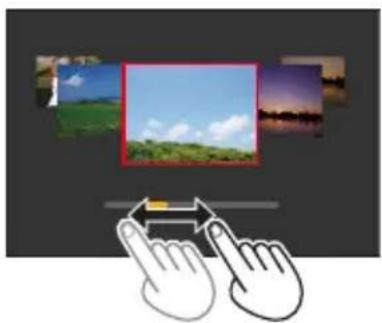
Touching and holding the screen in a sideways motion across the touch screen.
natural_image
Computer screen with two finger icons pointing at a photo frame, no text or symbols visiblePinch (spread/pinch)
On the touch screen, spread (pinch out) your 2 fingers to zoom in, and pinch (pinch in) your 2 fingers to zoom out.
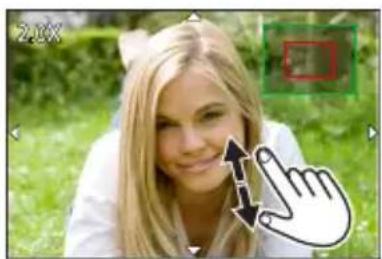
natural_image
Close-up photo of a person outdoors with hands pointing at the face (no visible text or symbols)Make sure your fingers are clean and dry before you touch the screen.
You can apply a commercially available screen protector to the touch screen. Make sure to read the instructions that come with the screen protector before applying it. (Some screen protectors can impair screen visibility or its functionality.)
Screen functionality may also be impaired by the following:
- When touched by a gloved hand
- When the touch screen is wet
Taking pictures using the touch function
Focusing on the subject (Touch AF, Touch Shutter)
Recording mode: A P A S M ▶ M □ SCN COL
1 Touch [◀]
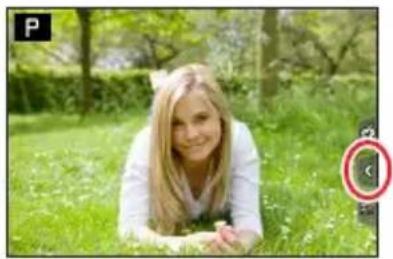
natural_image
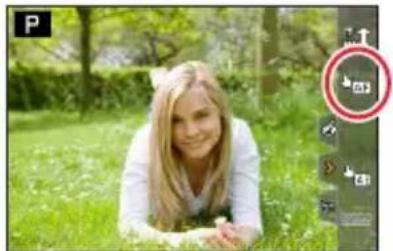
Woman lying on grass in a park, smiling at camera (no visible text or symbols)2 Touching an icon
• The icon changes with every touch.
natural_image
Woman lying on grass in a park, with a circular overlay showing a thumbs-up icon (no readable text or symbols)| [↓] (Touch AF) | Focuses on the position you touch. * |
| [↓] (Touch shutter) | Focuses on the touched position before the picture is taken. * |
| [↓] (OFF) | Touch AF and Touch Shutter are disabled. |
*Picture focus and brightness is optimized at the touched position if [Touch AF] is set to [AF+AE] in the [Touch Settings] of the [Custom] ([Operation]) menu. (→100)
3 (When any other setting than OFF is selected) Touch the subject
For details on changing the position and size of the AF area when [◀AF] (Touch AF) is set, see (→96).
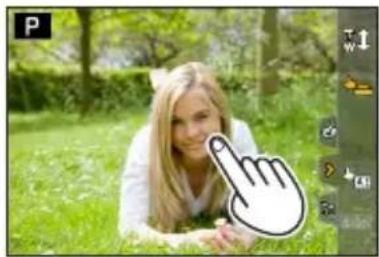
natural_image
Woman lying on grass with a hand cursor icon overlay (no text or symbols)If shooting with the touch shutter fails, the AF area turns red and disappears.
Matching the brightness to the touched position ([Touch AE])
Recording mode: A A P A S M M SCN COL
When the face of the subject appears dark, you can brighten the screen according to the brightness of the face.
1 Touch [◀]
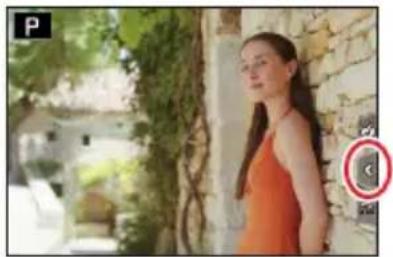
natural_image
Woman in orange dress standing outdoors near stone wall and greenery (no visible text or symbols)2 Touch [↓]
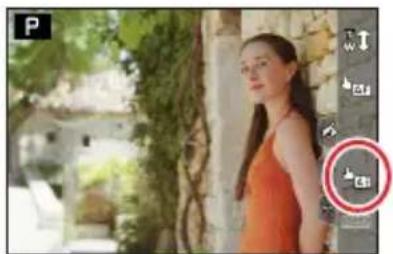
natural_image
Woman in orange shirt standing outdoors near a building with greenery and a red circular overlay (no readable text or symbols)3 Touch the subject you want to optimize the brightness for
- Touching [Reset] will bring the brightness optimization position back to the center.
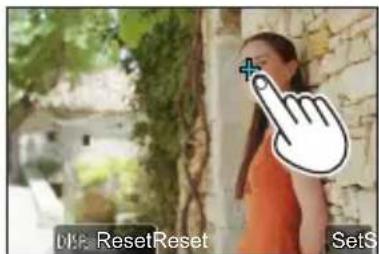
4 Touch [Set]
- Canceling the [Touch AE] function Touch [图标]
This function is not available in the following cases:
- When Digital Zoom is activated
- When recording with [High Speed Video]
- When recording using [4K Live Cropping]
- When [Touch AF] is set to [AF + AE] in the [Touch Settings] of the [Custom] ([Operation]) menu.
Menu Settings
Menu settings are configured via button or touch operation.
1 Press [MENU/SET] to bring up the menu
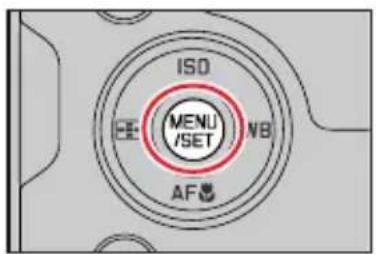
2 Switch the menu type
① Press
② Press ▲▼ to select a tab, e.g. [ ]
- You can also select the tab by rotating the front dial.
③ Press [MENU/SET]
- Using touch screen operations enabled Touch a tab, e.g. [√]
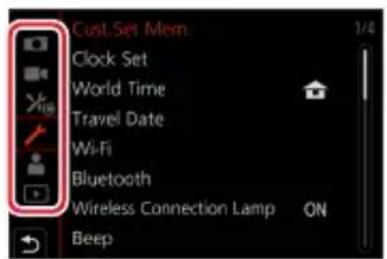
| [Rec](→170) | Setting options include aspect ratio, number of pixels, 4K Photo, etc. | |
| [Motion Picture](→185) | Setting options include [Rec Quality] and other aspects of video recording | |
| [Custom](→189) | Setting options include screen display views and button functions | |
| [Setup](→204) | Settings include clock settings, audible signals and Bluetooth-related functions | |
| [My Menu](→214) | Configures custom menus | |
| [Playback](→215) | Playback and picture editing functions |
- Menus to be displayed in each recording mode (→169)
Menu Settings
3 Press ▲ to select a menu item and press [MENU/SET]
- The menu item can also be selected by rotating the rear dial.
- You can also switch to the next page by rotating the zoom lever.
- Using touch screen operations enabled Touch the menu item
- You can switch pages by touching on the right side of the display.
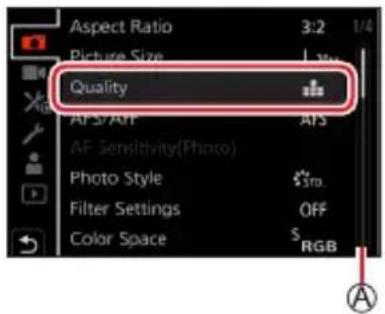
4 Press ▲ to select a setting and press [MENU/SET]
- The setting can also be selected by rotating the rear dial.
- The setting methods vary depending on the menu item.
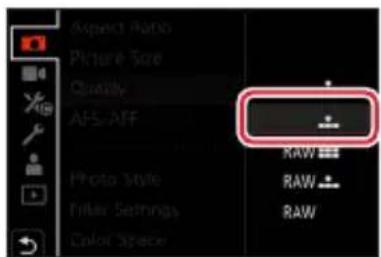
- Using touch screen operations enabled Touch the setting to set
5 Press the [→] button repeatedly until the recording or playback screen appears
• Alternatively, you can exit the menu screen by pressing the shutter button to the first pressure point.
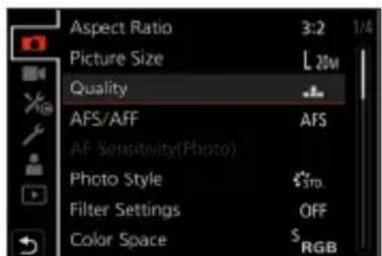
- Using touch screen operations enabled Touch [◀]
![LEICA V-LUX 5 - - Using touch screen operations enabled Touch [◀] - 1](/content/2026/05/882858/images/ad9fada216471401091e5a767c2d9b84d618060f8f852e5cfb3dad2c383350bc.jpg)
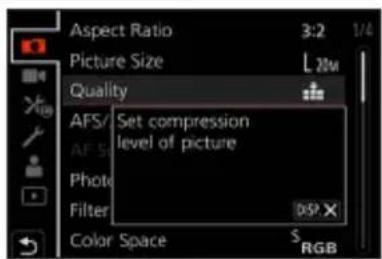
You can display an explanation on the menu by pressing the [DISP] button while you select a menu item or setting. Deactivated menu items are grayed out. In some setting conditions, the reason the setting is disabled is displayed when you press [MENU/SET] if you select a grayed out menu item.
Accessing frequently used menu items (Quick Menu)
Some menu items can be made available in recording mode for quick access.
1 Press the [Q MENU] button
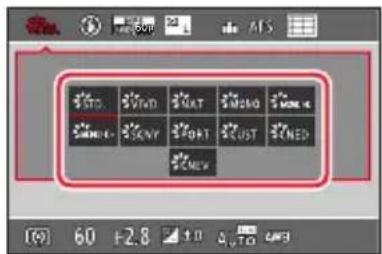
2 Turn the front dial to select the menu item
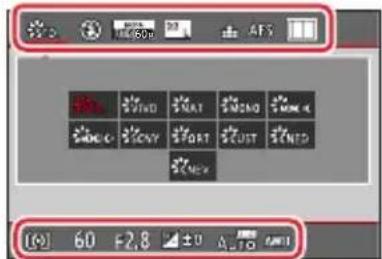
3 Turn the rear dial to select the setting
4 Press the [Q MENU] button to exit the Quick Menu
Using the Quick menu on the monitor recording information screen ( 43)
Select the item by pressing the [Q MENU] button and rotating the front dial, and then select the setting items by rotating the rear dial.
![P ISO AUTO ±0 ±0 AFS OFF FmT ISO AND 167 [ 98 ]](/content/2026/05/882858/images/05da6354e0a36e144aa2bdd1fb9dd7cf4cb67fb9211cb6ced44fad4801b2fec6.jpg)
You can also use ▲▼ to select menu and setting items. Some items or settings cannot be selected depending on the current camera mode or display style.
Configuring the Quick Menu
Up to 15 items can be included in the Quick Menu.
MENU → ⚙️ [Custom] → Ⓞ [Operation] → [Q.MENU] → [CUSTOM]
1 After pressing the [Q MENU] button, press ▼ to select [OK] and press [MENU/SET]
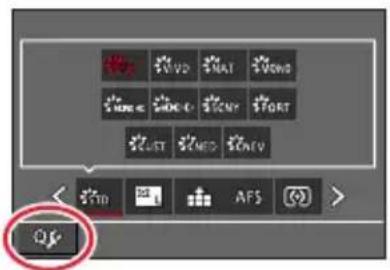
2 Press ▲▼ to select the menu item in the top row and press [MENU/SET]
Ⓐ Top row: menu items for selection
(B) Bottom row: Set items
- Items that are displayed in light gray in the top row have already been set.
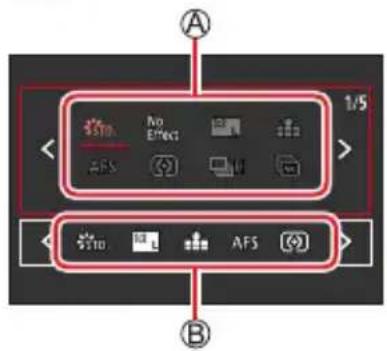
3 Press ◀ to select an empty space in the bottom row and press [MENU/SET]
- You can also set the menu item by dragging it from the top row to the bottom row.
- If there is no empty space in the bottom row, you can replace an existing item with a new item by selecting the existing item.
- To cancel the setting, move to the bottom row by pressing and select an item to cancel, and then press [MENU/SET].
4 Press the [←] button
- The display returns to the screen of step1. Press [MENU/SET] to switch to the recording screen.
Assigning frequently used button functions
(Function buttons)
You can assign frequently-used functions to specific function buttons ([FN1] - [FN8]) or icons displayed on the screen ([FN9] - [FN13]).
1 Set the menu
MENU → ⚡️ [Custom] → Ⓞ [Operation] → [Fn Button Set]
Settings: [Setting in REC mode] / [Setting in PLAY mode]
2 Press ▲ to select the function button you want to assign a function to and press [MENU/SET]
- Press the [DISP] button to switch pages.
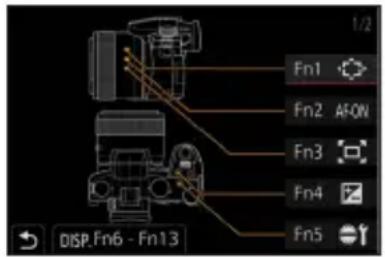
3 Press ▲ to select the function you want to assign and press [MENU/SET]
- For details on the functions that can be assigned in [Setting in REC mode], refer to ( 53) .
- For details on the functions that can be assigned in [Setting in PLAY mode], refer to ( 55) .
Configuring the function button settings from the monitor recording information screen
Touching [Fn] on the monitor recording information screen (→43) also allows you to display the screen in step 2.
Quick function assignment
The screen displayed in Step 3 can be displayed by holding a function button ([FN1] to [FN8]) for 2 seconds. (Depending on the registered function or displayed screen, it may not be possible to display the assignment screen.)
Certain functions cannot be assigned to some function buttons. The function assigned to the function button may not work in some modes or on some display screens.
Using the function buttons during recording
Press the function button to use the assigned function.
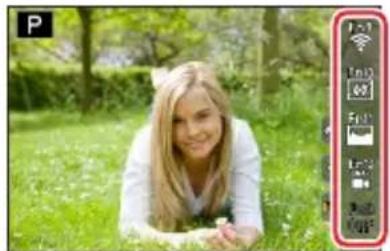
Using function buttons with touch operations
① Touch [Fn]
② Touch [FN9], [FN10], [FN11], [FN12] or [FN13]
natural_image
Woman lying on grass in a park, smiling at the camera (no visible text or symbols)Available function assignments in [Setting in REC mode]
• [Exposure Comp.]: [FN4] ^1
• [Wi-Fi]: [FN9] ^1
• [Q.MENU]: [FN6] ^1
• [Video Record]
• [EVF/Monitor Switch]: [FN8] ^1
• [EVF/Monitor Disp. Style]
• [AF/AE LOCK]
• [AF-ON]: [FN2] ^1
• [Preview]: [FN7]*1
• [One Push AE]
- [Touch AE]
• [Level Gauge]: [FN10] ^1
• [Focus Area Set]: [FN1] ^1
• [1 Shot "4K PHOTO"]
• [Operation Lock]
• [Dial Operation Switch]: [FN5]*1
• [Photo Style]
• [Filter Effect]
- [Aspect Ratio]
• [Picture Size]
• [Quality]
• [AFS/AFF]
• [Metering Mode]
• [Burst Rate]
• [4K PHOTO]
• [Self Timer]
• [Bracket]
• [Highlight Shadow]
• [i.Dynamic]
• [i.Resolution]
• [Min. Shtr Speed]
• [HDR]
- Shutter Type
• [Flash Mode]
• [Flash Adjust.]
• [i.Zoom]
• [Digital Zoom]
• [Stabilizer]
• [E-Stabilization (Video)]
• [4K Live Cropping]
• [Snap Movie]: [FN12] ^1
• [Motion Pic. Rec Quality]
• [Picture Mode in Rec.]
• [Sound Rec Level Disp.]
• [Sound Rec Level Adj.]
• [Silent Mode]
• [Peaking]
• [Histogram]: [FN1 1]
• [Guide Line]
• [Zebra Pattern]
• [Monochrome Live View]
• [Constant Preview]
• [Rec Area]
- [Zoom lever]
• [Zoom Compose Assist]: [FN3]*1
• [Sensitivity]
• [White Balance]
• [AF Mode/MF]
• [Macro Mode]
• [Rec / Playback Switch]
• [Off]2: [FN13]*1
*1 Default function button assignments.
*2 No function is assigned to function buttons.
Assigning frequently used button functions (Function buttons)
When [Video Record] is assigned to the function button, you can start and stop recording video by pressing the Video button.
When [Focus Area Set] is assigned to the function button, you can display the AF area or the MF Assist position setting screen.
When [1 Shot "4K PHOTO"] is set, recording is performed in a specified 4K Photo Mode only once. After the recording has finished, the camera returns to normal state.
When [Operation Lock] is assigned to the function button, you can disable the operations that were set using [Operation Lock Setting] in the [Custom] ([Operation]) menu. To cancel the lock, press the function button to which [Operation Lock] is assigned again.
When [Rec / Playback Switch] is assigned to the function button, you can switch between recording mode and playback mode.
To restore the default function button settings, select [Restore to Default].
If the screen displays ☐ or similar, the displayed operation will be performed instead of the function assigned to function buttons by [Fn Button Set].
Using the function buttons during playback
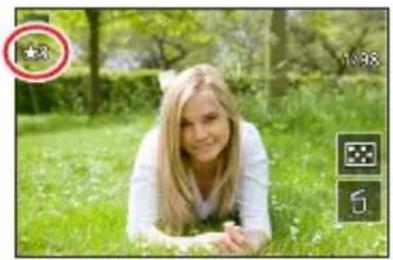
You can directly set an assigned function to an image by pressing the function button during playback.
Example: When [FN6] is set to [Rating★3]
1 Press ◀ to select the picture
2 Press the [FN6] button and then set the picture as [Rating★3]
natural_image
Woman lying on grass in a park, no visible text or symbolsFunctions that can be assigned in [Setting in PLAY mode]
- The following functions can be assigned to the buttons [FN1], [FN2], [FN3], [FN4], [FN5], [FN6] or [FN8].
• [Wi-Fi]: [FN5]
• [EVF/Monitor Switch]: [FN8] ^1
• [Rec / Playback Switch]
• [4K PHOTO Play]
- [Delete Single]
• [Protect]
• [Rating★1]
• [Rating★2]
• [Rating★3]: [FN6] ^1
• [Rating★4]
• [Rating★5]
- [RAW Processing]
• [4K PHOTO Bulk Saving]
• [Off] ^2 :
[FN1], [FN2], [FN3], [FN4]*1
*1 Default function button assignments.
*2 No function is assigned to function buttons.
If you assign [4K PHOTO Play], a screen will be displayed, allowing you to select the pictures to be extracted from a 4K burst file and saved.
To restore the default function button settings, select [Restore to Default].
Entering text
Follow the steps below when the text entry screen is displayed.
1 Use ▲▼ to select characters
2 Press [MENU/SET] several times until the desired character is displayed
- Enter a space.
change the character type
- Press the [DISP] button
- Use ▲ ▼ ◀ to select [ ] and press [MENU/SET]
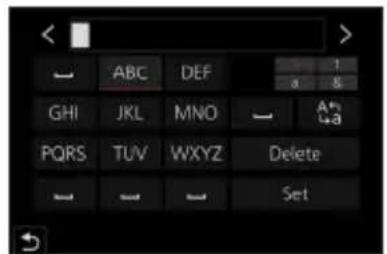
continue entering characters
- Use ▲▼◀to select [ ] and press [MENU/SET]
- Move the zoom lever toward T side
- Turn the rear dial to the right.
edit text
① Use ▲▼◀▶ to select [◀] [>] and press [MENU/SET]. Then, move the cursor to the text to edit
- You can also use the zoom lever or rear dial to reposition the cursor.
② Use ▲▼ to select [Delete] and press [MENU/SET]
③ Use ▲▼ to select the correct text, and press [MENU/SET]
3 When you are finished entering text, use ▲▼ to select [Set] and press [MENU/SET]
A maximum of 30 characters can be entered (maximum of 9 characters when setting names in [Face Recog.]).
A maximum of 15 characters can be entered for [ \ ], [ 「 ], [ J ], [ • ] and [ — ] (maximum of 6 characters when setting names in [Face Recog.]).
Taking pictures with automatic settings (Snapshot Modes)
Recording mode: A A
This mode is recommended for those who want to point and shoot as the camera optimizes settings to match the subject and recording environment.
1 Set mode dial to [A]
- By default, the camera is set to Snapshot Plus Mode.
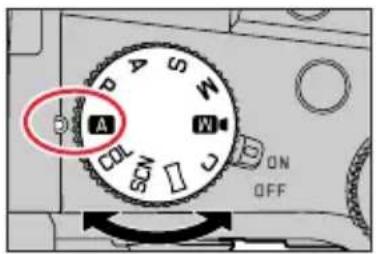
2 Point the camera at the subject
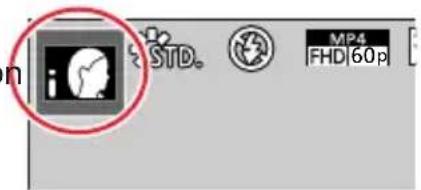
- When the camera identifies the optimal scene, the icon switches to the one for that scene. (Automatic Scene Detection)
Toggling between Snapshot Plus Mode and Snapshot Mode
MENU → A [Snapshot Mode] → [Snapshot Mode]
Settings: [A] (Snapshot Mode) / [A](Snapshot Plus Mode)
![LEICA V-LUX 5 - Settings: [A] (Snapshot Mode) / [A](Snapshot Plus Mode) - 1](/content/2026/05/882858/images/8df744c9981be957b0373009bd28dc05aef4a088e10b79d2743eae54ac45edf7.jpg)
Alternatively, you can touch the Recording Mode icon in the recording screen to display the selection screen.
![LEICA V-LUX 5 - Settings: [A] (Snapshot Mode) / [A](Snapshot Plus Mode) - 2](/content/2026/05/882858/images/ce42cd95b223252f6ab1c4cb9f6a95de94a30fa69adbab1cb3fc723d88667629.jpg)
[ A ] allows you to adjust some settings such as the brightness and color tone while also using [ A ] for other settings so that you can record pictures more suited to your preferences.
(○: Available, —: Not available)
| A Snapshot Plus Mode | A Snapshot Mode | |
| Setting the color saturation | ○ - | |
| Setting the brightness (exposure) | ○ - | |
| Defocus control function | ○ - | |
| Configurable menus Many Few | ||
Auto Focus, Face/Eye Detection, and Face Recognition
[AF Mode] is set to [●] by default. Touching the subject on the touch screen will switch the mode to [■] and the AF Tracking function activates.
- You can also switch to [◀] by pressing the [◀] button (◀). Align the AF tracking area with the subject and press the shutter button halfway to operate the AF tracking function.
- When [Face Recog.] is set to [ON] and if the camera recognizes a face similar to a registered face, [R] is displayed on the upper right corner of the [i], [i], and [i] icons.
Flash
When the flash is open, the camera will automatically be set to [i A] , [i B] (Auto/Red-Eye Reduction) [i B] or [i D] depending on the type of subject and brightness.
When [ ] or [ ] is displayed, the [Red-Eye Removal] function is activated to automatically detect red-eye and correct the picture data. When [ ] or [ ] is selected, the shutter speed is reduced. In Snapshot Plus Mode, you can set [Flash Mode] under [Flash] in the [Rec] menu to [✗] (Forced Flash Off) even when the flash is open. (→149)
Automatic Scene Detection
When taking pictures
| i [i-Portrait] | i [i-Scenery] | i [i-Macro] |
| i [i-Night Portrait]*1 | i [i-Night Scenery] | i [i-Handheld Night Shot]*2 |
| i [i-Food] | i [i-Baby]*3 | i [i-Sunset] |
| A / A When scene does not correspond to any of the above | ||
When recording video
| i [i-Portrait] | i [i-Scenery] | i [i-Low Light] | i [i-Macro] |
| A / A When scene does not correspond to any of the above | |||
*1 Displayed only when using flash.
*2 When [iHandheld Night Shot] is [ON].
*3 When children (that are registered in the camera with Face Recognition) under 3 years old are recognized.
Taking pictures with automatic settings (Snapshot Modes)
- When the camera identifies 📄 as the optimal scene and if the camera determines that jitter is reduced by the use of a tripod or by other means, a shutter speed that is slower than usual is selected. After pressing the shutter button, do not move the camera while recording.
- When recording 4K photos or when recording using [Post Focus], Scene Detection works the same way as when recording video.
Depending on recording conditions, different scene types may be determined for the same subject.

About Backlight Compensation
Backlight compensation is automatically activated in Snapshot Plus Mode or Snapshot Mode. Backlight is a condition where a light shines from behind a subject. When there is a backlight, the subject appears darker and the camera will automatically attempt to correct it by increasing the brightness of the picture.
[Snapshot Mode] menu
Taking pictures using a handheld camera ([iHandheld Night Shot])
Recording mode: A A
[iHandheld Night Shot] can record a still with less jitter and less noise without using a tripod by combining a burst of pictures if a night scene is detected automatically while the unit is being handheld.
MENU → A [Shot Mode] → [iHandheld Night Shot]
Settings: [ON] / [OFF]
The view angle narrows slightly.
Do not move the camera during the burst operation after the shutter button has been pressed.
The flash is fixed to the [④] (Forced Flash Off) setting.
This function will not work for stills while video is being recorded.
This function is not available in the following cases:
- When using [Burst]
- When recording 4K photos
- When recording using [Post Focus]
- When recording using [Bracket]
- When [Quality] is set to RAW, [RAW] or [ ] RAW
- When using [Time Lapse Shot]
- When [Auto Shooting] of [Stop Motion Animation] is set to [ON]
Combining pictures into a single still with rich gradation ([iHDR])
Recording mode: A A
In case of strong contrast between the background and the subject, [iHDR] records multiple stills with differing exposures and combines them to create a single still rich in gradation.
[iHDR] is activated when required. When activated, [HDR] will be displayed on the screen.
MENU → A [S shot Mode] → [iHDR]
Settings: [ON] / [OFF]
The view angle narrows slightly.
Do not move the camera during the burst operation after the shutter button has been pressed.
Since a burst of stills are combined after they have been recorded, it will be a few moments before you can record another picture.
In the case of composition from a burst, afterimages may appear if the subject was moving.
This function will not work for stills while video is being recorded.
This function is not available in the following cases:
- When recording using the flash
- When using [Burst]
- When recording 4K photos
- When recording using [Post Focus]
- When recording using [Bracket]
- When [Quality] is set to RAW, [RA]WQ[ ] RAW
- When using [Time Lapse Shot]
- When [Auto Shooting] of [Stop Motion Animation] is set to [ON]
Taking pictures with custom color saturation, focus and brightness settings
Recording mode: A
Color saturation settings
① Press [WB] button ( ) to display the setting screen
② Turn the rear dial to adjust the color
- Press [MENU/SET] to return to the recording screen.
- The color setting will return to the default setting (center point) when the camera is turned off or set to a different recording mode.
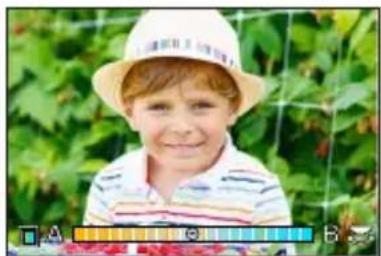
natural_image
Portrait of a smiling child wearing a straw hat, set against a green vine background (no text or symbols visible)Defocusing the background (Defocus control function)
① Press the [FN7] button to display the setting screen
② Turn the rear dial to adjust the background defocusing
- Press [MENU/SET] to return to the recording screen.
- Pressing the [FN7] button on the blurriness setting screen will cancel the setting.
- Auto Focus Mode is set to [■]. The position of the AF area can be set by touching the screen. (Its size cannot be changed)
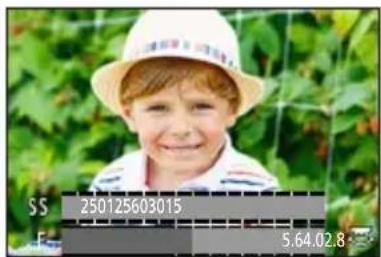
Brightness settings
① Press [+2 button]
② Turn the rear dial to adjust brightness
- You can change the setting on the exposure compensation screen from [Exposure Comp. Disp. Setting] in the [Custom] ([Operation]) menu. (→194)
- Press [Z] button again to return to the recording screen.

natural_image
Portrait of a smiling child wearing a straw hat, set against a green vine background (no text or symbols visible)Touch screen settings
① Touch [ ]
② Touch the item you want to set
[☐: Color saturation
[ ]: Degree of defocusing
[+] Brightness
③ Drag the slide bar or exposure meter to set
- Press [MENU/SET] to return to the recording screen.
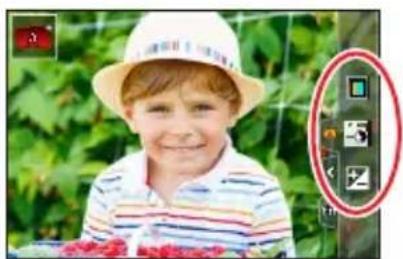
natural_image
Portrait of a smiling child wearing a hat and striped polo shirt, outdoors with green foliage background (no visible text or symbols)Taking pictures with automatic aperture value and shutter speed settings (Program AE Mode)
Recording mode: P
Take pictures with automatic aperture value and shutter speed settings to match the image subject brightness.
1 Set mode dial to [P]
2 Press the shutter button halfway to display the aperture value and shutter speed value on screen
- If the aperture value and shutter speed flash red, you do not have the correct exposure.
3 Use Program Shift to change the values by turning the front or rear dial while the numeric values are on screen (they remain visible for approx. 10 s)
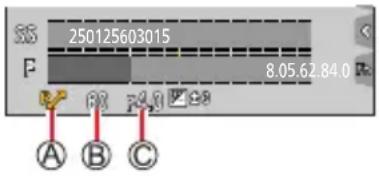
Ⓐ Program Shift indication
⑧ Shutter speed
© Aperture value
A Program Shift indication
B Shutter speed
C Aperture value
- Exit Program Shift by turning the camera off and on again or by turning the front or rear dial until the Program Shift icon disappears.
- Program Shift can easily be canceled by setting a function button to [One Push AE]. (→52, 68)
- Exit Program Shift by turning the camera off and on again or by turning the front or rear dial until the Program Shift icon disappears. - Program Shift can easily be canceled by setting a function button to [One Push AE]. (→52, 68)
About Program Shift
The function for maintaining the same exposure (brightness) while changing the aperture value and shutter speed combination is called “Program Shift”. You can use “Program Shift” to take pictures by adjusting the aperture value and shutter speed in Program AE Mode.
Program Shift cannot be used in the following cases:
- When recording using the flash
- When recording 4K photos
- When recording using [Post Focus]
- When ISO sensitivity is set to [ISO]
Taking pictures with manual settings for aperture value and shutter speed
Recording mode: ASM
The effect of the aperture value and shutter speed you have set is not applied to the recording screen. Use Preview Mode to check the effect on the recording screen. (→67)
The brightness of the screen may vary from the actual pictures recorded. Check the brightness of pictures using the playback screen.
An exposure meter is displayed when you adjust the aperture value and shutter speed. If aperture and shutter speed are shown in red, you do not have appropriate exposure.
The numeric values for aperture and shutter speed will flash red if the exposure settings are incorrect and you press the shutter button to the first pressure point.
Taking pictures with only the aperture value set manually (Aperture-Priority AE Mode)
The camera automatically optimizes the shutter speed for the brightness of the image subject if the aperture value is set manually.
1 Set mode dial to [A]
2 Turn the rear or front dial to set the aperture value
Ⓐ Aperture value
⑧ Exposure meter
| Available aperture values* | Shutter speed set (seconds) |
| F2.8 - F11 | 60 - 1/4000(With mechanical shutter)1 - 1/16000(With electronic shutter) |
* Some settings may be unavailable due to the zoom factor.
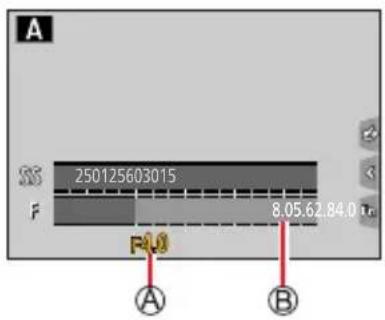
Taking pictures with manual settings for aperture value and shutter speed
Taking pictures with only the shutter speed set manually (Shutter-Priority AE Mode)
The camera automatically optimizes the aperture value for the brightness of the image subject if the shutter speed is set manually.
1 Set mode dial to [S]
2 Turn the rear or front dial to set the shutter speed
Ⓐ Shutter speed
⑧ Exposure meter
| Available shutter speed settings (seconds) | Aperture value set |
| 60 - 1/4000(With mechanical shutter)1 - 1/16000(With electronic shutter) | F2.8 - F11 |
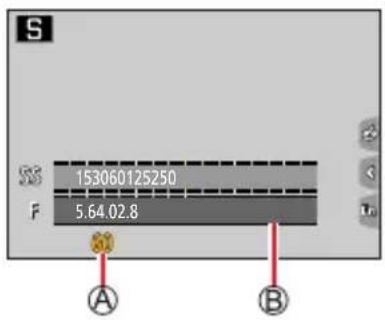
Taking pictures with manual settings for aperture value and shutter speed
Taking pictures with manual settings for aperture value and shutter speed (Manual Exposure Mode)
Determine the exposure by manually setting the aperture value and the shutter speed.
1 Set mode dial to [M]
2 Turn the rear dial to set the shutter speed, and turn the front dial to set the aperture value
Ⓐ Shutter speed
⑧ Aperture value
© Manual Exposure Assist
⑭ Exposure meter
| Available aperture settings* | Available shutter speed settings (seconds) |
| F2.8 - F11 | [B] (Bulb), 60 - 1/4000(When the mechanical shutter is used)1 - 1/16000(When the electronic shutter is used) |
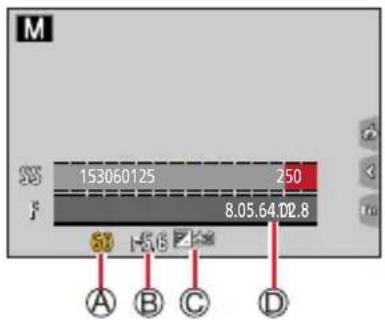
* Some settings may be unavailable due to the zoom factor.

Optimizing the ISO sensitivity for the aperture value and shutter speed
When the ISO sensitivity is set to [AUTO], the camera sets the ISO sensitivity automatically so that the exposure will be appropriate for the aperture value and shutter speed.
- Depending on recording conditions, an appropriate exposure may not be set or the ISO sensitivity may become higher.

Manual exposure assist (estimate)
 | Shows pictures with standard brightness (appropriate exposure). |
 | Shows brighter pictures. For the appropriate exposure, either use a faster shutter speed or increase aperture value. |
 | Shows darker pictures. For the appropriate exposure, either use a slower shutter speed or reduce aperture value. |
Taking pictures with manual settings for aperture value and shutter speed
[B] (Bulb) (Approximately up to 120 seconds)
If you set the shutter speed to [B], the shutter stays open while the shutter button is pressed fully.
The shutter closes when you release the shutter button.
Use this function when you want to keep the shutter open for an extended period of time, e.g. to take pictures of fireworks or night scenes.
![LEICA V-LUX 5 - [B] (Bulb) (Approximately up to 120 seconds) - 1](/content/2026/05/882858/images/a1209f4ad2f7b03b9fc4dd0f699a38a7fcea7aaa3d239d79281c16c51970981e.jpg)
When the shutter speed is set to [B], we recommend using a tripod and taking pictures remotely by connecting the camera to a smartphone via Wi-Fi connection to prevent camera shake.
When you take stills with the shutter speed set to B (Bulb), the pictures may have higher noise levels. If you want to suppress noise, we recommend taking pictures by setting [Long Shtr NR] to [ON] in the [Rec] menu. ( 180)
This function is not available in the following cases:
- When recording using the flash (Only when [Flash Synchro] is set to [2ND])
- When recording 4K photos
- When recording using [Post Focus]
- When recording using [Bracket]
- When [HDR] is set to [ON]
- When using the electronic shutter
- When [Silent Mode] is set to [ON]
- When using [Time Lapse Shot]
- When [Auto Shooting] of [Stop Motion Animation] is set to [ON]
Taking pictures with manual settings for aperture value and shutter speed
Checking the effects of the aperture value and shutter speed (Preview Mode)
Recording mode: A A P A S M ▶ M □ SCN COL
- Checking the effect of the selected aperture value: You can check the depth of field (focus range) by physically narrowing the lens aperture blades to the aperture value used for the actual recording.
- Checking the effect of the selected shutter speed: You can check motion in a scene by displaying the screen at the shutter speed used for the actual recording.
Preparation
Assign [Preview] to a function button ( 52)
The following step is an example of assigning [Preview] to the [FN7] button.
1 Press the [FN7] button to toggle the confirmation screen
• Every time you press the [FN7] button, the screen switches.
Normal recording screen Aperture effect preview
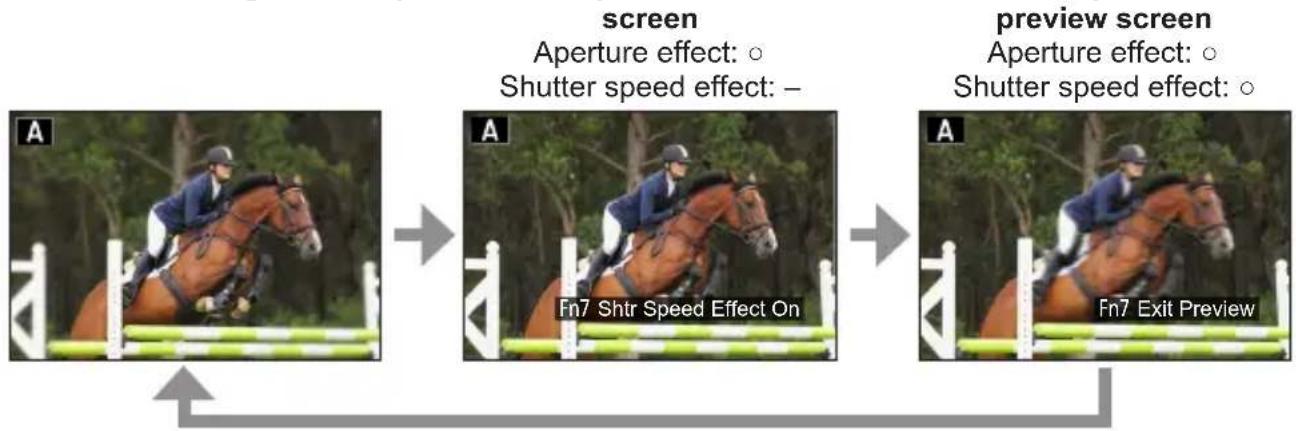
![LEICA V-LUX 5 - Press the [FN7] button to toggle the confirmation screen - 2](/content/2026/05/882858/images/c75e1cdd9d14e574b81be30d2f86c1590bd50070fcc9a8b4a2310daae30f6911.jpg)
Depth of field characteristic
| Recording conditions | Aperture value Small Large | ||
| Focal length Telephone photo Wide-angle | |||
| Distance to a subject Close Far | |||
| Depth of field(Focus range) | Shallow (narrow)Example:To take a picture bydeliberately blurring thebackground | Deep (wide)Example:To take a picture by adjustingthe focus while including thebackground | |
Taking pictures with manual settings for aperture value and shutter speed
You can take a picture with Preview Mode enabled.
The range in which you can check the effect of a selected shutter speed is between 8 seconds and 1/16000 seconds.
This mode cannot be used with [☐ ([4K Pre-Burst]) of 4K Photo.
Setting the aperture value / shutter speed for suitable exposure (One Push AE)
Recording mode: A A P A S M M SCN COL
When the exposure setting is too bright or too dark, you can use one push AE to achieve a suitable exposure setting.

How to tell if the exposure is not adequate
Ⓐ Blinks red
- If the aperture values and shutter speed blink red when the shutter button is pressed halfway.
- If the Manual Exposure Assistance (→65) is anything other than [ ] when in Manual Exposure Mode.
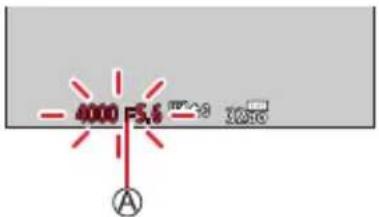
Preparation
Assign [One Push AE] to the function button ( 52)
1 (When exposure is not adequate) Press the function button
⑧ Change to appropriate exposure
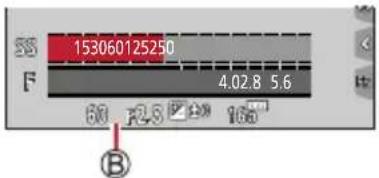
In the following cases, suitable exposure cannot be set.
- When the subject is extremely dark and it is not possible to achieve adequate exposure by changing the aperture value or shutter speed
- When recording using the flash
- Preview Mode
Recording panorama pictures (Panorama Shot Mode)
Recording mode:
Consecutive photos taken while the camera is moved are stitched together to form a single panorama picture.
1 Set mode dial to [☐]
2 Press the shutter button halfway to focus
3 Press the shutter button fully and pan the camera in a small circular motion to the recording direction to start recording
Ⓐ Horizontal/vertical guide line
⑧ Recording direction and progress status (approximate)
Taking pictures from left to right
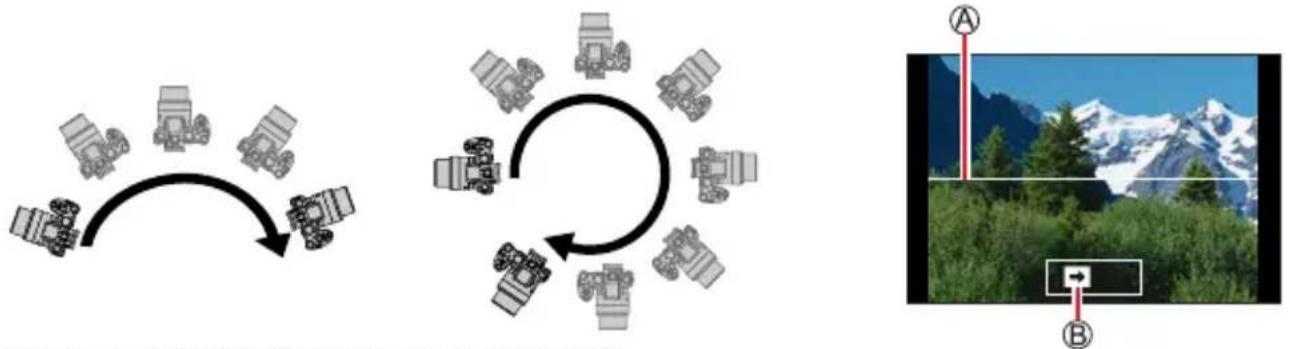
Image size: [STANDARD] Image size: [WIDE]
- Pan the camera at a constant speed.
- Panning the camera too quickly or too slowly will not result in a successful panorama shot.
4 Press the shutter button fully again to end recording
- You can also end recording if you stop panning the camera while taking pictures.
- Recording can also be ended by moving the camera to the end of the guide.
Recording panorama pictures (Panorama Shot Mode)
Changing the recording direction and angle of view (image size) of panorama pictures
MENU → [Panorama Shot] → [Direction] / [Picture Size]
[Direction] Sets the recording direction.
[Picture Size] Sets the angle of view (image size).
[STANDARD] / [WIDE]
- The number of recording pixels per horizontal line and vertical line of a panorama picture varies depending on the picture size, recording direction and number of stitched pictures. The maximum number of recording pixels is as follows:
| Image size Recording | Direction Horizontal Resolution Vertical Resolution | |
| [STANDARD] | Horizontal 8176 pixels 1920 pixels | |
| Vertical 2560 pixels 7680 pixels | ||
| [WIDE] | Horizontal 8176 pixels 960 pixels | |
| Vertical 1280 pixels 7680 pixels | ||
![LEICA V-LUX 5 - MENU → [Panorama Shot] → [Direction] / [Picture Size] - 1](/content/2026/05/882858/images/6660e02c45605dc4287df1d9a77e939f6ad5e2832e2957a9bc556f5f31877720.jpg)
Tips
Pan the camera in the recording direction as steadily as possible.
(If the camera shakes too much, it may not be able to take pictures or may end up creating a narrow (small) panorama picture.)
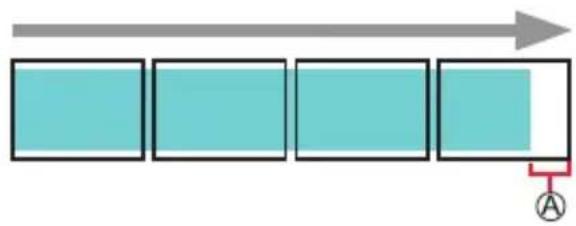
flowchart
graph LR
    A[" "] --> B[" "]
    B --> C[" "]
    C --> D[" "]
    D --> E[" "]
    style A fill:#f9f,stroke:#333
    style B fill:#f9f,stroke:#333
    style C fill:#f9f,stroke:#333
    style D fill:#f9f,stroke:#333
    style E fill:#ccf,stroke:#333
Ⓐ Pan the camera to a point slightly ahead of the point that you want to take.
(The last frame is not recorded to the end.)
Recording panorama pictures (Panorama Shot Mode)
About panorama picture playback
Pressing ▲ will start scrolling playback automatically in the same direction as the recording.
- The following operations can be performed during scrolling playback.
| ▲ | Start panorama playback / Pause* | |
| ▼ | Stop |
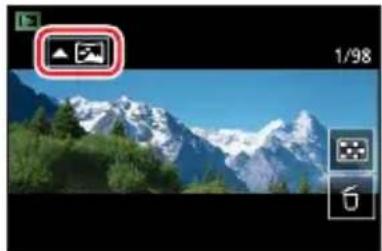
natural_image
Mountain landscape photo with snow-capped peaks and forested slopes, no visible text or symbols* When the playback is paused, you can scroll forwards and backwards by dragging the screen. When the scroll bar is touched, the playback position jumps to the touched position.
The zoom position is fixed to the W end.
The focus, exposure and White Balance are all fixed to optimal values for the first picture. If the focusing or brightness of pictures recorded as part of a panorama picture after the first picture are significantly different from those of the first picture, the panorama picture as a whole (when all pictures are stitched together) may not have consistent focus and brightness.
Since several pictures are stitched together to create a panorama picture, some subjects may be distorted or the joining portions of successively taken pictures that are stitched may be noticeable.
Panorama pictures may not be created or pictures may not be recorded properly when taking pictures of the following subjects or when taking pictures in the following recording conditions:
- Subjects that have a continuous monotone or pattern (sky, beach, etc.)
- Moving subjects (person, pet, vehicle, waves, or flowers swaying in the wind, etc.)
- Subjects whose colors or patterns change quickly (such as an image appearing on a display)
- Dark locations
- Locations with a flickering light source (fluorescent lamp, candle light, etc.)
Taking scene pictures (Scene Guide Mode)
Recording mode: SCN
If you select a scene to suit the subject and recording conditions with reference to the example images, the camera will set optimal exposure, color, and focus, allowing you to record in a manner appropriate to the scene.
1 Set the mode dial to [S]CN
2 Press ◀ to select the scene and press [MENU/SET]
- The scene can also be selected by dragging an example image or the slide bar.
![LEICA V-LUX 5 - Press ◀ to select the scene and press [MENU/SET] - 1](/content/2026/05/882858/images/06ae4c3c10424349976b39b0a3ddef0987e124a55ec41c3873c2d52b18308669.jpg)
natural_image
Composite image showing a scenic landscape with green fields, blue sky, and distant hills (no text or symbols)![LEICA V-LUX 5 - Press ◀ to select the scene and press [MENU/SET] - 2](/content/2026/05/882858/images/5f96b911819136356b2fa706b01c0ffb4f99bb85c901ecb58c7fde5ee2e73d4f.jpg)
Displaying the description of each scene and recording tips
Press the [DISP] button while the scene selection screen is displayed
Normal display Guide display List display
![LEICA V-LUX 5 - Press the [DISP] button while the scene selection screen is displayed - 1](/content/2026/05/882858/images/06d3be6b3b2f5f41a28b5ab8f4ff2dc8dd76a1db5e54e7d66905cdbe52656947.jpg)
flowchart
graph LR
    A["Image generation"] --> B["Image processing"]
    B --> C["Output: 10x10 video frames with various settings"]
    style A fill:#f9f,stroke:#333
    style B fill:#bbf,stroke:#333
    style C fill:#dfd,stroke:#333
![LEICA V-LUX 5 - Press the [DISP] button while the scene selection screen is displayed - 2](/content/2026/05/882858/images/a52df7679ea8d9685b00127c7e99eb7707888a0681f49906169d65598f36f6eb.jpg)
Alternatively, you can touch the Recording Mode icon in the recording screen to display the selection screen.
![LEICA V-LUX 5 - Press the [DISP] button while the scene selection screen is displayed - 3](/content/2026/05/882858/images/79db3474bdbbfc04f07ff7059f9ca2b1abab441b6c606acbd1ec55fa478373b6.jpg)
Depending on the scene, the recording screen may seem as if frames are missed.
To change the scene, select [Scene Switch] in the [Scene Guide] menu, and then press [MENU/SET]. You can return to step 2.
Some of the recording menu items cannot be set in Scene Guide Mode because the camera automatically adjusts the settings to the optimal values.
Although White Balance is fixed to [AWB] for certain types of scenes, you can fine tune the White Balance or use White Balance bracketing by pressing the [WB] button (▶) on the recording screen.
Taking scene pictures (Scene Guide Mode)
1: [Clear Portrait]
2: [Silky Skin]
Ia part of the background etc. is a color close to skin color, this part is also smoothed. This mode may not be effective when there is insufficient brightness.
3: [Backlit Softness]
4: [Clear in Backlight]
5: [Relaxing Tone]
6: [Sweet Child's Face]
When you touch the face, a still is recorded with the focus and exposure set for the touched location.
7: [Distinct Scenery]
8: [Bright Blue Sky]
9: [Romantic Sunset Glow]
10: [Vivid Sunset Glow]
11: [Glistening Water]
Star filter used in this mode may cause glistening effects on the objects other than water surface.
12: [Clear Nightscape]
13: [Cool Night Sky]
14: [Warm Glowing Nightscape]
15: [Artistic Nightscape]
Taking scene pictures (Scene Guide Mode)
16: [Glittering Illuminations]
17: [Handheld Night Shot]
After the shutter button has been pressed, do not move the camera during the burst operation. The angle of view becomes narrow slightly.
18: [Clear Night Portrait]
Tripod, self-timer recommended. When [Clear Night Portrait] is selected, keep the subject still for about 1 second after taking the picture.
19: [Soft Image of a Flower]
For close-up recording, we recommend that you avoid using the flash.
20: [Appetizing Food]
For close-up recording, we recommend that you avoid using the flash.
21: [Cute Dessert]
For close-up recording, we recommend that you avoid using the flash.
22: [Freeze Animal Motion]
Default AF Assist Lamp setting is [OFF].
23: [Clear Sports Shot]
24: [Monochrome]
Taking pictures with creative effects (Creative Control Mode)
Recording mode: COL
You can select the effects to be applied from sample pictures and preview these effects on the screen.
1 Set mode dial to [CDL
2 Press ▲ to select the picture effect (filters) and press [MENU/SET]
Ⓐ Preview display
- You can also select the picture effects (filters) by touching the example images.
![LEICA V-LUX 5 - Press ▲ to select the picture effect (filters) and press [MENU/SET] - 1](/content/2026/05/882858/images/bbb2f4c94439a611b7d90f2050f49f6f626e4815d3590053ca07ef92c85a9be8.jpg)
natural_image
Collage of colorful photos including a child running on grass, balloons, and framed pictures (no text or symbols)![LEICA V-LUX 5 - Press ▲ to select the picture effect (filters) and press [MENU/SET] - 2](/content/2026/05/882858/images/4d2b84196588f3461d48d3fbe283e9e2cd03bd76728307f568b70f04d237c049.jpg)
Displaying the description of each picture effect (Filter)
Press [DISP] button while the picture effect selection screen is displayed
- When it is set to the guide display, explanations for each picture effect are displayed.
Normal display Guide display List display
![LEICA V-LUX 5 - Press [DISP] button while the picture effect selection screen is displayed - 1](/content/2026/05/882858/images/3e68837577eb5a59535cea01107bf37156c321d4e70db22094e59e3cbe243fbb.jpg)
flowchart
graph LR
    A["Photo Frame"] -->|1/8| B["Image Collection"]
    B -->|1/8| C["Output Image Grid"]
![LEICA V-LUX 5 - Press [DISP] button while the picture effect selection screen is displayed - 2](/content/2026/05/882858/images/ec31b0344ee04611a580db17c92b19adecce2a0c1946cdb9e1a40721fa545aa3.jpg)
Alternatively, you can touch the Recording Mode icon in the recording screen to display the selection screen.
![LEICA V-LUX 5 - Press [DISP] button while the picture effect selection screen is displayed - 3](/content/2026/05/882858/images/53632d556766c239689fbdd573ff873b47a41be71037637de92cec376ff04e84.jpg)
Depending on the picture effect, the recording screen may seem as if frames are missed.
[White Balance] will be fixed to [AWB] and ISO sensitivity to [AUTO].
The following menu items can be set in the [Creative Control] menu.
• [Filter Effect]: Allows you to set the picture effect (filter).
- [Simultaneous Record w/o Filter]: Allows you to set the camera to take a picture with and without an picture effect simultaneously. (→176)
Taking pictures with creative effects (Creative Control Mode)
Adjusting the picture effects according to your preferences
1 Press [W]button ( ▶to display the setting screen
2 Turn the rear dial to adjust the setting conditions of the picture effects
- Press [MENU/SET] to return to the recording screen.
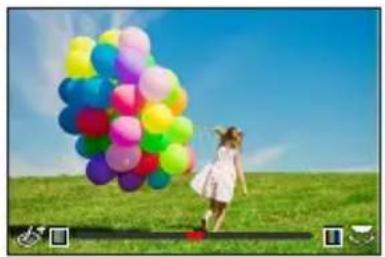
natural_image
A young girl walking on a grassy field holding a large bundle of colorful balloons against a blue sky (no text or symbols visible)Taking pictures with creative effects (Creative Control Mode)
| Picture effect Items that can be set | |
| [Expressive] Vividness | Subdued coloring Gaudy coloring |
| [Retro] Coloring | Yellowish coloring Reddish coloring |
| [Old Days] Contrast | Low contrast High contrast |
| [High Key] Coloring | Pinkish coloring Light-bluish coloring |
| [Low Key] Coloring | Reddish coloring Bluish coloring |
| [Sepia] Contrast | Low contrast High contrast |
| [Monochrome] Coloring | Yellowish coloring Bluish coloring |
| [Dynamic Monochrome] Contrast | Low contrast High contrast |
| [Rough Monochrome] Grainy picture effect | Weak grainy picture effect Strong grainy picture effect |
| [Silky Monochrome] Degree of defocusing | Slight defocusing Strong defocusing |
| [Impressive Art] Vividness | Black & white Gaudy coloring |
| [High Dynamic] Vividness | Black & white Gaudy coloring |
| [Cross Process] Coloring | Greenish coloring / Bluish coloring / Yellowish coloring / Reddish coloringTurn the rear dial to select coloring, and press [MENU/SET]. 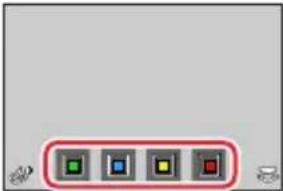 |
| [Toy Effect] | ColoringOrangish coloring Bluish coloring |
| [Toy Pop] | Range in which peripheral brightness is reducedSmall Large |
| [Bleach Bypass] | ContrastLow contrast High contrast |
| [Miniature Effect] | VividnessSubdued coloring Gaudy coloringFor details about [Miniature Effect] ( 78) |
Taking pictures with creative effects (Creative Control Mode)
| Picture effect Items that can be set | |
| [Soft Focus] Degree of defocusing | Slight defocusing ↔ Strong defocusing |
| [Fantasy] Vividness | Subdued coloring ↔ Gaudy coloring |
| [Star Filter] | Length of the rays of lightRays of light is short ↔ Rays of light is longNumber of the rays of lightSmaller ↔ LargerAngle of the rays of lightTurn to the left ↔ Turn to the right |
| [One Point Color] Amount of color retained | Leaves a small amount of color ↔ Leaves a large amount of color• For details about [One Point Color] (→79) |
| [Sunshine] Coloring | Yellowish coloring / Reddish coloring / Bluish coloring / Whitish coloring• Turn the rear dial to select coloring, and press [MENU/SET].• For details about [Sunshine] (→79) |
Setting the type of defocus ([Miniature Effect])
① Touch [6], then touch [ ]
② Press ▲▼r to move the focusing area (frame)
- You can also move the in-focus portion by touching the recording screen.
- Touch[] to set the recording orientation (defocus orientation).
③ Turn the rear dial to select the size of the focusing area (frame)
- On the touch screen, spread (pinch out) your 2 fingers to zoom in, and pinch (pinch in) your 2 fingers to zoom out.
- Pressing the [DISP] button will reset the default values.
④ Press [MENU/SET]
![LEICA V-LUX 5 - Setting the type of defocus ([Miniature Effect]) - 1](/content/2026/05/882858/images/9ff193e3547164c8a57af6c440917e81e6dcbcee772361edf73f212d2479498d.jpg)
natural_image
Aerial view of a historic European town with dense red-tiled rooftops and surrounding greenery (no visible text or signage)Taking pictures with creative effects (Creative Control Mode)
Video is recorded without audio.
The length of a recorded video will be around 1/10th of the actual recording time. (A ten minute recording will therefore be about 1 minute in length.) The recordable time displayed on the camera is approx. 10 times of the actual recording time.
Selecting the color to be retained ([One Point Color])
① Touch [∅], then touch [∅]
② Select the color to be retained with ▲▼ and press [MENU/SET]
- Pressing the [DISP] button will reset the default values.
![LEICA V-LUX 5 - Selecting the color to be retained ([One Point Color]) - 1](/content/2026/05/882858/images/4d3228f41cf43057900d840b759e585419de51acb100180827ea63455324fd77.jpg)
natural_image
Black and white photo of a pink lotus flower with dark leaves in the background (no text or symbols)The selected color may not be applied for some subjects.
Setting the position and size of the light source ([Sunshine])
① Touch [icon], then touch [icon]
② Press ▲▼ to move the center of the light source to a different position
- The position of the light source can also be moved by touching the screen.
③ Turn the rear dial to adjust the size of the light source
- On the touch screen, spread (pinch out) your 2 fingers to zoom in, and pinch (pinch in) your 2 fingers to zoom out.
- Pressing the [DISP] button will reset the default values.
④ Press [MENU/SET]
![LEICA V-LUX 5 - Setting the position and size of the light source ([Sunshine]) - 1](/content/2026/05/882858/images/ff10861ae8f0c2727403b98b3d3a2d37770ffb9e294eebe1dd14068ec6287506.jpg)
Tips on positioning the center of the light source
You can move the center of the light source to a point outside the image to obtain a more natural effect.
Taking pictures with different degrees of blurriness and brightness
Defocusing the background (Defocus control function)
① Press the [FN7] button to display the setting screen
② Turn the rear dial to adjust the background defocusing condition
- Press [MENU/SET] to return to the recording screen.
- Pressing the [FN7] button on the blurriness setting screen will cancel the setting.
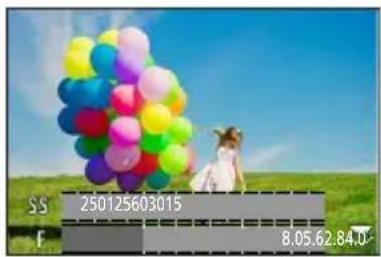
natural_image
A person sitting on a grassy field with colorful balloons in the background under a clear blue sky (no text or symbols visible)Setting the brightness
① Press the [+button]
② Turn the rear dial to adjust brightness
- Change the setting on the exposure compensation screen from [Exposure Comp. Disp. Setting] in the [Custom] ([Operation]) menu. (→194)
- Press [1] button again to return to the recording screen.
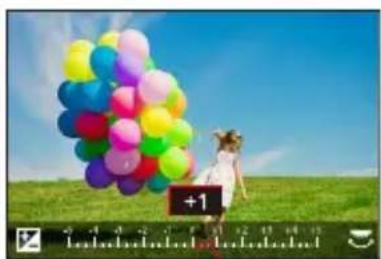
natural_image
A child standing on a grassy field holding a large bundle of colorful balloons against a blue sky (no text or symbols visible)Touch screen operation
① Touch [ ]
② Touch the item you want to set
[☐]: Adjusting the picture effect
[→]: Degree of defocusing
[+] Brightness
③ Drag the slide bar or exposure meter to set • Press [MENU/SET] to return to the recording screen.
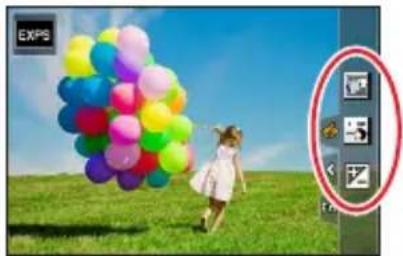
natural_image
Child walking on a grassy field holding a large colorful balloon, with no visible text or symbols.Defocus control operation is not available in [Miniature Effect] (Creative Control Mode).
Recording video by setting the aperture/shutter speed/ISO sensitivity (Creative Video Mode)
Recording mode: ▶M
The operation for changing the aperture value, shutter speed or ISO sensitivity is the same as the operation for setting the mode dial to [P], [A], [S] or [M] (except Program Shift Mode).
1 Set mode dial to [▶M]
2 Set the menu
MENU → MCreative Video] → [Exposure Mode]
Settings: [P] / [A] / [S] / [M]

Alternatively, you can touch the Recording Mode icon in the recording screen to display the selection screen.
3 Press the video button (or shutter button) to start recording
① Touch [☐] (Cannot be used during [High Speed Video] recording.)
② Touch icons
 | Zoom Exposure Compensation |  | |
 | Aperture value ISO sensitivity |  | |
 | Shutter speed [Sound Rec Level Adj.] |  |
③ Drag the slide bar to set


ges the setting slowly


Changes the setting quickly
Using touch icons allows silent operation while recording video.
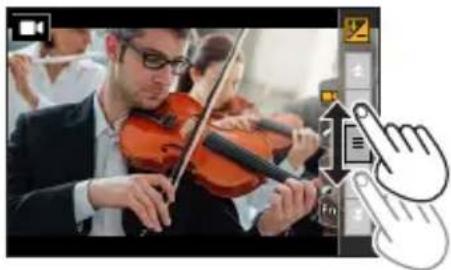
natural_image
Photo of a violinist performing in a music class with a finger pointing at the right (no visible text or symbols)4 Press the video button (or shutter button) to stop recording
Recording video by setting the aperture/shutter speed/ISO sensitivity (Creative Video Mode)
The ISO sensitivity can be set within the following range.
• [AUTO], [125] to [6400] ([L.80] to [6400] when [Extended ISO] is set to [ON])
Setting the upper limit value of ISO sensitivity when [Sensitivity] is set to [AUTO]
MENU → Motion Picture] → [ISO Auto Upper Limit (Video)]
Settings: [AUTO] / [200] / [400] / [800] / [1600] / [3200] / [6400]
Recording slow motion video ([High Speed Video])
Slow motion video is achieved by recording at a super high speed. When these recordings are played back, the motion is displayed slowly.
- To record pictures, use a UHS Speed Class 3 card.
1 Set the mode dial to [▶M]
2 Set the menu
MENU → M [Creative Video] → [High Speed Video] → [ON]
- Recording is done at 120 frames/second with [FHD] in [MP4].
3 Press the video button (or shutter button) to start recording
4 Press the video button (or shutter button) to stop recording
The view angle narrows during recording.
No sound is recorded.
Files are split into smaller video files for recording and playback when the file size exceeds 4 GB.
(You can continue to record video without interruption.)
Max. continuous video recording time is 29 minutes.
(In terms of playback time, you can record up to approximately 120 minutes.)
The settings for the focus and zoom are fixed to the settings specified when recording was started.
Flickering or horizontal stripes may appear while recording under fluorescent lighting.
Recording video by setting the aperture/shutter speed/ISO sensitivity (Creative Video Mode)
Pan or zoom while recording with the camera in a fixed position ([4K Live Cropping])
By cropping your video down from the 4K angle of view to Full High Definition, you can record a video that pans and zooms in/out while leaving the camera in a fixed position.
![LEICA V-LUX 5 - Pan or zoom while recording with the camera in a fixed position ([4K Live Cropping]) - 1](/content/2026/05/882858/images/d73188c2af12b1a7752f40ab5f8a830d037321e8d29078dec23ae2152bff7d07.jpg)
natural_image
Panoramic view of a waterfall surrounded by greenery and water, with a filmstrip overlay showing an arrow pointing to the scene (no text or symbols)Pan Zoom in
![LEICA V-LUX 5 - Pan or zoom while recording with the camera in a fixed position ([4K Live Cropping]) - 2](/content/2026/05/882858/images/8f3d9d010c388b55529befc180a8146cc564f535842c22809cbd31a06db4ada2.jpg)
natural_image
Portrait of a woman in an orange top, set against a stone wall with greenery (no visible text or symbols)- Hold the camera firmly in place while recording.
• A video will be recorded at [FHD/20M/30p] under [MP4].
1 Set mode dial to [▶M]
2 Set the menu
MENU → Creative Video] → [4K Live Cropping]
Settings: [40SEC] / [20SEC] / [OFF]
3 Set the crop start frame and press [MENU/SET] to set
Ⓐ Crop start frame
- When making settings for the first time, a crop start frame of size 1920 × 1080 is displayed.
- The camera will remember the frame position and size even when the camera is turned off.
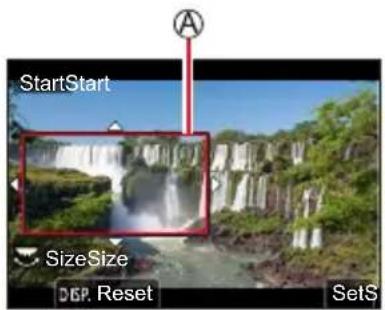
| Operation Touch operation Description | ||
| ▲▼◀▶ | Touch Moves the frame | |
![LEICA V-LUX 5 - Set the crop start frame and press [MENU/SET] to set - 2](/content/2026/05/882858/images/94f8603714a0bb4ff5223042133dfbfb911d12be5aed082850185bbb54caa0da.jpg) | Pinch out / Pinch in | Enlarges/reduces the frame (The range of settings allowed is from 1920×1080 to 3840×2160.) |
| [DISP] [Reset] | Returns the position of the frame and its size to the default settings | |
| [MENU/SET] [Set] | Decides the position and size of the frame | |
Recording video by setting the aperture/shutter speed/ISO sensitivity (Creative Video Mode)
4 Repeat step 3, and then set the crop end frame
⑧ Crop end frame
- The setting of [AF Mode] switches to 📷] (Face Detection). (The Eye Detection cannot be used.)
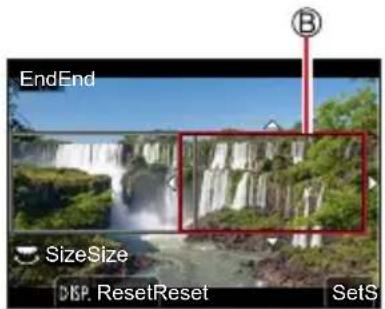
5 Press the video button (or shutter button) to start recording
© Elapsed recording time
(D) Set operating time
- Press the video button (or shutter button) briefly.
- When the set operating time has elapsed, recording automatically ends. To end recording midway, press the video button (or the shutter button) again.
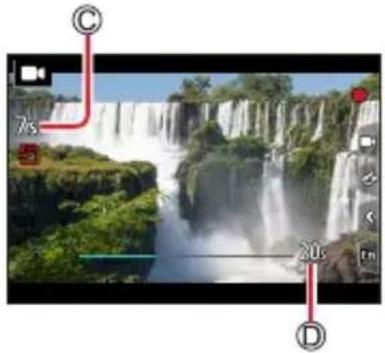
natural_image
Scenic view of a waterfall surrounded by greenery, with no visible text or symbols
When you want to zoom in/out, set different angles of view for the cropping start and end frames. For example, to zoom in, set a larger angle of view for the start frame and a smaller angle of view for the end frame.
Changing the position and size of a crop frame
Press the [FN7] button while the recording screen is displayed, and perform steps 3 and 4.
▶ cancel [4K Live Cropping] recording
Set [OFF] in step 2.
The angle of view narrows.
[4K Live Cropping] is disabled when [High Speed Video] is set.
Focus is adjusted and fixed in the crop start frame.
[Continuous AF] is set to [OFF].
[Metering Mode] will be [☐(Multi Metering).
You cannot zoom in/out during [4K Live Cropping] recording.
Configuring custom recording settings (Custom Mode)
Recording mode: C
Configuring custom recording settings ([Cust.Set Mem.])
Up to 3 sets of current camera settings can be stored using [Cust.Set Mem.].
([C]1[ ], [2]) C3
- AE Mode is the default program setting.
Preparation
Set in advance the recording mode and menu settings so that the camera can be in the state with the settings to be saved.
MENU → [Setup] → [Cust.Set Mem.] → Memory location for custom settings.
The following menu items are not customizable.
| [Custom] menu [Setup] menu [Playback] menu | |
| • [Menu Guide]• Data registered with [Face Recog.]• The [Profile Setup] setting | • All menus • [Rotate Disp.]• [Picture Sort]• [Delete Confirmation] |
Configuring custom recording settings (Custom Mode)
Recording with profiles
1 Set mode dial to [☐]
- The most recently selected profile will be activated when the camera is turned on.
Switching profiles
① Set mode dial to [C]
② Press [MENU/SET] to bring up the menu
③ Press ▲ to select the profile you want to use, and press [MENU/SET]
- The settings saved for the selected profile are activated.

Alternatively, touch the Recording Mode icon in the recording screen to display the selection screen.
Modifying a saved profile
The settings of the currently selected saved profile will remain unchanged when the mode dial is set to [C] and settings are changed temporarily. The settings of a saved profile can only be changed permanently via [Cust.Set Mem.] in the [Setup] menu.
Taking Pictures with Auto Focus
1 Set the focus mode lever to [AFS/AFF] or [AFC]
• The Focus Mode will be set. (→88)
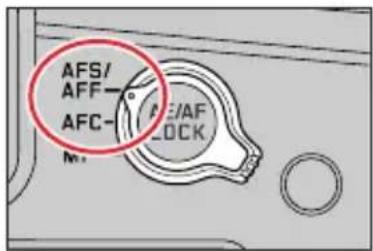
2 Press the [button ( )
3 Press ◀▶ to select AF Mode and then press [MENU/SET]
- Switching [AF Mode] ( 90)
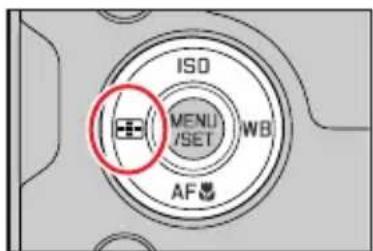
4 Press the shutter button halfway
Ⓐ Focus display
( When focus is aligned: illuminated When focus is not aligned: flashing)
B AF area
(When focus is aligned: green)
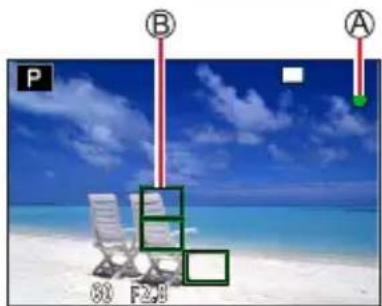
natural_image
Beach scene with lounge chairs and a blue sky background, no visible text or symbols- Two "beep" sounds are heard and Auto Focus is activated.
Four "beep" sounds when focus is not aligned.
- When you take a picture in a dark location, _LOW ] is displayed for the focus display and it may take longer to adjust focus than usual.
- If the camera detects stars in the night sky after displaying LOW, Starlight AF will be activated. When focus is achieved, the focus indication [STA] and AF areas in focus are displayed. (Starlight AF cannot perform detection on the edges of the screen.)

Subjects/environments which may make focusing difficult:
- Fast-moving or extremely bright objects, or objects with little color contrast.
• Taking pictures through glass or near objects emitting light.
• In the dark, or with significant jitter.
- The image object is too close to the camera or the picture composition includes objects that are very close and others that are very far away.
Taking Pictures with Auto Focus
When the lighting is low making it difficult to focus with Auto Focus, set [Monitor Display Speed] or [EVF Display Speed] to [60fps].
Starlight AF will not function properly via the monitor if [Monitor Display Speed] is set to [ECO 30fps] or via the viewfinder if [EVF Display Speed] is set to [ECO 30fps].
Selecting a Focus Mode (AFS, AFF, AFC)
Recording mode: A P A S M M □ SCN COL
Focusing with the shutter button held on the first pressure point.
1 Set the focus mode lever to [AFS/AFF] or [AFC]
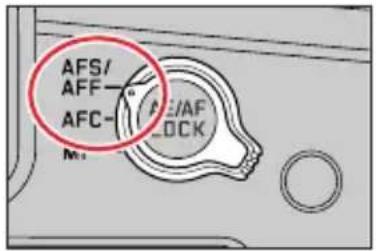
| Setting | Image object/scenery movement | Description | |
| [AFS/AFF] | [AFS] | Subject is still (Scenery, anniversary photograph, etc.) | AFS stands for “Auto Focus Single”. The camera focuses the image for a single exposure while the shutter button held on the first pressure point. |
| [AFF] | Movement cannot be predicted (Children, pets, etc.) | AFF stands for “Auto Focus Flexibility”. The camera focuses the image for a single exposure while the shutter button held on the first pressure point. Should motion be detected while the shutter button is held on the first pressure point, the camera will automatically refocus. | |
| The [AFS/AFF] setting is accessible via the [Rec]/[Motion Picture] menu. | |||
| [AFC] | Image subject is in motion (sports, vehicles, etc.). | AFC stands for “Auto Focus Continuous”. The camera continuously focuses to match the motion while the shutter button is held on the first pressure point. | |
![LEICA V-LUX 5 - Set the focus mode lever to [AFS/AFF] or [AFC] - 2](/content/2026/05/882858/images/f90b4b361dcf7992713e8dc21123a14541a10b536fb3879dc04503a8e6534f79.jpg)
Recording in [AFF]/[AFC] mode
For a moving image subject, the camera predicts the subject's position at the time of recording to focus. (Movement prediction)
Focusing may take time if the zoom is suddenly changed from max. Wide to max. Tele, or if you suddenly move closer to a subject from a greater distance.
Press the shutter button halfway again when it is difficult to focus on the subject.
While the shutter button is pressed halfway, shaking may be seen on the screen.
[AFF] or [AFC] operates as [AFS] in the following case:
- Creative Video Mode
- When recording with [K] ([4K Burst(S/S)]) of the 4K Photo function.
- When the lighting is low.
It is fixed to [AFS] when Panorama Shot Mode is set.
[AFF] is not available when recording 4K photos. Continuous AF works during recording.
This setting cannot be used when recording using [Post Focus].
Setting the tracking sensitivity of the focus position
Recording mode: A A P A S M M SCN COL
This item works only when the Focus Mode is set to [AFF] or [AFC].
MENU → [Rec] → [AF Sensitivity(Photo)]
Settings: [-2] to [+2]
| + | When the distance to the subject changes drastically, the camera re-adjusts the focus immediately. You can bring different subjects into focus one after another. |
| - | When the distance to the subject changes drastically, the camera waits for a short period of time before re-adjusting the focus. This allows you to prevent the focus from being accidentally re-adjusted when, for example, an object crosses the camera. |
The [AF Sensitivity(Photo)] does not function in the following cases:
- When recording 4K photos
- When recording using [Post Focus]
Switching [AF Mode]
Recording mode: A A P A S M M □ SCN COL
This allows the focusing method that suits the positions and number of the subjects to be selected.
1 Press the [button ( )
2 Press ◀▶ to select Auto Focus mode and press [MENU/SET]
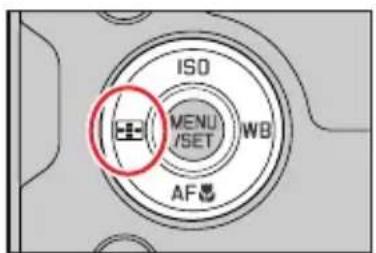
Settings:[●] (Face/Eye Detection) / [■] (Tracking) / [■(49-area-focusing) / [⊕] etc. (Custom Multi) / [■] (1-area-focusing) / [■(Pinpoint-focusing) (→91 - 95)
In Snapshot Mode and Snapshot Plus Mode, [●] or [ ] can be set. (→58)
The [AF Mode] is fixed to [●] in the following case:
- When recording using [4K Live Cropping]
Auto Focus is fixed to [☐]n the following cases:
- When using the Digital Zoom
• [Miniature Effect] (Creative Control Mode)
[AF Mode] cannot be set in the following cases:
- When recording using [Post Focus]
- When [Pull Focus] in [Snap Movie] is set to [ON]
Portrait photography (Face/Eye Detection)
The camera automatically detects the faces and eyes of subjects. The camera adjusts the focus on the eye that is closer to the camera and the exposure using the face (when [Metering Mode] is set to [☐] (Multi Metering)).
• The camera can detect up to 15 faces.
- When the camera recognized a face, the AF area and eye used for focusing are displayed.
Ⓐ Eye used for focusing
Yellow: When the shutter button is pressed halfway and the subject is focused, the frame turns green.
White: Displayed when more than one face is detected. Other faces that are the same distance away as faces within the yellow AF area are also focused.
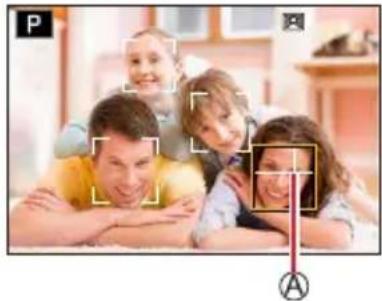
natural_image
Family photo of four smiling adults and children lying on the floor, with a camera lens icon overlay (no text or symbols)Changing the eye to be in focus
Touch the eye you wish to focus on
- If you touch [AF] or press [MENU/SET], the eye focus setting will be canceled.
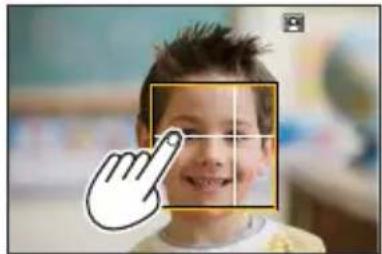
natural_image
Close-up of a smiling child's face with a hand pointing to the nose, no visible text or symbolsCannot set to [☐(Face/Eye Detection) in the following cases:
• [Clear Nightscape], [Cool Night Sky], [Warm Glowing Nightscape], [Artistic Nightscape], [Glittering Illuminations], [Handheld Night Shot], [Appetizing Food], [Cute Dessert] (Scene Guide Mode)
The eye to be in focus cannot be changed when [4K Live Cropping] is set.
If conditions prevent the face from being recognized, such as when the movement of the subject is too rapid, the AF Mode setting switches to [■] (49-area-focusing).
Focusing on a moving subject (tracking)
With button operation
Align the AF Tracking area with the subject and press the shutter button halfway
Ⓐ AF Tracking area
When the subject is detected the AF tracking area turns green. When you release the shutter button, the AF tracking area turns yellow and the subject is automatically kept in focus.
• To release AF Tracking → Press [MENU/SET].
- Focus range: same as macro recording [F] (→101)
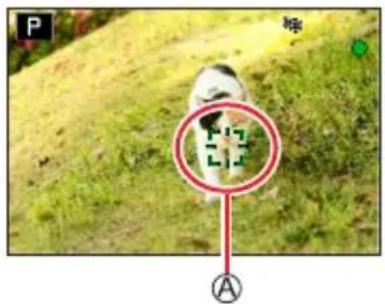
natural_image
Close-up photo of a small dog on grass with a red circular overlay highlighting a green crosshair symbol (no text or symbols present)With touch screen operation
Touch the subject
Perform these operations with the touch shutter function released. The AF Tracking area turns yellow while the subject is locked.
• To release AF Tracking → Touch [AF].
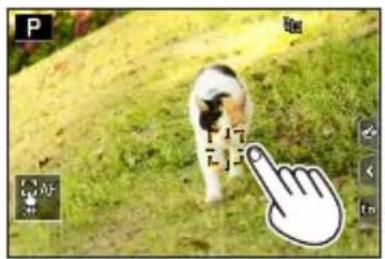
natural_image
A white cat standing on a grassy slope with a finger pointing at it, no visible text or symbols.IPAF Lock fails, a red frame flashes for a while and then turns off.
When you set [Metering Mode] to ☐, the camera adjusts the exposure using a locked subject. (→177)
Under certain recording conditions, such as when the subject is small or dark, AF Tracking may not operate correctly. When AF Tracking does not work, focus will be on [■] (1-area-focusing).
This function is not available in the following case:
- When using [Time Lapse Shot]
In the following cases, [■] performs the operation of [■] (1-area-focusing).
- [Glistening Water], [Glittering Illuminations], [Soft Image of a Flower], [Monochrome] (Scene Guide Mode)
- [Sepia], [Monochrome], [Dynamic Monochrome], [Rough Monochrome], [Silky Monochrome], [Soft Focus], [Star Filter], [Sunshine] (Creative Control Mode)
• [Monochrome], [Monochrome HC], [Monochrome HC+] ([Photo Style])
Subject not centered in picture 49-area-focusing)
Focuses on the subject in the wide range area (up to 49-area-focusing) on the recording screen.
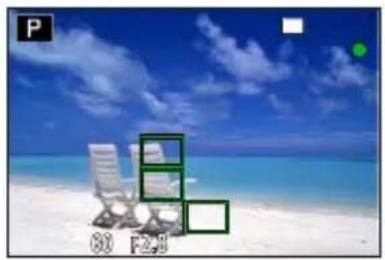
natural_image
Beach scene with white lounge chairs and turquoise ocean background (no text or symbols)Setting the shape of an AF area etc. (Custom Multi)
You can set the preferred shape of an AF area by selecting 49 points in the AF area, based on the subject.
1 Press the [button ( )
2 Select a Custom Multi icon ([☐], etc.), and press ▲
3 Use ◀ to select the setting item
Ⓐ Current AF area shape
| ([Horizontal Pattern]) | Ideal shape for panning, etc. | 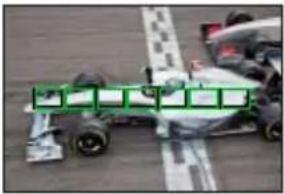 |
| ([Vertical Pattern]) | Ideal shape for recording structures, etc. | 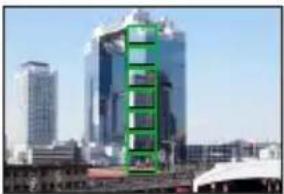 |
| ([Central Pattern]) | Ideal shape for focusing around the center. | 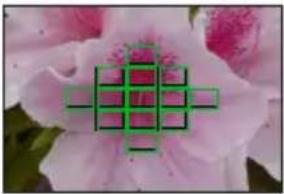 |
| (Custom) | You can save the shape. |
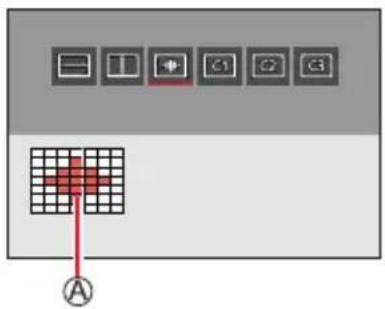
4 Press ▼
• The AF area setting screen appears.
5 Select the AF area
⑧ Selected AF area
When selecting [□/ [ □] ]
① Change the shape of an AF area
| Operation | Touch operation | Description |
| Touch Moves position | ||
| Pinch out / Pinch in | Changes the size (3 stages) | |
| [DISP] [Reset] | Resets the AF area back to the center.• If you press the button again, the size will be reset to the initial setting. | |
② Press [MENU/SET]
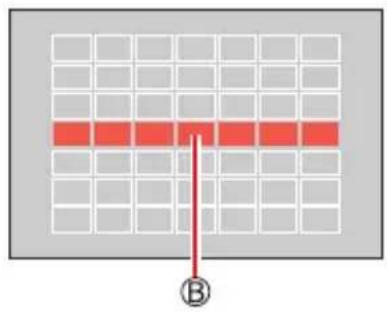
When selecting [C] / [Φ] [C3]
① Change the shape of an AF area
With button operation
Use ▲▼▶ select AF area and press [MENU/SET] to set (repeat)
- If you press [MENU/SET] again, the setting will be canceled.
• To cancel all the settings, press the [DISP] button.
With touch screen operation
Touch the parts you want to set as AF areas • If you touch one of the selected AF areas, the selection of the area will be canceled.
② Press [FN6] button
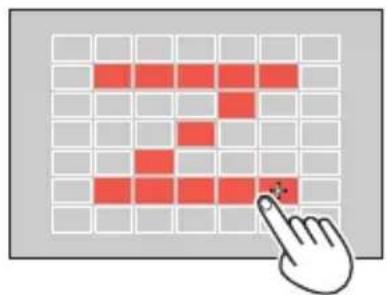
Taking Pictures with Auto Focus
Saving the set AF area in [C1], [C2] and [C3] (Custom)
① Press ▲ on the screen of step 3
② Use ▲ to select the target icon and press [MENU/SET]
During 4K Photo recording or while recording videos with [Continuous AF], the camera focuses on the center of the AF area.
The settings adjusted in [—], [☐] or [⊕] will be restored to the default settings when the camera is turned off.
Determined position for focus □-area-focusing) / + (Pinpoint-focusing)
(1-area-focusing)
Focuses on the AF area.

When the subject is not in the center of the composition in [☐], you can bring the subject into the AF area, fix the focus and exposure by pressing the shutter button halfway, move the camera to the composition you want with the shutter button pressed halfway, and then take the picture. (Only when the focus mode is set to [AFS].)
+ (Pinpoint-focusing)
Enables more precise focusing on a smaller point than [■] (1-area-focusing). When you press the shutter button halfway, an enlarged display of the focus position appears.
☑[+] (Pinpoint-focusing) is selected while recording videos or 4K photos, the setting is changed to [■] (1-area-focusing).
Cannot set to [+] (Pinpoint-focusing) in the following case: - When the focus mode is set to [AFF] or [AFC]
Changing the position and size of the AF area
Recording mode: A A P A S M ▶ M □ S C N C O L
When [●], [■], [■], or [+] in Auto Focus Mode is selected, you can change the position and size of the AF area. With [●], you can set the lock-on position.
- You can also display the AF area setting screen by touching the recording screen. (When [Touch AF] in [Touch Settings] of the [Custom] ([Operation]) menu has been set to [AF].)
- Perform these operations with the touch shutter function released.
When you set [Metering Mode] to [☐(spot-focusing), the metering target will move along with the AF area.
The position and size of the AF area cannot be changed in the Digital Zoom range.
When selecting [ˈɑːl] / [ˈɜːl] / [ˈɑːl]
① Press the [button ( )
② Select [ ] , [ ] or [ ] and press
• The AF area setting screen appears.
![LEICA V-LUX 5 - When selecting [ˈɑːl] / [ˈɜːl] / [ˈɑːl] - 1](/content/2026/05/882858/images/62ebffa99d701e70c19f4e09ef6c6812e8ad83cf023dfbf9c5558b775d3fbd6e.jpg)
natural_image
Rural landscape with a tree surrounded by hills and blue sky (no text or symbols)③ To change the AF area
| Operation | Touch operation | Description |
| ▲▼◀▶ | Touch | To move the position of the AF area. |
![LEICA V-LUX 5 - When selecting [ˈɑːl] / [ˈɜːl] / [ˈɑːl] - 2](/content/2026/05/882858/images/79c58221df91abdc63214a80f432609f8839c97e26cdbf314e519dfe1cb345cc.jpg) | Pinch out / Pinch in | Enlarges/reduces the AF area in small steps.* |
![LEICA V-LUX 5 - When selecting [ˈɑːl] / [ˈɜːl] / [ˈɑːl] - 3](/content/2026/05/882858/images/5c9caf505b00a49eda406be4c73fb6b21d84a1faef71e1439105e8843b176092.jpg) | — | Enlarges/reduces the AF area in large steps.* |
| [DISP] | [Reset] | Resets the AF area back to the center.• If you press the button again, the size will be reset to the initial setting. |
*Not available when [ ] is selected.
④ Press [MENU/SET]
- AF area with the same function as [■] is displayed in the set position, when the [●] is selected. Setting of the AF area is cleared when [MENU/SET] is pressed or [AF] is touched.
When selecting [ ]
You can set the focus position by selecting an AF area group. The AF area, which is configured with 49 points, is divided into groups consisting of 9 points each (6 points or 4 points for the groups located at the edges of the screen).
① Press [button ( )
② Select [ ] and press ▼
• The AF area setting screen appears.
③ Press ▲▼ to select an AF area group
④ Press [MENU/SET]
- Setting of the AF area is cleared when [MENU/SET] is pressed or [AF] is touched.
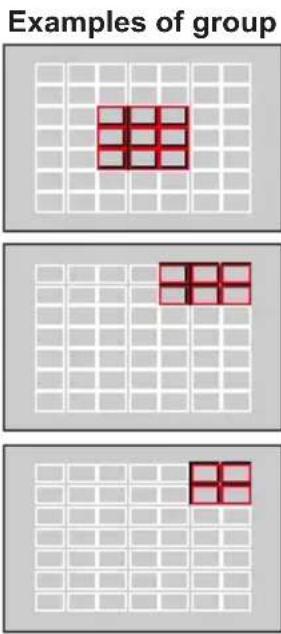
When selecting [+]
You can enlarge the screen to perform more precise settings of the focus position.
- You cannot set the focus position at the edges of the screen.
① Press the [button ( )
② Select [+] and press ▼
③ Use ▲▼ to set the focus position and press
[MENU/SET]
- The enlarged screen will appear for setting the focus position.
![LEICA V-LUX 5 - When selecting [+] - 1](/content/2026/05/882858/images/0171ef7b7de12a98a91b168d4dba073bf42f4caf491f73933010afd91db4d9d5.jpg)
natural_image
Close-up of a white daffoderm with a yellow center, set against a blurred green background (no text or symbols)④ Move [+] to the focus position
| Operation Touch operation Description | ||
| ▲▼◀▶ | Touch Moves [+]. | |
![LEICA V-LUX 5 - When selecting [+] - 2](/content/2026/05/882858/images/e1a0abc51f04411f454f0b40b90eae09e721d96edf7a46b7e6c698fa3f76f5c2.jpg) | Pinch out / Pinch in Enlarges/reduces the screen in small steps. | |
![LEICA V-LUX 5 - When selecting [+] - 3](/content/2026/05/882858/images/d2c5f0585d03b5b362baade4d17cd6359539ef4fcb78fa447c94936f9029bdd5.jpg) | — Enlarges/reduces the screen in large steps. | |
![LEICA V-LUX 5 - When selecting [+] - 4](/content/2026/05/882858/images/6526d5fdc63da029ef489a56781a6c9993cd73eb9337e86195b836819e521747.jpg) | ![LEICA V-LUX 5 - When selecting [+] - 5](/content/2026/05/882858/images/7aa48fdb4b26a20934a43184348c76da44d6266eb7b64b2d33834b8012ccf442.jpg) | Switches the enlarged display. (windowed/full screen)![LEICA V-LUX 5 - When selecting [+] - 6](/content/2026/05/882858/images/3c996ade4b9ea4afed6bc16a695259525005553fa27eaf2064a2fd80c8f1db4f.jpg) ![LEICA V-LUX 5 - When selecting [+] - 7](/content/2026/05/882858/images/4828f319e2a4ba326c886ca9fca6688ee04f3554554df13a74875d309e96f3ec.jpg) ![LEICA V-LUX 5 - When selecting [+] - 8](/content/2026/05/882858/images/2567e649bcef2c764b9b975a87090502d34d83a6d986c291be96b16cc61982bb.jpg) |
| [DISP] | [Reset] | Returns to the screen of step 3. |
⑤ Press [MENU/SET]
Setting the AF area position with the touch pad
Recording mode: A P A S M ▶ M □ SCN COL
You can move the AF area displayed on the viewfinder by touching the monitor.
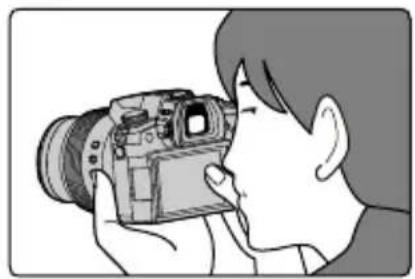
natural_image
Illustration of a person holding a camera, no text or symbols visible| MENU → ⚫ [Custom] → ⚪ [Operation] → [Touch Settings] → [Touch Pad AF] | ||
| [EXACT] Moves the AF area of the viewfinder by touching a desired position on the touch pad. | 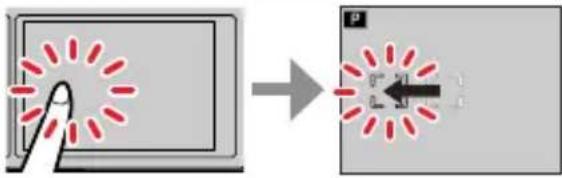 | |
| [OFFSET 1] to [OFFSET 7] | Moves the AF area of the viewfinder according to the distance you drag the touch pad.You can choose from among seven different areas.Settings: [OFFSET 1] (whole area)[OFFSET 2] (right half)[OFFSET 3] (upper right)[OFFSET 4] (bottom right)[OFFSET 5] (left half)[OFFSET 6] (upper left)[OFFSET 7] (bottom left) | Example: When the setting is set to [OFFSET 1].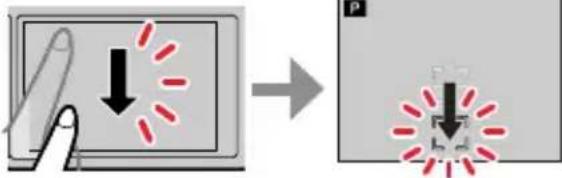 |
| [OFF] — | ||
- Press the shutter button halfway to determine the focus position. If you press the [DISP] button before determining the focus position, the focus position returns to the center.
- To cancel the settings for the AF area when the Auto Focus Mode is set to [💡] (Face/ Eye Detection), [💡] (tracking), or [💡49-area-focusing), press [MENU/SET].
The [Touch Pad AF] does not function in the following cases:
- When recording using [4K Live Cropping]
- When [Pull Focus] in [Snap Movie] is set to [ON]
Optimizing the focus and brightness for a touched position
Recording mode: A P A S M M SCN COL
MENU → ⚙️ [Custom] → Ⓞ [Operation] → [Touch Settings] → [Touch AF] → [AF+AE]
1 Touch the subject you want to optimize the brightness for
- The AF area with the same function as [■] is displayed on the touched position. (→96)
- The brightness optimization position is displayed on the center of the AF area. The position follows the movement of the AF area.
- [Metering Mode] is set to L_AF , which is used exclusively for the [Touch AE].
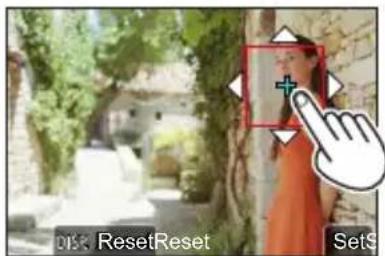
2 Touch [Set]
- If you touch [AF AE] (touch [ when [ set), the setting of [AF+AE] is canceled.
![LEICA V-LUX 5 - Touch [Set] - 1](/content/2026/05/882858/images/ca5d1e691fc5609aac9e67ad4d72c5b4e5ac4a7c98f3fca30cb62c7e3847e4c2.jpg)
When the background has become too bright, etc., the brightness contrast with the background can be adjusted by compensating the exposure.
![LEICA V-LUX 5 - Touch [Set] - 2](/content/2026/05/882858/images/2b8b4ba6a5aadcb513631d5043056c935bd5b888492ae5ca447f6f59e51ac5af.jpg)
natural_image
Woman in an orange dress standing beside a stone wall with greenery and a white building in the background (no visible text or symbols)When recording with the Touch Shutter, the focus and brightness are optimized for the touched position before recording takes place.
At the edge of the screen, the metering may be affected by the brightness around the touched location.
The [AF+AE] does not function in the following cases:
- When using the Digital Zoom
- When recording using [4K Live Cropping]
Taking close-up pictures (Macro recording)
Recording mode: A A P A S M M SCN COL
This mode allows you to take close-up pictures of a subject, e.g. when taking pictures of flowers.
1 Press the [A] Button ( ) ▼
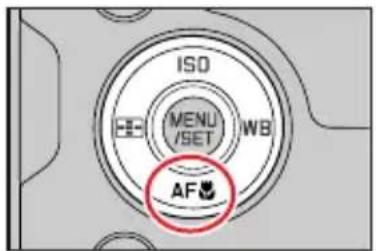
2 Press ◀▶ select the item and press [MENU/SET]
| [AF] ([AF Macro]) | You can take pictures of a subject as close as 3 cm (0.098 feet) from the lens by rotating the zoom lever upmost to Wide. |
![LEICA V-LUX 5 - Press ◀▶ select the item and press [MENU/SET] - 1](/content/2026/05/882858/images/a1cdb60581b70dbc4978ee2196c1edacd5059c09eaabbd3558371e082d13cf20.jpg) ([Macro Zoom]) ([Macro Zoom]) | Use this setting to get close to the subject and then further enlarge when taking the picture. You can take a picture with the Digital Zoom up to 3x while maintaining the distance to the subject for the extreme Wide position (3 cm (0.098 feet)).• Note that enlarging will decrease picture quality.• Zoom range will be displayed in blue (digital zoom range). |
When recording a subject close to the camera, we recommend taking a picture without using the flash.
A picture may be out of focus when the subject is out of focus range, even if the focus display is lit. When a nearby subject is to be recorded
- Using a tripod and [Self Timer] (→137) is recommended.
- The effective focus range (depth of field) is significantly narrowed. Therefore, if the distance between the camera and the subject is changed after focusing on the subject, it may become difficult to focus on it again.
- Resolution may be slightly reduced around the edges of the picture. This is not a malfunction.
Cannot set to [AF Macro] in the following case:
• In Manual Focus
Cannot set to [Macro Zoom] in the following cases:
• [Handheld Night Shot] (Scene Guide Mode)
- Panorama Shot Mode
- When recording with [High Speed Video]
• [Impressive Art], [Toy Effect], [Toy Pop], [Miniature Effect] (Creative Control Mode)
- When [HDR] is set to [ON]
- When [Multi Exp.] is set
- When [Quality] is set to [RAW], [RAVQ]. [ ] RAW
Taking pictures with Manual Focus
Recording mode: A A P A S M M SCN COL
Manual Focus is convenient when you want to lock the focus to take pictures or when it is difficult to adjust focus using Auto Focus.
1 Set the focus mode lever to [MF]
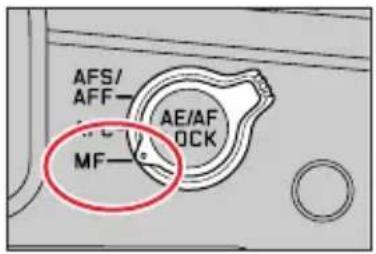
2 Press the [button ( )
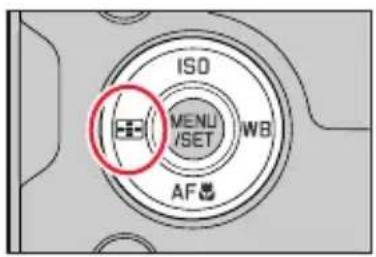
3 Press ▲▼▶adjust the focus position, and press [MENU/SET]
![LEICA V-LUX 5 - Press ▲▼▶adjust the focus position, and press [MENU/SET] - 1](/content/2026/05/882858/images/a3077d083ea220f0a144c9bdbd55fedafdbf4c29b0e99028549f6feddd594886.jpg)
natural_image
Close-up of a red square button with white circular elements, partially blurred background (no text or symbols visible)• The screen changes to the assist screen and an enlarged display appears. (MF Assist)
You can move the enlarged part by dragging the screen.
- You can also enlarge the display by pinching out or touching the screen twice.
- To return the focus position to the center, press [DISP] button.
Taking pictures with Manual Focus
4 Turn the control ring to adjust focus
Turn to Inside: Focuses on nearby subject
Turn to Bside: Focuses on distant subject
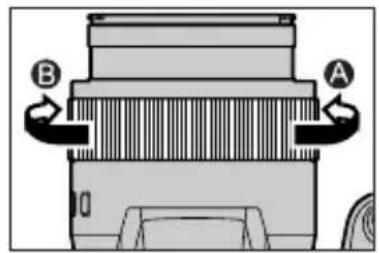
Ⓐ MF Assist (Enlarged screen)
B Peaking
Color is added to the portions of the image that are in focus. (→196)
© MF Guide ( 199)
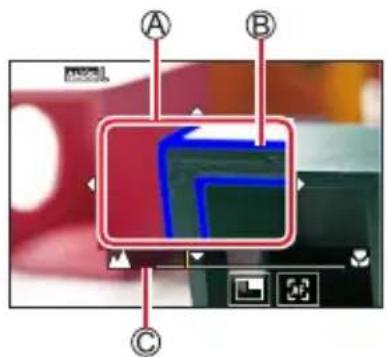
| Operation Touch operation Description | ||
| ▲▼◀▶ | Drag Moves | the enlarged area. |
 | Pinch out / Pinch in | Enlarges/reduces the screen in small increments. |
 | — Enlarges/reduces the screen in large increments. | |
| — | *1 | Switches the enlarged display. (windowed/full screen)*2 |
| [DISP] [Reset] | Resets the area to be enlarged back to the center.• If you press the button again, the size will be reset to the initial setting. | |
*1 Cannot be set when using Snapshot Mode.
*2 The image of a part of the screen can be enlarged or reduced approximately 3 to 6 times. The image of the entire screen can be enlarged or reduced approximately 3 to 10 times.
5 Press the shutter button halfway
• The recording screen will be displayed.
- The same operation can be performed by pressing [MENU/SET].
When [Focus Switching for Vert / Hor] in the [Custom] ([Focus / Release Shutter]) menu is set, you can set a position of the enlarged area of MF Assist for each direction of the camera.

Quickly adjusting the focus using Auto Focus
In Manual Focus, the focus can be set on the subject through Auto Focus.
1 Touch [ ]
• Auto Focus is activated at the center of the frame.
• Auto Focus also works with the following operations.
- Pressing the [AE/AF LOCK] button to which [AF-ON] is assigned (→105)
- Pressing the function button to which [AF-ON] is assigned (→52)
- Drag & drop at the position you want to focus on
- This function cannot be used when [4K Live Cropping] is selected.
![LEICA V-LUX 5 - Touch [ ] - 1](/content/2026/05/882858/images/499c11de41e30e2602abc738e257b036f109bcf8fc64759cbfed3c4714fc928d.jpg)
natural_image
Close-up of a blue box with a circular button and a small icon, against a blurred red geometric background (no text or symbols)Taking pictures by locking the focus and/or exposure (AF/AE Lock)
Recording mode: A A P A S M M SCN COL
You can use the AF/AE Lock function to fix the focus and exposure in advance and change the composition of the picture when recording. This function is convenient when you want to focus on the edge of the screen or when your subject is back-lit.
1 Point the camera at the subject
2 Lock the focus and/or exposure while you press and hold the [AE/AF LOCK] button
- When you release the [AE/AF LOCK] button, the focus and/or exposure lock is canceled.
3 While you press and hold the [AE/AF LOCK] button, move the camera to compose the picture you want to take and fully press the shutter button
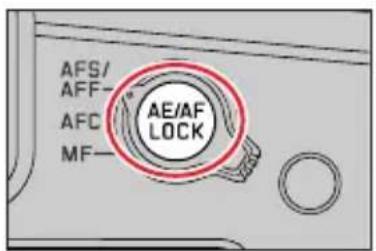
Setting the function of [AF/AE LOCK]
| MENU → ⬆ [Custom] → [FOUS] [Focus / Release Shutter] → [AF/AE Lock] | |
| [AE LOCK] | Locks exposure only.· [AEL] is displayed when the correct exposure is achieved. |
| [AF LOCK] | Locks focus only.· [AFL] is displayed when the subject comes into focus. |
| [AF/AE LOCK] | Locks focus and exposure.· [AFL] and [AEL] are displayed when the subject is in focus and the correct exposure is achieved. |
| [AF-ON] Auto Focus is activated. | |
| AE Lock is disabled in Manual Exposure Mode.AF Lock is disabled during Manual Focus.Program Shift can be set even when AE is locked. | |
Taking pictures with Exposure Compensation
Recording mode:

Corrects the exposure when there is a backlight or when the subject is too dark or too bright.
1 Press the [+ button
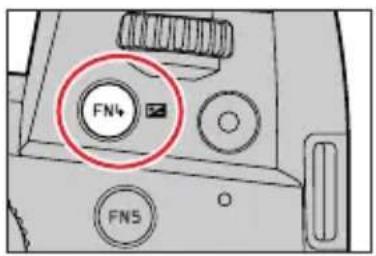
2 Turn the rear or front dial to compensate the exposure
Ⓐ Exposure Compensation
- You can change the setting on the exposure compensation screen from [Exposure Comp. Disp. Setting] in the [Custom] ([Operation]) menu. (→194)
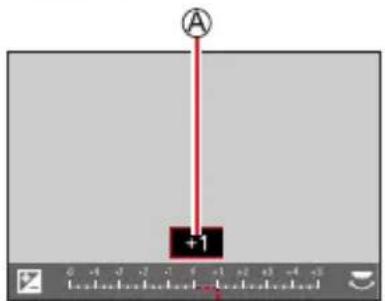
Under-exposed
natural_image
Exterior view of a person standing beside a stone wall with trees and buildings in the background (no visible text or symbols)
Adjust the exposure to the [+] direction
Optimum exposure
natural_image
Woman in an orange dress standing beside a stone wall with greenery and a small building in the background (no visible text or symbols)
Adjust the exposure to the [-] direction
Over-exposed
natural_image
Woman in an orange dress standing beside a stone wall with greenery (no visible text or symbols)3 Press the [+] button to set
- You can also press the shutter button halfway to set.
In Manual Exposure Mode, you can correct the exposure only when the ISO sensitivity is set to [AUTO].
You can set the exposure compensation value in the range between -5 EV and +5 EV.
Settings can be made within a range of -3 EV to +3 EV while recording video, recording 4K photos, or recording in [Post Focus].
When [Auto Exposure Comp.] of [Flash] in the [Rec] menu is set to [ON], the flash output is also automatically adjusted based on the exposure compensation value.
Depending on the brightness, this may not be possible in some cases.
When the Exposure Compensation value is out of the -3 EV to +3 EV range, the brightness of the recording screen will no longer change. You can apply the exposure compensation value by pressing the shutter button halfway or pressing the [AE/AF LOCK] button to lock exposure.
The set Exposure Compensation value is stored even if the camera is turned off. (When [Exposure Comp. Reset] is set to [OFF])
Setting the ISO Sensitivity
Recording mode:

Set ISO sensitivity (sensitivity to lighting).
1 Press the [IS]button ( )▲
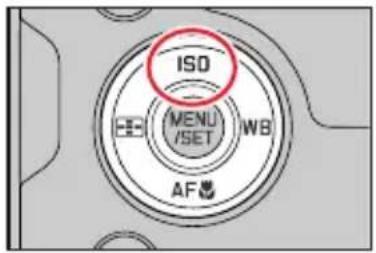
2 Select the ISO sensitivity by turning the rear or front dial
Ⓐ ISO sensitivity
- You can change the setting content on the ISO sensitivity screen from [ISO Displayed Setting] in the [Custom] ([Operation]) menu. (→193)
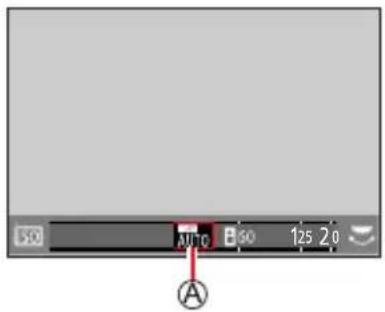
| AUTO | ISO sensitivity is automatically set in a range up to 3200*1depending on the brightness of a subject. |
| BISO(Intelligent ISO) | ISO sensitivity is automatically set in a range up to 3200*1depending on the movement and brightness of a subject.The shutter speed is not fixed when the shutter button is pressed halfway. It is continuously changing to match the movement of the subject until the shutter button is pressed fully. |
| [L.80]*2 / [L.100]*2 / from [125] to [12500] / [H.25000]*2 | ISO sensitivity is fixed at the selected setting. |
* When [ISO Auto Upper Limit (Photo)] in the [Rec] menu is set to [AUTO].
*2 Only when [Extended ISO] in the [Custom] ([Exposure]) menu is [ON].
3 Press [MENU/SET] to set
- You can also press the shutter button halfway to set.
![LEICA V-LUX 5 - Press [MENU/SET] to set - 1](/content/2026/05/882858/images/e6e2cf082b9f25349733538a5f81b6a29485648fcdb5e746cdcb7550d95f48a3.jpg)
Setting guide
| ISO sensitivity [125] [12500] | ||
| Location(recommended) | Bright(outdoors) | Dark |
| Shutter speed Slow Fast | ||
| Interference Low High | ||
| Subject blur High Low | ||
For details on the available flash range used when the ISO sensitivity is set to [AUTO], refer to (→147).
Cannot select [B] in the following cases:
- Shutter-Priority AE Mode
- Manual Exposure Mode
When [Multi Exp.] is set, the maximum setting is [3200].
ISO sensitivity is set to [AUTO] (for video) while a video is being recorded. (When not in Creative Video Mode)
You can use the following ISO sensitivity settings when recording in Creative Video Mode, when recording 4K photos, or when recording using [Post Focus].
• [AUTO], [125] to [6400] ([L.80] to [6400] when [Extended ISO] is set to [ON])
Adjusting the White Balance
Recording mode: A A P A S M M SCN COL
This item adjusts to the color of white which is closest to what is seen by the eye in accordance with the light source.
1 Press the [W]button ( ▶
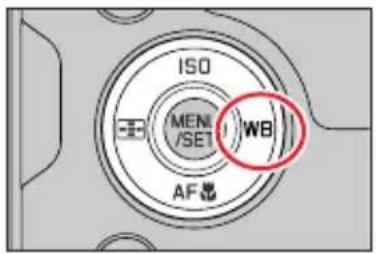
2 Turn the rear or front dial to select the White Balance
| [AWB]/ [AWBc]/ [AWBw] | Automatic adjustment in accordance with the light source. · Under a light source (such as an incandescent light) that produces reddish pictures: - [AWBc] gives higher priority to the original colors of the subject and reduces the reddish hue. - [AWBw] gives higher priority to what is seen by the eye and retains the reddish hue. · When the white balance is set to [AWBc] or [AWBw], the adjustment effect may be similar to that of [AWB], depending on the light source. |
| [★] | Adjust to the color under a clear sky. |
| [★] | Adjust to the color under a cloudy sky. |
| [★] | Adjust to the color in the shade. |
| [★] | Adjust to the color under incandescent lights. |
| [★WB]* | Adjust to the color that is optimal for taking pictures using the flash. |
 | Use the White Balance value that was set manually. 1 Press ▲ 2 Point the camera at a white object such as a piece of paper, ensuring that it is inside the frame at the center of the screen, and press the shutter button · This will set the White Balance and return you to the recording screen. · It may not be possible to set the correct White Balance if subjects are too bright or too dark. |
| [K] | You can set the White Balance using color temperature. 1 Press ▲ 2 Use ▲ to select the color temperature value and press [MENU/SET] · You can set the color temperature from [2500K] to [10000K]. |
*The [AWB] setting is applied while recording video, recording 4K photos, or recording in [Post Focus].
3 Press [MENU/SET] to set
- You can also press the shutter button halfway to set.
![LEICA V-LUX 5 - Press [MENU/SET] to set - 1](/content/2026/05/882858/images/ad4b77aae2f0729eeb9de00e1ff2593d64b90428735af3590be36a8b885f418d.jpg)
Under fluorescent lighting, LED lighting fixtures, etc., the optimal White Balance will vary depending on the lighting type, so use [AWB], [AWBc], [AWBw], [1], [2], [3] or [4].
The White Balance may not operate correctly if you take pictures using a flash and the subject is recorded outside of the effective flash range.
In Scene Guide Mode, settings suitable for each scene are made.
In Scene Guide Mode, changing the scene or recording mode will return White Balance settings (including the White Balance fine adjustment setting) back to [AWB].
Auto White Balance
When [AWB] (Automatic White Balance) is set, the coloring is adjusted in accordance with the light source. However, if the scene is too bright or too dark or if other extreme conditions apply, the pictures may appear reddish or bluish. The White Balance may not operate correctly if there is a multiple number of light sources. In that case, set the [White Balance] to settings other than [AWB], [AWBc] or [AWBw] to adjust the coloring.
: [AWB] operational range
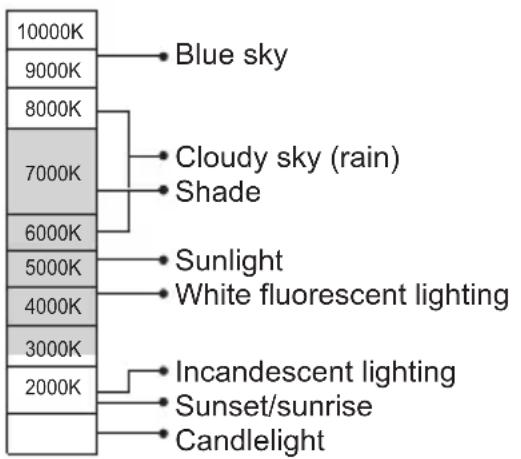
flowchart
graph TD
    A["10000K"] --> B["Blue sky"]
    C["9000K"] --> D["Cloudy sky (rain)"]
    E["8000K"] --> F["Shade"]
    G["7000K"] --> H["Sunlight"]
    I["6000K"] --> J["White fluorescent lighting"]
    K["5000K"] --> L["Incandescent lighting"]
    M["4000K"] --> N["Sunset/sunrise"]
    O["3000K"] --> P["Candlelight"]
    Q["2000K"] --> R["Incandescent lighting"]
K=Kelvin Color Temperature
Performing White Balance fine adjustments
White Balance settings can be individually fine-tuned if colors still do not appear as anticipated.
1 In step 2 of "Adjusting the White Balance" ( 109), select the White Balance and press ▼
2 Use ▲▼ to perform White Balance fine adjustments
◀: A (amber: orangish colors)
▶: B (blue: bluish colors)
▲: G (green: greenish colors)
▼: M (magenta: reddish colors)
- You can also make fine adjustments by touching the White Balance graph.
- Pressing [DISP] button resets the position back to the center.
3 Press [MENU/SET] to finalize the setting
- Press the shutter button halfway to return to the recording screen.
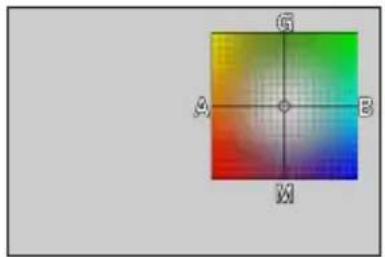
natural_image
Color gradient square with labeled axes (G, H, M) and origin point (no text or symbols beyond labels)When you perform fine adjustments of the White Balance toward the A (amber) or B (blue) side, the color of the White Balance icon displayed on the screen will change to the fine-tuned color. When you perform fine adjustments of the White Balance toward the G (green) or M (magenta) side, [+] or [-] will be displayed in the White Balance icon on the screen.
Bracketing with White Balance
Bracket settings are performed based on the fine adjustment values for White Balance, and three pictures with different coloring are automatically recorded when the shutter button is pressed once.
1 Perform fine adjustments of the White Balance in step 2 of "Performing White Balance fine adjustments" (→111) and turn the rear dial to perform the Bracket setting
- You can also set the bracket by touching [◀]/[ ]/[ ]
2 Press [MENU/SET] to finalize the setting
- Press the shutter button halfway to return to the recording screen.
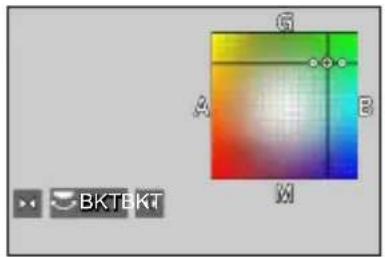
You can also set the White Balance Bracket in [Bracket] in the [Rec] menu. (→138)
This function is not available in the following cases:
• Panorama Shot Mode
• [Glistening Water], [Glittering Illuminations], [Handheld Night Shot], [Soft Image of a Flower] (Scene Guide Mode)
- When using [Burst]
- When recording 4K photos
- When recording using [Post Focus]
- When taking stills while a video is being recorded
- When [Quality] is set to [AW], [RAWQ]. [ ] RAW
- When [Multi Exp.] is set
- When using [Time Lapse Shot]
- When [Auto Shooting] of [Stop Motion Animation] is set to [ON]
Selecting a Drive Mode
Recording mode: A A P A S M M □ SCN COL
You can switch the operation to be performed when you press the shutter button.
1 Turn the drive mode dial
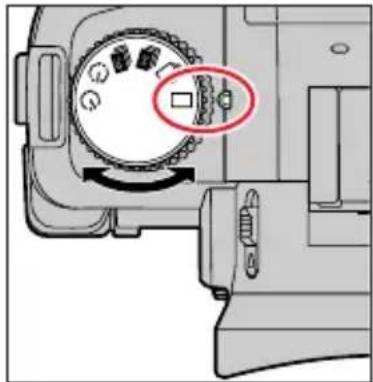
| ☐ | [Single] When the shutter button is pressed, only one picture is recorded. | |
 | [Burst] (→114) | The pictures are recorded in succession while the shutter button is pressed. |
 | [4K PHOTO] (→116) | When the shutter button is pressed, a picture is recorded with the 4K Photo function. |
 | [Post Focus] (→127) | When the shutter button is pressed, the pictures are recorded with [Post Focus]. |
 | [Time Lapse/Animation] (→132) | Pictures are recorded with Time Lapse Shot or Stop Motion Animation. |
 | [Self Timer] (→137) | When the shutter button is pressed, recording takes place after the set time has elapsed. |
Burst function
Recording mode: A A P A S M M □ SCN COL
1 Set the drive mode dial to [☐]
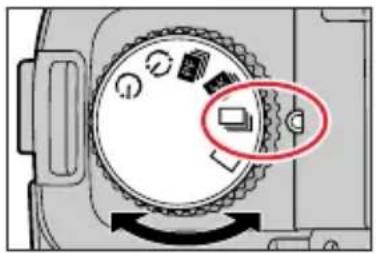
2 Focus on the subject and take pictures
- The pictures are recorded in succession while the shutter button is pressed.
Setting [Burst Rate]
| MENU → [Rec] → [Burst Rate] |
| [H](High speed) | [M](Middle speed) | [L](Low speed) | ||
| Speed (pictures/sec.) | [AFS] / [MF] 12 | 7 | 2 | |
| [AFF] / [AFC] 7 | ||||
| Live View during burst recording | [AFS] / [MF] None | Available Available | ||
| [AFF] / [AFC] Available | ||||
| Number of recordable pictures*1 | With RAW files 26 or more | |||
| Without RAW files 100 or more | ||||
*1 When recording is performed under the test conditions specified by Leica Camera AG. Pictures can be taken until the card becomes full. However, the burst speed will become slower halfway through the recording. The number of burst pictures is limited by the picture-taking conditions and the type and/or status of the card used.
About the maximum number of pictures that can be taken continuously
When you press the shutter button halfway, the maximum number of pictures you can take continuously will appear. You can check the approximate number of pictures that can be taken before the burst speed slows down.
Example: When 20 pictures can be taken: [r20]
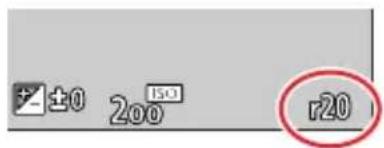
- Once recording starts, the maximum number of pictures that can be taken continuously will decrease. When [r0] appears, the burst speed will slow down.
- When [r99 + ] is displayed, you can take 100 or more pictures continuously.

Focusing in burst mode
Focusing varies depending on focus settings and the setting of [Focus/Release Priority] in the [Custom] ([Focus / Release Shutter]) menu.
| Focus settings [Focus/Release Priority] [H] [M], [L] | |||
| [AFS] | [FOCUS]/[BALANCE]/[RELEASE] | At the first picture | |
| [AFF] / [AFC]*2 | [FOCUS] | Predicted focusing*3 | Normal focusing*4 |
| [BALANCE]/[RELEASE] | Predicted focusing*3 | ||
| [MF] — Focus set with Manual Focus | |||
*2 Focus is fixed in the first picture when dark subjects are recorded.
*3 The camera predicts the focus within a possible range by giving higher priority to the burst speed.
*4 Since the camera records a burst of pictures while it adjusts the focus, the burst speed may be slower.
The burst speed may become slower depending on the following settings: [Sensitivity], [Picture Size], [Quality], focus mode, [Focus/Release Priority]
When the burst speed is set to [H] (when focus mode is [AFS] or [MF]), the exposure is fixed at the settings used for the first picture for the subsequent picture as well. In other cases, the camera adjusts the exposure for each frame.
I may take a while to store stills that were taken using the burst function. If you continue to record while storing, the number of burst pictures that can be taken will be reduced. A high-speed card is recommended when recording using the burst function.
This function is not available in the following cases:
- [Glistening Water], [Glittering Illuminations], [Handheld Night Shot], [Soft Image of a Flower] (Scene Guide Mode)
- [Rough Monochrome], [Silky Monochrome], [Miniature Effect], [Soft Focus], [Star Filter], [Sunshine] (Creative Control Mode)
- When recording using the flash
- When [Multi Exp.] is set
Recording with the 4K Photo function and selecting pictures to save
Recording with the 4K Photo function
Recording mode: A A P A S M ▶M □ SCN COL
You can take burst pictures of approximately 8 million pixels with a burst rate of 30 fps. You can select and save a frame from the burst file.
• To record pictures, use a UHS Speed Class 3 card.
1 Set the drive mode dial to [
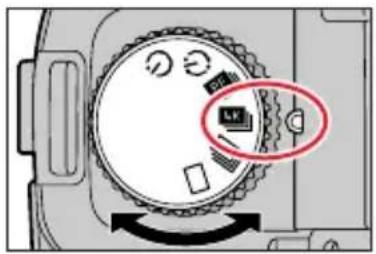
2 Select the recording method
| MENU → [0] Rec] → [4K PHOTO] | |
 | For capturing the best shot of a fast-moving subject(e.g., sports, aeroplanes, trains)Audio recording: None |
| [4K Burst] | |
 | For capturing unpredictable photo opportunities(e.g., plants, animals, children)Audio recording: Available* |
| [4K Burst(S/S)]“S/S” is an abbreviationof “Start/Stop”. | |
 | For recording as needed whenever a photo opportunity arises(e.g. the moment when a ball is thrown)Audio recording: None |
| [4K Pre-Burst] | |
* Audio is not played back when you perform playback with the camera.
3 Press the shutter button halfway to exit the menu
Recording with the 4K Photo function and selecting pictures to save
4 Recording with the 4K Photo function
| [4K Burst] | 1Press the shutter button halfway2Press and hold the shutter button fully for as long as you want to perform recordingRecording will start approximately 0.5 seconds after you press the shutter button fully. Therefore, press the button fully slightly in advance.APress and holdBRecording is performed 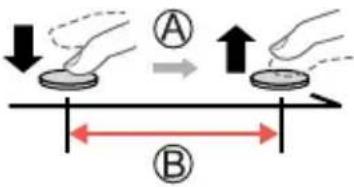 |
| [4K Burst(S/S)]“S/S” is an abbreviation of “Start/Stop”. | 1Press the shutter button fullyRecording will start.Press the shutter button fully againRecording will stop.CStart (First)DStop (Second)ERecording is performed 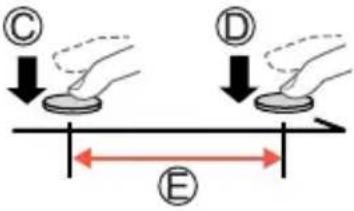 |
| When you press the [FN6] button while recording, you can add a marker. (Up to 40 markers for each recording.) When selecting and saving pictures from a 4K burst file, you can skip to the positions where you added markers. |
Recording with the 4K Photo function and selecting pictures to save
 [4K Pre-Burst] [4K Pre-Burst] | 1Press the shutter button fullyThe camera adjusts the focus continuously when using Auto Focus. Except when in Manual Exposure Mode, it also adjusts the exposure continuously.Images may not be displayed as smoothly as when recording with the normal recording screen.F Approximately 1 secondG Recording is performed 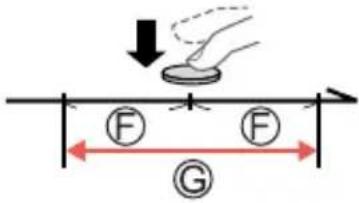 |
 In situations where you want to lock focus and exposure, such as when the subject is not at the center, use [AF/AE LOCK]. (→105) In situations where you want to lock focus and exposure, such as when the subject is not at the center, use [AF/AE LOCK]. (→105) |
- Burst pictures are saved as a single 4K burst file in the MP4 format.
- When [Auto Review] is enabled, the picture selection screen will be displayed automatically. To continue recording, press the shutter button halfway to display the recording screen.
- For information on how to select and save pictures from 4K burst files, refer to (→119).

Battery discharge and camera temperature
If the surrounding temperature is high or 4K photos are recorded continuously, [A] may be displayed and recording may be stopped halfway through. Wait until the camera cools down.
When [ ] ([4K Pre-Burst]) is set, the battery drains faster and the camera temperature rises. (to protect itself, the camera may switch to [ ] ([4K Burst]))
Select [ ] ([4K Pre-Burst]) only when recording.
Recording with the 4K Photo function and selecting pictures to save
Selecting pictures from 4K burst file and saving
1 Select a picture with the [▲] on the playback screen, and press ▲
- The same operation can be performed by touching
- In the case of recording with [LK] ([4K Pre-Burst]), proceed to the step 3.
2 Drag the slide bar to perform rough scene selection
- For information on how to operate the slide view screen, refer to ( 120) .
- If you touch [box] (or press the [FN4] button), you can choose a scene in the 4K burst playback screen. (→121)
3 Drag to select the frame you want to save as a picture
- The same operation can be performed using
natural_image
Software interface icons including play button, play button icon, and 4K control buttons (no text or symbols)Slide view screen
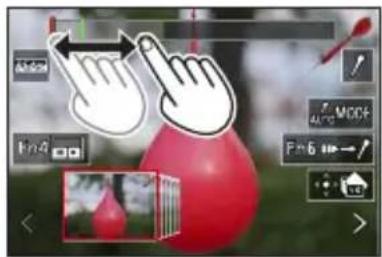
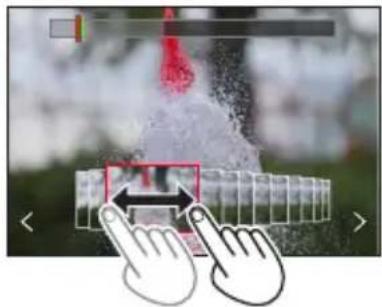
natural_image
Close-up of a water spray bottle with red spray and white spray, no visible text or symbols4 Touch [☐] to save the picture
- The selected picture will be saved as a new picture in the JPEG format separate from the 4K burst file.
- The picture will be saved with recording information (Exif information), including its shutter speed, aperture and ISO sensitivity information.
![LEICA V-LUX 5 - Touch [☐] to save the picture - 1](/content/2026/05/882858/images/2dea48967043be7a6719bd6714b605f1dde00f68035981ad43661f98ae282d17.jpg)
If you use [4K PHOTO Bulk Saving] in the [Playback] menu, you can bulk save 5 seconds' worth of 4K recording. (→222)
Recording with the 4K Photo function and selecting pictures to save
Ⓐ Position of the displayed frame
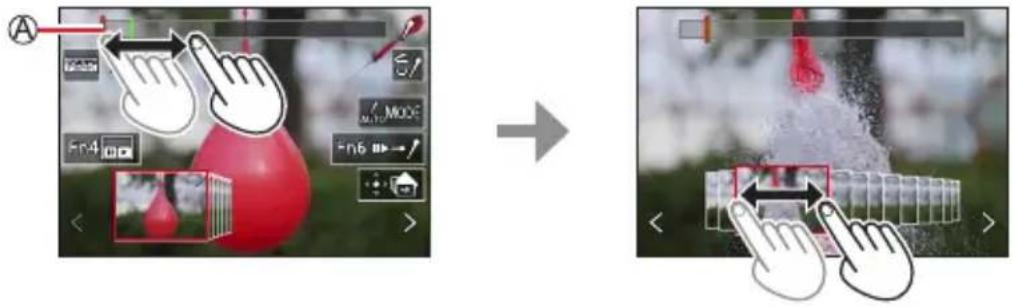
| Operation Touch operation Description | ||
| — | Touch / Drag | Selects the scenes to be displayed |
![LEICA V-LUX 5 - Touch [☐] to save the picture - 2](/content/2026/05/882858/images/48a78eea7c4d6be358d23dc003044ecf845fe1eab5167034a28b6b958746343d.jpg) | <>Drag | Selects the frame• To switch the slide view, select the frame at either end and touch [< ] or ▷]. |
| ◀▶Press and hold | <>Touch and hold | Continuously scrolls the scene or frame-by-frame backward or forward. |
![LEICA V-LUX 5 - Touch [☐] to save the picture - 3](/content/2026/05/882858/images/1098d94aa146efd0522d678193dec8a2fb82d847d88cd8c104aba814e41aebf2.jpg) | Pinch out / Pinch in | Enlarges/reduces the display |
| — | Selects a frame while maintaining the enlarged display (during enlarged display) | |
| ▲▼◀▶ | Drag Moves | the enlarged area (during enlarged display) |
![LEICA V-LUX 5 - Touch [☐] to save the picture - 4](/content/2026/05/882858/images/8a5b1e3743b561f0068fe3c8b31bd32d51cd2902f031252438e95dbd1ef5b957.jpg) | ![LEICA V-LUX 5 - Touch [☐] to save the picture - 5](/content/2026/05/882858/images/3f1f1cc8cdd6450c4a8d44e8853c2fb8be3e86428f504e2260e9c6806ae45d59.jpg) | Switches a marker to be displayed (→123) |
| Switches to marker operation (→122) | ||
| Displays the 4K burst playback screen | ||
| — | ![LEICA V-LUX 5 - Touch [☐] to save the picture - 6](/content/2026/05/882858/images/546c263fe464e2ffa79ae24add37c23b216e89c8cc24baa69599c4519cc6deb5.jpg) | Adds/deletes a marker |
| — | [IMAGE] | In-focus portions are highlighted with color. ([Peaking])• Switches in order of PEAK OFF → PEAK [LOW] → [PEAK H] ([HIGH]). |
| [MENU/SET] | ![LEICA V-LUX 5 - Touch [☐] to save the picture - 7](/content/2026/05/882858/images/8021ba3811ab311328762f62cf97b234379cec086d6417b58f0252da88f0728a.jpg) | Saves the picture |
Recording with the 4K Photo function and selecting pictures to save
<4K burst playback screen>
![LEICA V-LUX 5 - Touch [☐] to save the picture - 9](/content/2026/05/882858/images/1033547cad4ac9a6b52727c958cb4bc1d0a06deadfb0fb4e6f27a77f7e543943.jpg)
natural_image
Close-up of a red, pointed object resembling a stylized flower or pod, with blurred background foliage and no visible text or symbols.During pause During continuous playback
| Operation Touch operation Description | |||||
| — | Touch / DragSelects the scenes to be displayed (while paused) | ||||
| ▲ | ▶/ □□□□□□□□□□□□□□□□□□□□□□□□□□□□□□□□□□□□□□□□□□□□□□□□□□□□□□□□□□□□□□□□□□□□□□□□□□□□□□□□□□□□□□□□□□□□□□□□□□□□□○□□□□□□□□□□□□□□□□□□□□□□□□□□□□□□□□□□□□□□□□□□□□□□□□□□□□□□□□□□□□□□□□□□□□□□□□□□□□□□□□□□□□□□□□□□□□□□□□□□□ □ □ □ □ □ □ □ □ □ □ □ □ □ □ □ □ □ □ □ □ □ □ □ □ □ □ □ □ □ □ □ □ □ □ □ □ □ □ □ □ □ □ □ □ □ □ □ □ □ □ ▢ ▢ ▢ ▢ ▢ ▢ ▢ ▢ ▢ ▢ ▢ ▢ ▢ ▢ ▢ ▢ ▢ ▢ ▢ ▢ ▢ ▢ ▢ ▢ ▢ ▢ ▢ ▢ ▢ ▢ ▢ ▢ ▢ ▢ ▢ ▢ ▢ ▢ ▢ ▢ ▢ ▢ ▢ ▢ ▢ ▢ ▢ ▢ ▢ ▢ □ □ □ □ □ □ □ □ □ □ □ □ □ □ □ □ □ □ □ □ □ □ □ □ □ □ □ □ □ □ □ □ □ □ □ □ □ □ □ □ □ □ □ □ □ □ □ □ □ △ △ △ △ △ △ △ △ △ △ △ △ △ △ △ △ △ △ △ △ △ △ △ △ △ △ △ △ △ △ △ △ △ △ △ △ △ △ △ △ △ △ △ △ △ △ △ △ △ △ ▩ △ △ △ △ △ △ △ △ △ △ △ △ △ △ △ △ △ △ △ △ △ △ △ △ △ △ △ △ △ △ △ △ △ △ △ △ △ △ △ △ △ △ △ △ △ △ △ △ △ ▸ ▸ ▸ ▸ ▸ ▸ ▸ ▸ ▸ ▸ ▸ ▸ ▸ ▸ ▸ ▸ ▸ ▸ ▸ ▸ ▸ ▸ ▸ ▸ ▸ ▸ ▸ ▸ ▸ ▸ ▸ ▸ ▸ ▸ ▸ ▸ ▸ ▸ ▸ ▸ ▸ ▸ ▸ ▸ ▸ ▸ ▸ ▸ ▸ ▸ ▪ ▪ ▪ ▪ ▪ ▪ ▪ ▪ ▪ ▪ ▪ ▪ ▪ ▪ ▪ ▪ ▪ ▪ ▪ ▪ ▪ ▪ ▪ ▪ ▪ ▪ ▪ ▪ ▪ ▪ ▪ ▪ ▪ ▪ ▪ ▪ ▪ ▪ ▪ ▪ ▪ ▪ ▪ ▪ ▪ ▪ ▪ ▪ ▪ ▪ ▫ ▫ ▫ ▫ ▫ ▫ ▫ ▫ ▫ ▫ ▫ ▫ ▫ ▫ ▫ ▫ ▫ ▫ ▫ ▫ ▫ ▫ ▫ ▫ ▫ ▫ ▫ ▫ ▫ ▫ ▫ ▫ ▫ ▫ ▫ ▫ ▫ ▫ ▫ ▫ ▫ ▫ ▫ ▫ ▫ ▫ ▫ ▫ ▫ ▫ ▪ ▪ ▪ ▪ ▪ ▪ ▪ ▪ ▪ ▪ ▪ ▪ ▪ ▪ ▪ ▪ ▪ ▪ ▪ ▪ ▪ ▪ ▪ ▪ ▪ ▪ ▪ ▪ ▪ ▪ ▪ ▪ ▪ ▪ ▪ ▪ ▪ ▪ ▪ ▪ ▪ ▪ ▪ ▪ ▪ ▪ ▪ ▪ ▪ ▸ ▸ ▸ ▸ ▸ ▸ ▸ ▸ ▸ ▸ ▸ ▸ ▸ ▸ ▸ ▸ ▸ ▸ ▸ ▸ ▸ ▸ ▸ ▸ ▸ ▸ ▸ ▸ ▸ ▸ ▸ ▸ ▸ ▸ ▸ ▸ ▸ ▸ ▸ ▸ ▸ ▸ ▸ ▸ ▸ ▸ ▸ ▸ ▸ ▩ ▩ ▩ ▩ ▩ ▩ ▩ ▩ ▩ ▩ ▩ ▩ ▩ ▩ ▩ ▩ ▩ ▩ ▩ ▩ ▩ ▩ ▩ ▩ ▩ ▩ ▩ ▩ ▩ ▩ ▩ ▩ ▩ ▩ ▩ ▩ ▩ ▩ ▩ ▩ ▩ ▩ ▩ ▩ ▩ ▩ ▩ ▩ ▩ ▩ ▢ ▢ ▢ ▢ ▢ ▢ ▢ ▢ ▢ ▢ ▢ ▢ ▢ ▢ ▢ ▢ ▢ ▢ ▢ ▢ ▢ ▢ ▢ ▢ ▢ ▢ ▢ ▢ ▢ ▢ ▢ ▢ ▢ ▢ ▢ ▢ ▢ ▢ ▢ ▢ ▢ ▢ ▢ ▢ ▢ ▢ ▢ ▢ ▢ ▩ ▩ ▩ ▩ ▩ ▩ ▩ ▩ ▩ ▩ ▩ ▩ ▩ ▩ ▩ ▩ ▩ ▩ ▩ ▩ ▩ ▩ ▩ ▩ ▩ ▩ ▩ ▩ ▩ ▩ ▩ ▩ ▩ ▩ ▩ ▩ ▩ ▩ ▩ ▩ ▩ ▩ ▩ ▩ ▩ ▩ ▩ ▩ ▩ ▦ ▦ ▦ ▦ ▦ ▦ ▦ ▦ ▦ ▦ ▦ ▦ ▦ ▦ ▦ ▦ ▦ ▦ ▦ ▦ ▦ ▦ ▦ ▦ ▦ ▦ ▦ ▦ ▦ ▦ ▦ ▦ ▦ ▦ ▦ ▦ ▦ ▦ ▦ ▦ ▦ ▦ ▦ ▦ ▦ ▦ ▦ ▦ ▦ ▦ ▤ ▦ ▦ ▦ ▦ ▦ ▦ ▦ ▦ ▦ ▦ ▦ ▦ ▦ ▦ ▦ ▦ ▦ ▦ ▦ ▦ ▦ ▦ ▦ ▦ ▦ ▦ ▦ ▦ ▦ ▦ ▦ ▦ ▦ ▦ ▦ ▦ ▦ ▦ ▦ ▦ ▦ ▦ ▦ ▦ ▦ ▦ ▦ ▦ ▦ ▥ ▦ ▦ ▦ ▦ ▦ ▦ ▦ ▦ ▦ ▦ ▦ ▦ ▦ ▦ ▦ ▦ ▦ ▦ ▦ ▦ ▦ ▦ ▦ ▦ ▦ ▦ ▦ ▦ ▦ ▦ ▦ ▦ ▦ ▦ ▦ ▦ ▦ ▦ ▦ ▦ ▦ ▦ ▦ ▦ ▦ ▦ ▦ ▦ ▦ ▧ ▦ ▦ ▦ ▦ ▦ ▦ ▦ ▦ ▦ ▦ ▦ ▦ ▦ ▦ ▦ ▦ ▦ ▦ ▦ ▦ ▦ ▦ ▦ ▦ ▦ ▦ ▦ ▦ ▦ ▦ ▦ ▦ ▦ ▦ ▦ ▦ ▦ ▦ ▦ ▦ ▦ ▦ ▦ ▦ ▦ ▦ ▦ ▦ ▦ ▮ ▮ ▮ ▮ ▮ ▮ ▮ ▮ ▮ ▮ ▮ ▮ ▮ ▮ ▮ ▮ ▮ ▮ ▮ ▮ ▮ ▮ ▮ ▮ ▮ ▮ ▮ ▮ ▮ ▮ ▮ ▮ ▮ ▮ ▮ ▮ ▮ ▮ ▮ ▮ ▮ ▮ ▮ ▮ ▮ ▮ ▮ ▮ ▮ ▮ ▅ ▅ ▅ ▅ ▅ ▅ ▅ ▅ ▅ ▅ ▅ ▅ ▅ ▅ ▅ ▅ ▅ ▅ ▅ ▅ ▅ ▅ ▅ ▅ ▅ ▅ ▅ ▅ ▅ ▅ ▅ ▅ ▅ ▅ ▅ ▅ ▅ ▅ ▅ ▅ ▅ ▅ ▅ ▅ ▅ ▅ ▅ ▅ ▅ ▅ ▵ ▵ ▵ ▵ ▵ ▵ ▵ ▵ ▵ ▵ ▵ ▵ ▵ ▵ ▵ ▵ ▵ ▵ ▵ ▵ ▵ ▵ ▵ ▵ ▵ ▵ ▵ ▵ ▵ ▵ ▵ ▵ ▵ ▵ ▵ ▵ ▵ ▵ ▵ ▵ ▵ ▵ ▵ ▵ ▵ ▵ ▵ ▵ ▵ ▵ ▤ ▵ ▵ ▵ ▵ ▵ ▵ ▵ ▵ ▵ ▵ ▵ ▵ ▵ ▵ ▵ ▵ ▵ ▵ ▵ ▵ ▵ ▵ ▵ ▵ ▵ ▵ ▵ ▵ ▵ ▵ ▵ ▵ ▵ ▵ ▵ ▵ ▵ ▵ ▵ ▵ ▵ ▵ ▵ ▵ ▵ ▵ ▵ ▵ ▵ ▶ ▶ ▶ ▶ ▶ ▶ ▶ ▶ ▶ ▶ ▶ ▶ ▶ ▶ ▶ ▶ ▶ ▶ ▶ ▶ ▶ ▶ ▶ ▶ ▶ ▶ ▶ ▶ ▶ ▶ ▶ ▶ ▶ ▶ ▶ ▶ ▶ ▶ ▶ ▶ ▶ ▶ ▶ ▶ ▶ ▶ ▶ ▶ ▶ ▶ ▷ ▷ ▷ ▷ ▷ ▷ ▷ ▷ ▷ ▷ ▷ ▷ ▷ ▷ ▷ ▷ ▷ ▷ ▷ ▷ ▷ ▷ ▷ ▷ ▷ ▷ ▷ ▷ ▷ ▷ ▷ ▷ ▷ ▷ ▷ ▷ ▷ ▷ ▷ ▷ ▷ ▷ ▷ ▷ ▷ ▷ ▷ ▷ ▷ ▷ ▸ ▸ ▸ ▸ ▸ ▸ ▸ ▸ ▸ ▸ ▸ ▸ ▸ ▸ ▸ ▸ ▸ ▸ ▸ ▸ ▸ ▸ ▸ ▸ ▸ ▸ ▸ ▸ ▸ ▸ ▸ ▸ ▸ ▸ ▸ ▸ ▸ ▸ ▸ ▸ ▸ ▸ ▸ ▸ ▸ ▸ ▸ ▸ ▸ ▜ ▸ ▸ ▸ ▸ ▸ ▸ ▸ ▸ ▸ ▸ ▸ ▸ ▸ ▸ ▸ ▸ ▸ ▸ ▸ ▸ ▸ ▸ ▸ ▸ ▸ ▸ ▸ ▸ ▸ ▸ ▸ ▸ ▸ ▸ ▸ ▸ ▸ ▸ ▸ ▸ ▸ ▸ ▸ ▸ ▸ ▸ ▸ ▸ ▸ ▼ ▸ ▸ ▸ ▸ ▸ ▸ ▸ ▸ ▸ ▸ ▸ ▸ ▸ ▸ ▸ ▸ ▸ ▸ ▸ ▸ ▸ ▸ ▸ ▸ ▸ ▸ ▸ ▸ ▸ ▸ ▸ ▸ ▸ ▸ ▸ ▸ ▸ ▸ ▸ ▸ ▸ ▸ ▸ ▸ ▸ ▸ ▸ ▸ ▸ ▰ ▸ ▸ ▸ ▸ ▸ ▸ ▸ ▸ ▸ ▸ ▸ ▸ ▸ ▸ ▸ ▸ ▸ ▸ ▸ ▸ ▸ ▸ ▸ ▸ ▸ ▸ ▸ ▸ ▸ ▸ ▸ ▸ ▸ ▸ ▸ ▸ ▸ ▸ ▸ ▸ ▸ ▸ ▸ ▸ ▸ ▸ ▸ ▸ ▸ ▶ ▶ ▶ ▶ ▶ ▶ ▶ ▶ ▶ ▶ ▶ ▶ ▶ ▶ ▶ ▶ ▶ ▶ ▶ ▶ ▶ ▶ ▶ ▶ ▶ ▶ ▶ ▶ ▶ ▶ ▶ ▶ ▶ ▶ ▶ ▶ ▶ ▶ ▶ ▶ ▶ ▶ ▶ ▶ ▶ ▶ ▶ ▶ ▶ ▆ ▅△△△△△△△△△△△△△△△△△△△△△△△△△△△△△△△△△△△△△△△△△△△△△△△△△△△△△△△△△△△△△△△△△△△△△△△△△△△△△△△△△△△△△△△△△△△△△△△△△△△△□△△△△△△△△△△△△△△△△△△△△△△△△△△△△△△△△△△△△△△△△△△△△△△△△△△△△△△△△△△△△△△△△△△△△△△△△△△△△△△△△△△△△△△△△△△△△△△△△△△△○△○△○△○△○△○△○△○△○△○△○△○△○△○△○△○△○△○△○△○△○△○△○△○△○△○△○△○△○△○△○△○△○△○△○△○△○△○△○△○△○△○△○△○△○△○△○△○△○△○△ ○○○○○○○○○○○○○○○○○○○○○○○○○○○○○○○○○○○○○○○○○○○○○○○○○○○○○○○○○○○○○○○○○○○○○○○○○○○○○○○○○○○○○○○○○○○○○○○○○○○○○ ○○○○○○○○○○○○○○○○○○○○○○○○○○○○○○○○○○○○○○○○○○○○○○○○○○○○○○○○○○○○○○○○○○○○○○○○○○○○○○○○○○○○○○○○○○○○○○○○○○○ ○△△△△△△△△△△△△△△△△△△△△△△△△△△△△△△△△△△△△△△△△△△△△△△△△△△△△△△△△△△△△△△△△△△△△△△△△△△△△△△△△△△△△△△△△△△△△△△△△△△△▲△△△△△△△△△△△△△△△△△△△△△△△△△△△△△△△△△△△△△△△△△△△△△△△△△△△△△△△△△△△△△△△△△△△△△△△△△△△△△△△△△△△△△△△△△△△△△△△△△△△●△○○○○○○○○○○○○○○○○○○○○○○○○○○○○○○○○○○○○○○○○○○○○○○○○○○○○○○○○○○○○○○○○○○○○○○○○○○○○○○○○○○○○○○○○○○○○○○○○○○○- ○ ○ ○ ○ ○ ○ ○ ○ ○ ○ ○ ○ ○ ○ ○ ○ ○ ○ ○ ○ ○ ○ ○ ○ ○ ○ ○ ○ ○ ○ ○ ○ ○ ○ ○ ○ ○ ○ ○ ○ ○ ○ ○ ○ ○ ○ ○ ○ ○ ○ ○ ○ ○ ○ ○ ○ ○ ○ ○ ○ ○ ○ ○ ○ ○ ○ ○ ○ ○ ○ ○ ○ ○ ○ ○ ○ ○ ○ ○ ○ ○ ○ ○ ○ ○ ○ ○ ○ ○ ○ ○ ○ ○ ○ ○ ○ ○ ○ ○ ○ ● ● ● ● ● ● ● ● ● ● ● ● ● ● ● ● ● ● ● ● ● ● ● ● ● ● ● ● ● ● ● ● ● ● ● ● ● ● ● ● ● ● ● ● ● ● ● ● ● ● ● ● ● ● ● ● ● ● ● ● ● ● ● ● ● ● ● ● ● ● ● ● ● ● ● ● ● ● ● ● ● ● ● ● ● ● ● ● ● ● ● ● ● ● ● ● ● ● ● ●● ● ● ● ● ● ● ● ● ● ● ● ● ● ● ● ● ● ● ● ● ● ● ● ● ● ● ● ● ● ● ● ● ● ● ● ● ● ● ● ● ● ● ● ● ● ● ● ● ● ● ● ● ● ● ● ● ● ● ● ● ● ● ● ● ● ● ● ● ● ● ● ● ● ● ● ● ● ● ● ● ● ● ● ● ● ● ● ● ● ● ● ● ● ● ● ● ● ● ● C ● ● ● ● ● ● ● ● ● ● ● ● ● ● ● ● ● ● ● ● ● ● ● ● ● ● ● ● ● ● ● ● ● ● ● ● ● ● ● ● ● ● ● ● ● ● ● ● ● ● ● ● ● ● ● ● ● ● ● ● ● ● ● ● ● ● ● ● ● ● ● ● ● ● ● ● ● ● ● ● ● ● ● ● ● ● ● ● ● ● ● ● ● ● ● ● ● ● ● ◎ ○ ○ ○ ○ ○ ○ ○ ○ ○ ○ ○ ○ ○ ○ ○ ○ ○ ○ ○ ○ ○ ○ ○ ○ ○ ○ ○ ○ ○ ○ ○ ○ ○ ○ ○ ○ ○ ○ ○ ○ ○ ○ ○ ○ ○ ○ ○ ○ ○ ○ ○ ○ ○ ○ ○ ○ ○ ○ ○ ○ ○ ○ ○ ○ ○ ○ ○ ○ ○ ○ ○ ○ ○ ○ ○ ○ ○ ○ ○ ○ ○ ○ ○ ○ ○ ○ ○ ○ ○ ○ ○ ○ ○ ○ ○ ○ ○ ○ ○ ■ ● ● ● ● ● ● ● ● ● ● ● ● ● ● ● ● ● ● ● ● ● ● ● ● ● ● ● ● ● ● ● ● ● ● ● ● ● ● ● ● ● ● ● ● ● ● ● ● ● ● ● ● ● ● ● ● ● ● ● ● ● ● ● ● ● ● ● ● ● ● ● ● ● ● ● ● ● ● ● ● ● ● ● ● ● ● ● ● ● ● ● ● ● ● ● ● ● ● ● ★ ● ★ ● ★ ● ★ ● ★ ● ★ ● ★ ● ★ ● ★ ● ★ ● ★ ● ★ ● ★ ● ★ ● ★ ● ★ ● ★ ● ★ ● ★ ● ★ ● ★ ● ★ ● ★ ● ★ ● ★ ● ★ ● ★ ● ★ ● ★ ● ★ ● ★ ● ★ ● ★ ● ★ ● ★ ● ★ ● ★ ● ★ ● ★ ● ★ ● ★ ● ★ ● ★ ● ★ ● ★ ● ★ ● ★ ● ★ ● ★ ● ★ ●★★★ ★ ★★★★★★★★★★★★★★★★★★★★★★★★★★★★★★★★★★★★★★★★★★★★★★★★★★★★★★★★★★★★★★★★★★★★★★★★★★★★★★★★★★★★★★★★★★★★★★★★★★★★★★★★★★★★★★★★★★★★★★★★★★★★★★★★★★★★★★★★★★★★★★★★★★★★★★★★★★★★★★★★★★★★★★★★★★★★★★★★★★★★★★★★★★★★★★★★★★★★★★★★★★ ★ ★ ★ ★ ★ ★ ★ ★ ★ ★ ★ ★ ★ ★ ★ ★ ★ ★ ★ ★ ★ ★ ★ ★ ★ ★ ★ ★ ★ ★ ★ ★ ★ ★ ★ ★ ★ ★ ★ ★ ★ ★ ★ ★ ★ ★ ★ ★ ★ ★ ★ ★ ★ ★ ★ ★ ★ ★ ★ ★ ★ ★ ★ ★ ★ ★ ★ ★ ★ ★ ★ ★ ★ ★ ★ ★ ★ ★ ★ ★ ★ ★ ★ ★ ★ ★ ★ ★ ★ ★ ★ ★ ★ ★ ★ ★ ★ ★ ★ ★★★★★★★★★★★★★★★★★★★★★★★★★★★★★★★★★★★★★★★★★★★★★★★★★★★★★★★★★★★★★★★★★★★★★★★★★★★★★★★★★★★★★★★★★★★★★★★★★★★★★★★★★★★★★★★★★★★★★★★★★★★★★★★★★★★★★★★★★★★★★★★★★★★★★★★★★★★★★★★★★★★★★★★★★★★★★★★★★★★★★★★★★★★★★★★★★★★★ ★★★★★★★★★★★★★★★★★★★★★★★★★★★★★★★★★★★★★★★★★★★★★★★★★★★★★★★★★★★★★★★★★★★★★★★★★★★★★★★★★★★★★★★★★★★★★★★★★★★★★★★★★★★★★★★★★★★★★★★★★★★★★★★★★★★★★★★★★★★★★★★★★★★★★★★★★★★★★★★★★★★★★★★★★★★★★★★★★★★★★★★★★★★★★★★★★★★★★★☆ ★ ★ ★ ★ ★ ★ ★ ★ ★ ★ ★ ★ ★ ★ ★ ★ ★ ★ ★ ★ ★ ★ ★ ★ ★ ★ ★ ★ ★ ★ ★ ★ ★ ★ ★ ★ ★ ★ ★ ★ ★ ★ ★ ★ ★ ★ ★ ★ ★ ★ ★ ★ ★ ★ ★ ★ ★ ★ ★ ★ ★ ★ ★ ★ ★ ★ ★ ★ ★ ★ ★ ★ ★ ★ ★ ★ ★ ★ ★ ★ ★ ★ ★ ★ ★ ★ ★ ★ ★ ★ ★ ★ ★ ★ ★ ★ ★ ★ ★★ ★ ★ ★ ★ ★ ★ ★ ★ ★ ★ ★ ★ ★ ★ ★ ★ ★ ★ ★ ★ ★ ★ ★ ★ ★ ★ ★ ★ ★ ★ ★ ★ ★ ★ ★ ★ ★ ★ ★ ★ ★ ★ ★ ★ ★ ★ ★ ★ ★ ★ ★ ★ ★ ★ ★ ★ ★ ★ ★ ★ ★ ★ ★ ★ ★ ★ ★ ★ ★ ★ ★ ★ ★ ★ ★ ★ ★ ★ ★ ★ ★ ★ ★ ★ ★ ★ ★ ★ ★ ★ ★ ★ ★ ★ ★ ★ ★ ★★★★ ★ ★ ★ ★ ★ ★ ★ ★ ★ ★ ★ ★ ★ ★ ★ ★ ★ ★ ★ ★ ★ ★ ★ ★ ★ ★ ★ ★ ★ ★ ★ ★ ★ ★ ★ ★ ★ ★ ★ ★ ★ ★ ★ ★ ★ ★ ★ ★ ★ ★ ★ ★ ★ ★ ★ ★ ★ ★ ★ ★ ★ ★ ★ ★ ★ ★ ★ ★ ★ ★ ★ ★ ★ ★ ★ ★ ★ ★ ★ ★ ★ ★ ★ ★ ★ ★ ★ ★ ★ ★ ★ ★ ★ ★ ★ ★ ★★★★☆ ★ ★ ★ ★ ★ ★ ★ ★ ★ ★ ★ ★ ★ ★ ★ ★ ★ ★ ★ ★ ★ ★ ★ ★ ★ ★ ★ ★ ★ ★ ★ ★ ★ ★ ★ ★ ★ ★ ★ ★ ★ ★ ★ ★ ★ ★ ★ ★ ★ ★ ★ ★ ★ ★ ★ ★ ★ ★ ★ ★ ★ ★ ★ ★ ★ ★ ★ ★ ★ ★ ★ ★ ★ ★ ★ ★ ★ ★ ★ ★ ★ ★ ★ ★ ★ ★ ★ ★ ★ ★ ★ ★ ★ ★ ★ ★★★★☆★ ★★ ★★ ★★ ★★ ★★ ★★ ★★ ★★ ★★ ★★ ★★ ★★ ★★ ★★ ★★ ★★ ★★ ★★ ★★ ★★ ★★ ★★ ★★ ★★ ★★ ★★ ★★ ★★ ★★ ★★ ★★ ★★ ★★ ★★ ★★ ★★ ★★ ★★ ★★ ★★ ★★ ★★ ★★ ★★ ★★ ★★ ★★ ★★ ★★ ★★ ———— ———— ———— ———— ———— ———— ———— ———— ———— ———— ———— ———— ———— ———— ———— ———— ———— ———— ———— ———— ———— ———— ———— ———— ———— ———— ———— ———— ———— ———— ———— ———— ———— ———— -Y4T2 | 选择的顺序和程序的顺序、程序的顺序、程序的顺序、程序的顺序、程序的顺序、程序的顺序、程序的顺序、程序的顺序、程序的顺序、程序的顺序、程序的顺序、程序的顺序、程序的顺序、程序的顺序、程序的顺序、程序的顺序、程序的顺序、程序的顺序、程序的顺序、程序的顺序、程序的顺序、程序的顺序、程序的顺序、程序的顺序、程序的顺序、程序的顺序 | Selects the sequences to be displayed (while paused) | Selects the sequences to be displayed (while paused) | |
You can also zoom in by quickly touching the touch screen twice. (If the display was enlarged, it returns to the same magnification ratio.)
Recording with the 4K Photo function and selecting pictures to save
Selecting and saving pictures on the TV screen
- Set [HDMI Mode (Play)] to [AUTO] or [4K/30p]. When connecting to a TV that does not support 4K video, select [AUTO].
- Depending on the TV to be connected, 4K burst files may not be played back correctly.
Marker
When selecting and saving pictures from a 4K burst file, you can select pictures easily by skipping between marked positions.
Two types of markers are available.
White marker: This is manually set during recording or playback.
Green marker: This is automatically set by the camera during recording. (Auto Marking function)
Marker operation screen
natural_image
Vintage steam locomotive on rural ground with camera control buttons (no readable text or symbols)Skip to the marked positions
When [▶/] is touched on the slide view screen or 4K burst playback screen, the marker operation screen appears and you can skip to the marked positions. Touch [↗▶] to return to the original operation.
| Operation Touch operation Description | ||
| ◀/▶ | ◀/▶ | Moves to the previous/next marker. |
Recording with the 4K Photo function and selecting pictures to save

Auto Marking function
The camera automatically sets markers on scenes in which a face or the movement of a subject is detected.
(Example: At the scene when a vehicle passes by, a balloon bursts, or a person turns around)
- Up to 10 markers are displayed for each file.
- In the following cases, markers may not be set by the Auto Marking function depending on the recording conditions and the status of subjects.
– The camera is moving because of panning or jitter - The movement of a subject is slow/small, or the subject is small
– A face is not facing front
Select markers to be displayed
Touch [AUTOMODE] on the slide view screen, 4K burst playback screen, or marker operation screen.
| [Auto] Displays a marker on a scene in which a face or the movement of a subject is detected. | |
| [Face Priority] Displays a marker with preference given to a scene in which a face is detected. | |
| [Motion Priority] | Displays a marker with preference given to a scene in which the movement of a subject is detected. |
| [Off] Displays manually set markers only. | |
You cannot delete markers set by the Auto Marking function.
The markers set by the Auto Marking function may not be displayed correctly if you split the 4K burst file on a device other than this camera and then play it back on the camera.
In the following cases, markers set by the Auto Marking function are not displayed.
• 4K burst files recorded with [4K Pre-Burst]
Notes on the 4K Photo function
Changing the aspect ratio
Selecting [Aspect Ratio] in the [Rec] menu allows you to change the aspect ratio for 4K photos.
Recording a the subject with reduced blur
You can reduce the blur of the subject by setting a faster shutter speed.
① Set the mode dial to [S]
② Set the shutter speed by turning the rear or front dial
- Approximate shutter speed for outdoor recording in fine weather conditions: 1/1000 seconds or faster.
- If you increase the shutter speed, the ISO sensitivity becomes higher, which may increase the noise on the screen.
Preventing camera shake when you are recording pictures
When you perform [Light Composition] or [Sequence Composition], we recommend using a tripod and taking pictures remotely by connecting the camera to a smartphone to prevent camera shake. ( 232)
Shutter sound for 4K photo recording
- When using [RE] ([4K Burst]) or [RE] ([4K Pre-Burst]), you can change the electronic shutter sound settings in Shutter Vol. and [Shutter Tone]. (→206)
- When recording with [☐K] ([4K Burst(S/S)]), you can set the start/stop tone volume in [Beep Volume].
- You can perform high speed burst recording quietly using the 4K Photo function in combination with [Silent Mode]. (→181)
Scenes not suitable for the 4K Photo function
Recording indoors
When recording under fluorescent lighting or LED lighting fixtures, etc., the colors and brightness may change or horizontal striping may appear on the screen. The striping may be reduced by setting a slower shutter speed.
Fast-moving subjects
Subjects moving fast may appear distorted when recorded.
Recording with the 4K Photo function and selecting pictures to save
The camera's setup for the 4K Photo function
The camera's setup is automatically optimized for 4K photo recording.
• The following settings are fixed.
| [Picture Size] | [4K] (8M) |
| [4:3]: 3328×2496 [3:2]: 3504×2336[16:9]: 3840×2160 [1:1]: 2880×2880 | |
| [Quality] [ | * * ] |
| [Shutter Type] [ESHTR] | |
| [Rec Quality]* | [4K/100M/30p] |
| [Continuous AF]* | [ON] |
* Settings in the [Motion Picture] menu are not applied to 4K burst files recorded with the 4K Photo function.
- The following limitations apply to the recording functions indicated below.
| [ ][4K Burst] / [ ][4K Burst(S/S)]] | [ ][4K Pre-Burst]) | |
| Program Shift Disabled | ||
| Exposure Compensation -3 EV to +3 EV | ||
| Shutter speed 1/30 to 1/16000 | ||
| [Min. Shtr Speed] 1/1000 to 1/30 | ||
| Focus mode ([AFF]) Disabled | ||
| [AF Mode] ([+] ) | Disabled | |
| [MF Assist] ○ Disabled | ||
| White Balance (['zw]) | Disabled | |
| ISO sensitivity | [AUTO], [125] to [6400]([L.80] to [6400] when [Extended ISO] is set to [ON]) | |
| Flash | Disabled | |
| Bracket recording | Disabled | |
• The following menu items are disabled:
| [Snapshot Mode] | [iHandheld Night Shot], [iHDR] |
| [Creative Control] | [Simultaneous Record w/o Filter] |
| [Rec] | [Picture Size], [Quality], [AFS/AFF], [AF Sensitivity(Photo)], [Color Space], [Flash], [Long Shtr NR], [Shutter Type], [Bracket], [HDR] |
| [Custom] | [Rec Area], [Face Recog.], [Profile Setup] |
| [Setup] | [Economy] (Only [][4K Pre-Burst]), [Monitor Display Speed], [EVF Display Speed] |
Recording with the 4K Photo function and selecting pictures to save
Recording stops when the continuous recording time exceeds 29 minutes.
When using an SDHC memory card, the burst file is split into smaller files for recording and playback if the file size exceeds 4 GB. (You can continue to record without interruption.) If using an SDXC memory card, you can record in a single file even if the size is greater than 4 GB.
When recording, the angle of view becomes narrower.
The following changes occur when recording 4K photos:
- [Destination] in [Travel Date] cannot be recorded.
- [Simultaneous Record w/o Filter] in [Filter Settings] is not available.
- It is not possible to use the HDMI output.
When recording using the [ ] ([4K Pre-Burst]) function, Step Zoom does not operate.
Scene Detection in Snapshot Mode works the same way as when recording video.
When the drive mode is set to 4K Photo, it is not possible to take pictures while recording video. (Only when [ ] ([Photo Priority]) is set)
The 4K Photo function is disabled when using the following settings:
- [Clear in Backlight], [Glistening Water], [Artistic Nightscape], [Glittering Illuminations], [Handheld Night Shot], [Clear Night Portrait], [Soft Image of a Flower] (Scene Guide Mode)
- [Rough Monochrome], [Silky Monochrome], [Miniature Effect], [Soft Focus], [Star Filter], [Sunshine] (Creative Control Mode)
• During video recording - When [Multi Exp.] is set
Adjusting the focus after recording
([Post Focus]/[Focus Stacking])
Recording mode:

You can record 4K burst pictures while changing the focus point and then select a focus point after recording. This function is best for still subjects.
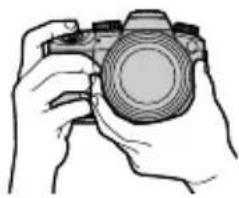
natural_image
Line drawing of a hand holding a camera (no text or symbols)4K burst recording with automatic focus shift

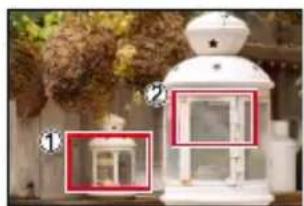
natural_image
Exterior view of a white decorative lantern with two labeled windows (1 and 2), surrounded by foliage (no text or symbols visible)Touch the desired focus point

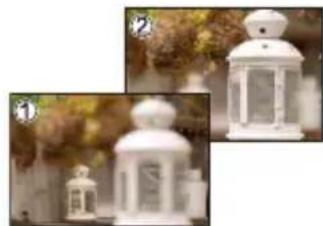
natural_image
Two white decorative lanterns with white lids, displayed outdoors with blurred foliage background (no text or symbols visible)Finished picture has the desired focus point
• To record pictures, use a UHS Speed Class 3 card.
- We recommend using a tripod to perform [Focus Stacking].
Recording using [Post Focus]
1 Set the drive mode dial to

2 Determine the composition and press the shutter button halfway
Ⓐ [Post Focus] icon
- Auto Focus activates and automatically detects the focus point on the screen. (While the shutter button is pressed halfway, shaking may be seen on the screen.)
- If there is no focus point on the screen, the Focus indicator (☐) blinks and you cannot record.
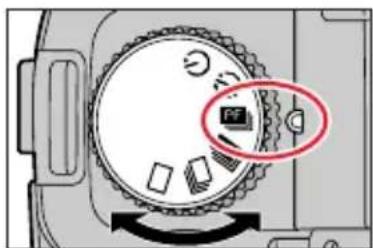
From halfway pressing the shutter button to completion of recording
- Do not change the distance to subject or the composition.
Adjusting the focus after recording ([Post Focus]/[Focus Stacking])
3 Press the shutter button fully to start recording
® Recording progress bar
- The focus point changes automatically while recording. When the recording progress bar disappears, recording automatically ends.
- The data will be saved as a single file in the MP4 format.
- If [Auto Review] is set, a screen will automatically appear that lets you select the focus point. (→129)
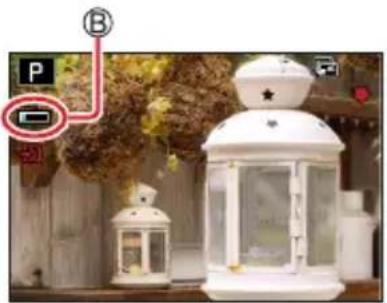
natural_image
Exterior view of a white decorative lantern with a star-shaped top, set against a leafy wall and wooden structure (no visible text or symbols)
About camera temperature
If the ambient temperature is high or [Post Focus] recording is performed continuously, [△] may be displayed and recording may be stopped halfway through. Wait until the camera cools down.
Select the focus point and save the picture ([Post Focus])
1 On the playback screen, select the image with the [icon and press]
- The same operation can be performed by touching
2 Touch the focal point
- If there are no pictures with the focus on the selected point, a red frame will be displayed, and pictures cannot be saved.
- The edge of the screen cannot be selected.
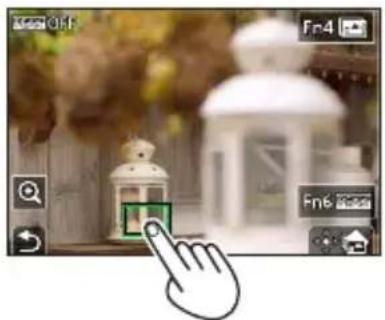
natural_image
Digital camera interface showing a hand cursor clicking a small green button next to a white dome-shaped building (no text or symbols visible)| Operation Touch operation Description | ||
 | Touch | Selects focus point• No selection can be made while display is enlarged. |
 |  | Enlarges the display |
 | Reduces the display (when in enlarged display) | |
| [FN4] |  | Switches to [Focus Stacking] operation (→130) |
| [FN6] | [6ABY] | In-focus portions are highlighted with color. ([Peaking])• Switches in order of [PEAK OFF] → [PEAK [LOW])→ [PEAK H] ([HIGH]). |
| [MENU/SET] |  | Saves the picture |
- You can make fine adjustments to the focus by dragging the slide bar during enlarged display. (The same operation can be performed using ◀▶.)
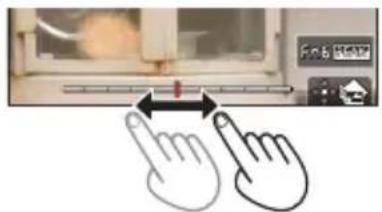
3 Touch [+] to save the picture
- The selected picture will be saved as a new separate file in the JPEG format.
Select the focus range to combine and create a single picture ([Focus Stacking])

1 Touch [icon] on the screen in step 2 of “Select the focus point and save the picture ([Post Focus])” (→129)
- The same operation can be performed by pressing the [FN4] button.
2 Choose a stacking method and touch to select it
| [Auto Merging] | Automatically select photos suitable for stacking and combine them into one picture.·Choose by giving preference to near-focus pictures.·Perform the focus stacking and save the picture. |
| [Range Merging] | Combine the pictures with the selected focus position into one picture. |
(When selecting [Range Merging])
3 Touch the focal point
- Select positions at two or more points.
- Focus points between the selected two positions will be selected.
- Positions that cannot be selected, or that would produce an unnatural result will be grayed out.
- Touch a position again to deselect it.
- If you drag the screen you can then continue to select positions.
| Operation Touch operation Description | |
| Touch Select the position | |
| [FN6] [Set/Cancel] Set/Clear the position | |
| [DISP] | [All] Select all positions (Before selecting position) |
| [Reset] Deselect All (After selecting position) | |
| [MENU/SET] | |
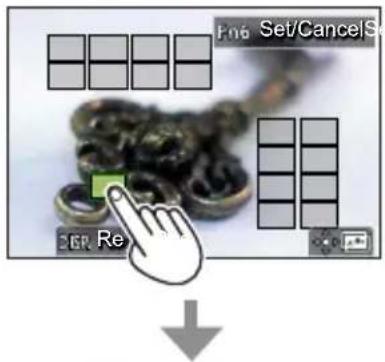
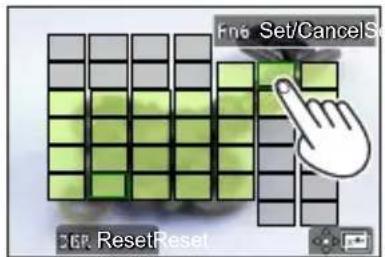
4 Touch [+] to combine and save the picture
- The picture will be saved in JPEG format with recording information (Exif information) from the nearest position's picture, including its shutter speed, aperture and ISO sensitivity information.
Notes on the [Post Focus]/[Focus Stacking]
The camera's setup for recording in [Post Focus]
- Since recording is performed in the same picture quality as 4K photos, certain limitations apply to recording functions and menu settings. For details, refer to “The camera’s setup for the 4K Photo function” (→125).
- In addition to the limitations of the 4K Photo function, the following limitations apply to [Post Focus] recording:
– [AF Mode] cannot be set.
- Manual Focus cannot be used.
– The following [Custom] menu items cannot be set:
[Shutter AF]
– Video mode is unavailable.
– [Digital Zoom] is not available.
During recording, the angle of view will be narrower.
The [Post Focus] function is disabled when using the following settings:
- [Clear in Backlight], [Glistening Water], [Artistic Nightscape], [Glittering Illuminations], [Handheld Night Shot], [Clear Night Portrait], [Soft Image of a Flower] (Scene Guide Mode)
- [Rough Monochrome], [Silky Monochrome], [Miniature Effect], [Soft Focus], [Star Filter], [Sunshine] (Creative Control Mode)
- When [Multi Exp.] is set
When selecting the focus and saving pictures, you cannot select and save the picture from a TV screen even if the camera is connected to a TV through an HDMI micro cable.
In the following cases, [Focus Stacking] may produce an unnatural picture:
• If the subject is in motion
- If there are large differences in distance to the subject
- If there is significant blurring (recording with a larger aperture might make the picture less unnatural)
During focus stacking, auto compensation is applied to deviations among pictures due to camera shake. In such cases, the angle of view will be slightly narrower at the time of focus stacking.
Only pictures taken using [Post Focus] on this camera are eligible for [Focus Stacking].
Taking pictures with Time Lapse Shot/Stop Motion Animation
Recording mode: A A P A S M M □ SCN COL
Take pictures with [Time Lapse Shot] or [Stop Motion Animation].
• The pictures are recorded as a set of group pictures.
- Complete the date and time settings in advance. (→31)
Taking pictures automatically at set intervals [Time Lapse Shot]
You can preset data such as recording start time and time lapse to take stills automatically. This setting is convenient for taking pictures at constant intervals for landscape scenes, observation of the gradual changes in animals/plants, and other applications.
1 Set the drive mode dial to [j]
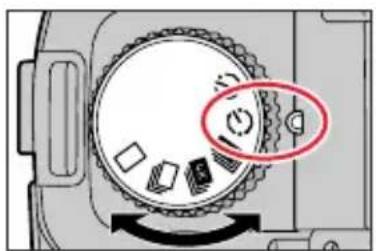
2 Set the menu
| MENU → [fRec] → [Time Lapse/Animation] | ||
| [Mode] Switches the recording method between [Time Lapse Shot] and [Stop Motion Animation].1 Select [Time Lapse Shot] | ||
| [Shooting Interval Setting] | [ON]: Sets the time from recording start time to the next recording start time.[OFF]: After recording is finished, the next recording is started without any interval. | |
| [Start Time] [Now] Starts the recording by fully-pressing the shutter button. | ||
| [Start Time Set] | Any time up to 23 hours 59 minutes ahead can be set.1 Press ◀▶ select the item (hour and/or minute), and ▲▼to set the start time, and press [MENU/SET] | |
| [Image Count] / [Shooting Interval]*1 | ◀▶: Select the item (digit)▲▼: Setting[MENU/SET]: Set | |
*1 Can be set only when [Shooting Interval Setting] is set to [ON].
Taking pictures with Time Lapse Shot/Stop Motion Animation
- The estimated recording ending time is displayed on the setting screen. (When [Shooting Interval Setting] is set to [OFF], the recording ending time is displayed only when the focus mode is set to [MF] in Shutter-Priority AE Mode or Manual Exposure Mode.)
- The camera may not be able to record using the pre-set interval and number of pictures to be recorded or may not finish recording at the estimated recording ending time under some recording conditions.

If you touch [icon] on the recording standby screen, the menu screen will be displayed.
3 Press the shutter button halfway to exit the menu
4 Focus on the subject and take a picture
- The recording starts by fully-pressing the shutter button.
- During recording standby, the camera turns off automatically when no operation is performed for a preset interval. The [Time Lapse Shot] recording will continue even if the camera is turned off, and the camera is automatically turned on at the recording start time. If you want to turn on the camera manually, press the shutter button halfway.
• Operations during recording standby (The camera is turned on)
| Operation Touch operation Description | ||
| [FN6]*2 | Displays a selection screen that lets you pause or stop the recording | |
| Displays a selection screen that lets you resume or stop the recording (during pause) | ||
*2 When you record pictures by setting [Shooting Interval Setting] to [OFF], you can press [FN6] even while recording is in progress. After recording (exposure) of a picture taken at the time when you pressed [FN6] is finished, a selection screen is displayed.
*3 When you record pictures by setting [Shooting Interval Setting] to [OFF], you cannot perform touch operation.
5 Select the video creation method
| [Rec Quality] | Sets the picture quality of the video. |
| [Frame Rate] | Set the number of frames per second. The higher the number is, the smoother the video will be. |
| [Sequence] | [NORMAL]: Stitches the stills in the recording sequence.[REVERSE]: Stitches the stills in the reverse order of recording. |
6 Press ▲ to select [OK] and press [MENU/SET]
- You can also create a video using [Time Lapse Video] in the [Playback] menu.
Taking pictures with Time Lapse Shot/Stop Motion Animation
This function is not intended for application-specific systems (monitoring cameras).
When using zoom, the camera could tilt when the lens barrel extends. Make sure to secure the camera in place with a tripod or by other means.
[Time Lapse Shot] is paused in the following cases:
- When the remaining battery power runs out
- Turning the camera off
If the number of pictures set has not been taken yet, you can restart the operation by turning off the camera in the pause state, replacing the battery or card, and then turning the camera on again. (Note, however, that the pictures recorded after restarting the operation are saved as a separate set of group pictures.)
We recommend using auto focus for time lapse recording in cases where a long [Shooting Interval] is set and the camera will turn off automatically between shots.
When creating video at a picture quality size of [4K], recording times are limited to 29 minutes.
If using an SDHC memory card, you will not be able to create video with a file size greater than 4 GB. With an SDXC memory card, you can create video with a file size greater than 4 GB.
When creating a video with a picture quality size of [FHD] or [HD], you will be unable to create it if the recording time is more than 29 minutes or the file size is greater than 4 GB.
This function is not available in the following cases:
• [Handheld Night Shot] (Scene Guide Mode)
- When [Multi Exp.] is set
Creating stop motion animation [Stop Motion Animation]
You can stitch stills to create stop motion animation.
1 Set the drive mode dial to [()]
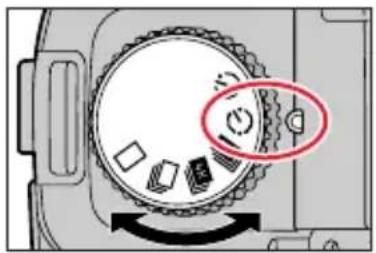
2 Set the menu
MENU → [Rec] → [Time Lapse/Animation]
| [Mode] Switches the recording method between [Time Lapse Shot] and [Stop Motion Animation].1 Select [Stop Motion Animation] |
| [Auto Shooting] [ON]: Takes pictures automatically at a set recording interval. [OFF]: Takes pictures manually, one frame at a time. |
| [Shooting Interval] (Only when [Auto Shooting] is set to [ON])Set the interval used for [Auto Shooting]. |
![LEICA V-LUX 5 - Creating stop motion animation [Stop Motion Animation] - 2](/content/2026/05/882858/images/2b7dc10c6c8c40817f9405329da3456a37c9ddeb73bce5012126d5da0ef73fb1.jpg)
If you touch [icon] on the recording standby screen, the menu screen will be displayed.
3 Press the shutter button halfway to exit the menu
4 Focus on the subject and take a picture
5 Move the subject to decide on the composition (repeat)
- Up to 9,999 frames can be recorded.
- When you turn off the camera during recording, a message to restart recording will appear when you turn the camera on.
![LEICA V-LUX 5 - Creating stop motion animation [Stop Motion Animation] - 3](/content/2026/05/882858/images/4a4c5ab47b5c536c392f17384ea22bc56fcd130a44d85063642aca47b6311e40.jpg)
How to create stop motion animation effectively
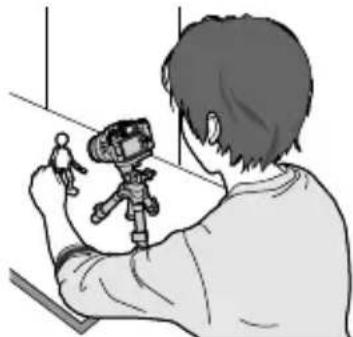
natural_image
Person using a camera on a handheld device (no text or symbols visible)Up to two previously recorded pictures are displayed on the recording screen. Check this screen as a guideline for determining the amount of required motion.
You can press the [▶] (Playback) button to check the recorded pictures. Press the [◀] button to delete unnecessary pictures. To return to the recording screen, press the [▶] (Playback) button again.
Taking pictures with Time Lapse Shot/Stop Motion Animation
6 Touch [☐] to stop recording
- You can also stop the recording by selecting [Time Lapse/Animation] in the [Rec] menu, and then pressing [MENU/SET].
- When [Auto Shooting] is set to [ON], select [End] on the confirmation screen. (If you select [Pause], press the shutter button fully to resume recording.)
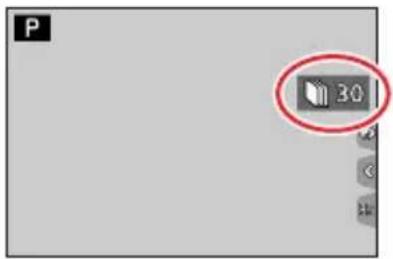
7 Select a method to create a stop motion animation
| [Rec Quality] | Sets the picture quality of the video. |
| [Frame Rate] | Set the number of frames per second. The higher the number is, the smoother the video will be. |
| [Sequence] | [NORMAL]: Stitches the stills in the recording sequence.[REVERSE]: Stitches the stills in the reverse order of recording. |
8 Press ▲ to select [OK] and press [MENU/SET]
- You can also create a stop motion animation using [Stop Motion Video] in the [Playback] menu.
Adding pictures to an already recorded stop motion animation group
When you select [Add to Picture Group] in step 2, group pictures recorded using [Stop Motion Animation] are displayed. Select a set of group pictures and press [MENU/SET]. Then, select [Yes] on the confirmation screen.
[Auto Shooting] may not be performed according to the preset interval because recording could take time under some recording conditions, such as when pictures are taken using a flash.
When creating video at a picture quality size of [4K], recording times are limited to 29 minutes.
If using an SDHC memory card, you will not be able to create video with a file size greater than 4 GB. With an SDXC memory card, you can create video with a file size greater than 4 GB.
When creating a video with a picture quality size of [FHD] or [HD], you will be unable to create it if the recording time is more than 29 minutes or the file size is greater than 4 GB.
You cannot select only one recorded stills using [Add to Picture Group].
This function is not available in the following cases:
- When [Multi Exp.] is set
[Auto Shooting] in [Stop Motion Animation] cannot be used in the following case:
• [Handheld Night Shot] (Scene Guide Mode)
Taking pictures with self-timer
Recording mode: A A P A S M M □ SCN COL
1 Set the drive mode dial to [💡]
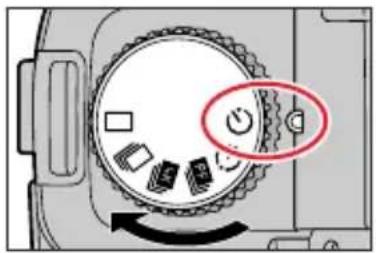
2 Press the shutter button halfway to focus and then press it fully to take a picture
• After the self-timer indicator flashes, recording will start.
Setting the self-timer operation
| MENU → [Rec] → [Self Timer] | |
 | The shutter is activated after 10 seconds. |
 | The shutter is activated after 10 seconds and three pictures are taken at intervals of approximately 2 seconds. |
 | The shutter is activated after 2 seconds. This is also effective for preventing jitter when pressing the shutter button. |
| We recommend using a tripod.It cannot be set to [ √ in the following cases:When recording using [Bracket]When [Multi Exp.] is setWhen [Simultaneous Record w/o Filter] of [Filter Settings] is set to [ON]This function is not available in the following cases:During video recording | |
Taking pictures while adjusting a setting automatically (Bracket Recording)
Recording mode:

You can take multiple pictures while automatically adjusting a setting by pressing the shutter button.
1 Set the menu
MENU → [Rec] → [Bracket] → [Bracket Type]
| (Exposure Bracket) | Press the shutter button to perform recording while adjusting the exposure. (→139) |
| (Aperture Bracket) | Press the shutter button to perform recording while adjusting the aperture. (→140)• Available in Aperture-Priority AE Mode or when the ISO sensitivity is set to [AUTO] in Manual Exposure Mode. |
| FOCUS(Focus Bracket) | Press the shutter button to perform recording while adjusting the focus position. (→140) |
| WB(White Balance Bracket) | Press the shutter button once to take three pictures with different white balance settings automatically. (→112) |
2 Press ▼ to select [More Settings] and then press [MENU/SET]
- For information on [More Settings], refer to the page that describes each function.
- Press the shutter button halfway to exit the menu.
3 Focus on the subject and take a picture
- When Exposure Bracket is selected, the bracket display flashes until all of the pictures you have set are taken. If you change the bracket settings or turn off the camera before all of the pictures you have set are taken, the camera restarts recording from the first picture.
To cancel [Bracket]
Select [OFF] in step 1.
Taking pictures while adjusting a setting automatically (Bracket Recording)
Bracket recording is disabled in the following cases.
- [Glistening Water], [Glittering Illuminations], [Handheld Night Shot], [Soft Image of a Flower] (Scene Guide Mode)
- [Rough Monochrome], [Silky Monochrome], [Miniature Effect], [Soft Focus], [Star Filter], [Sunshine] (Creative Control Mode)
- When recording using the flash (except for White Balance Bracket)
- When recording video
- When recording 4K photos
- When recording using [Post Focus]
- When [Multi Exp.] is set
- When using [Time Lapse Shot]
- When [Auto Shooting] of [Stop Motion Animation] is set to [ON]
Exposure Bracket
About [More Settings] (step 2 in (→138))
| [Step] | Sets the number of pictures to be taken and the exposure compensation range.[3·1/3] (Takes three pictures with an interval of 1/3 EV) to [7·1](Takes seven pictures with an interval of 1 EV) |
| [Sequence] Sets the order | in which pictures are taken. |
| [Single Shot Setting]* | [☐: Takes one picture each time you press the shutter button.[☐]: Takes all the pictures set to be taken when you press the shutter button once. |
* Not available for burst recording. When using burst recording, if you press and hold the shutter button, recording will be performed continuously until a specified number of pictures are taken.
[Step]: [3],1[Sequence]: [0/-/+]
1st picture 2nd picture 3rd picture
![LEICA V-LUX 5 - [Step]: [3],1[Sequence]: [0/-/+] - 1](/content/2026/05/882858/images/54665ad28737d4c881813616895c75e1900537098e1a1648f3f8b5192fda8979.jpg)
natural_image
Woman in an orange dress standing beside a stone wall with greenery, overlooking a village (no visible text or symbols)![LEICA V-LUX 5 - [Step]: [3],1[Sequence]: [0/-/+] - 2](/content/2026/05/882858/images/7b6ffbb0c226197abe8adf7c63e6bc04957dd23b91ed31fc0e85a3e6f2e4d325.jpg)
natural_image
Woman in orange dress standing beside a stone wall with greenery and a distant building (no visible text or symbols)![LEICA V-LUX 5 - [Step]: [3],1[Sequence]: [0/-/+] - 3](/content/2026/05/882858/images/3ca6d01ef124c6723fc42068bd3a8d6b3cc67d925eb96dc38ff0ee726e88d9c8.jpg)
natural_image
Woman in an orange dress standing beside a stone wall with greenery and a small building in the background (no visible text or symbols)±0 EV -1/3 EV +1/3 EV
When taking pictures using Exposure Bracket after setting the Exposure Compensation value, the pictures taken are based on the selected Exposure Compensation value.
Taking pictures while adjusting a setting automatically (Bracket Recording)
Aperture Bracket
Recording mode: AM
About [More Settings] (step 2 in (→138))
| [Image Count] | [3], [5]: Takes a preset number of pictures with different aperture values within the range based on the initial aperture value.[ALL]: Takes pictures using all aperture values. |
- When using burst recording, if you press and hold the shutter button, recording will be performed until a specified number of pictures are taken.
Example:
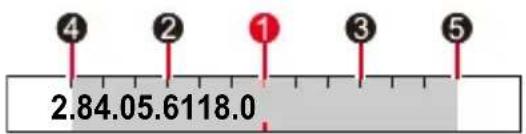
When the initial position is set to F5.6:
① first picture, ② second picture, ③ird picture... fifth picture
Focus Bracket
About [More Settings] (step 2 in (→138))
| [Step] Sets the interval between focus positions. | |
| [Image Count]* | Sets the number of pictures to be taken. |
| [Sequence] | [0/-/+]: Takes pictures with different focus positions within the range based on the initial focus position.[0/+]: Takes pictures with different focus positions toward the far side based on the initial focus position. |
* Not available for burst recording. When using burst recording, if you press and hold the shutter button, recording will be performed continuously until a specified number of pictures are taken.
[Sequence]: Example when [0/-/+] is selected [Sequence]: Example when [0/+] is selected

Ⓐ Close-up
B Infinity
① first picture, ② second picture... ⑤th picture...
Pictures taken with Focus Bracket are displayed as a set of group pictures.
Correcting jitter
Recording mode:

Automatically detects and prevents jitter. For video recording, the 5-Axis Hybrid Image Stabilizer function is available. It uses both the optical stabilizer of the lens and the electronic stabilizer of the camera's sensor. It corrects different types of jitters including those that occur during zoom recording and also recording while walking.
| MENU → [Rec] / [Motion Picture] → [Stabilizer] | ||
| [Operation Mode] | (Normal) | Corrects vertical and horizontal jitter. |
| (Panning) | Corrects vertical jitter. This setting is ideal for panning (technique of recording a subject by matching the camera movement with the movement of a subject going in a specific direction). We recommend using the Viewfinder. | |
| [OFF] [Stabilizer] | does not work. | |
| [E-Stabilization (Video)] | Corrects jitters that occur in 5 directions during video recording, namely the vertical direction, horizontal direction, rotation axis, vertical rotation, and horizontal rotation (5-axis Hybrid Image Stabilizer function).[ON] / [OFF]• [+] is displayed on the screen while recording video.• It is fixed to [ON] when [Level Shot] is set.• The angle of view may become narrower as compared to that during recording. | |

To prevent jitter
If a warning is displayed about jitter, use [Stabilizer], a tripod or [Self Timer]. Using a slower shutter speed can cause motion blur. Shutter speed will be slower particularly in the following cases. Keep the camera still from the moment the shutter button is pressed until the picture appears on the screen. We recommend using a tripod.
- [Slow Sync.]
• [Slow Sync./Red-Eye]
• [Clear Nightscape], [Cool Night Sky], [Warm Glowing Nightscape],
[Artistic Nightscape], [Glittering Illuminations], [Clear Night Portrait]
(Scene Guide Mode)
When you use a tripod, we recommend setting [Operation Mode] to [OFF].
[Stabilizer] cannot be used by selecting [Normal) in Panorama Shot Mode.
In the following cases, the [Stabilizer] will switch to [◀◀◀] (Normal), even if it is set to [◀◀◀]
(Panning):
• During video recording
- When recording 4K photos
- When recording using [Post Focus]
[Stabilizer] cannot be used when recording with [High Speed Video].
In the following cases, The 5-axis Hybrid Image Stabilizer function is not available.
- When using the Digital Zoom
- When recording using [4K Live Cropping]
- When recording video with [Rec Quality] set to [4K/100M/30p] or [4K/100M/24p]
Cases where the stabilizer function may be ineffective:
- When there is a lot of jitter
- When the zoom magnification is high (also in the Digital Zoom range)
- When taking pictures while following a moving subject
- When the shutter speed becomes slower to take pictures indoors or in dark places
The panning effect by selecting [1] is not fully achieved in the following cases:
• Bright summer days or other bright locations
- When the shutter speed is higher than 1/100 seconds
- When the motion of a subject is slow and the speed with which the camera is moved is too slow (a nice background blur is not achieved)
- When the camera is not adequately tracking the motion of a subject
Using Zoom
For details on zoom operations and the Zoom Compose Assist function, see ( 35, 36).
Zoom types and use
Optical Zoom
You can zoom in without degrading the picture quality.
Maximum magnification: 16x
This function is not available in the following case:
- Panorama Shot Mode
- When recording with [Macro Zoom]
Extended optical zoom
This function works when picture sizes with [EX] have been selected in [Picture Size]. Extended optical zoom allows you to zoom in using a higher zoom ratio than Optical Zoom, without degrading the picture quality. The maximum zoom ratio varies depending on the picture size.
Maximum magnification: 32x (Including the optical zoom ratio.)
This function is not available in the following cases:
- Creative Video Mode
- Panorama Shot Mode
• [Handheld Night Shot] (Scene Guide Mode)
• [Toy Effect], [Toy Pop] (Creative Control Mode) - When recording 4K photos
- When recording using [Post Focus]
- When [HDR] is set to [ON]
- When [Multi Exp.] is set
- When [iHandheld Night Shot] is set to [ON]
- When [iHDR] is set to [ON]
- When [Quality] is set to [AW]
- When [Rec Area] is set to [■]
- When recording with [Macro Zoom]
• During video recording
[i.Zoom]
You can use the camera's Intelligent Resolution technology to increase the zoom ratio up to 2x higher than the original zoom ratio with limited deterioration of picture quality.
MENU → [Rec] / [Motion Picture] → [i.Zoom]
Settings: [ON] / [OFF]
When [Picture Size] is set to [S], the zoom ratio can be increased to up to 1.5x the original zoom ratio.
[iZoom] works automatically in Snapshot Mode or Snapshot Plus Mode.
This function is not available in the following cases:
- Panorama Shot Mode
• [Handheld Night Shot] (Scene Guide Mode)
• [Impressive Art], [Toy Effect], [Toy Pop] (Creative Control Mode) - When recording with [Macro Zoom]
- When [HDR] is set to [ON]
- When [Multi Exp.] is set
- When [iHandheld Night Shot] is set to [ON]
- When [iHDR] is set to [ON]
- When [Quality] is set to RAW, [RAVQ], [ ] RAW
[Digital Zoom]
Recording mode: A A P A S M M SCN COL
You can zoom in up to 4x the original zoom magnification.
Note that, with Digital Zoom, enlarging will decrease picture quality.
MENU → [Rec] / [Motion Picture] → [Digital Zoom]
Settings: [ON] / [OFF]
When [Digital Zoom] is used simultaneously with [i.Zoom], you can increase the combined zoom ratio up to 4x.
When using [Digital Zoom], we recommend using a tripod and the self-timer ( 137) for taking pictures.
The AF area is largely displayed at the center in the Digital Zoom range.
This function is not available in the following cases:
- When [Monitor Display Speed] is set to [ECO 30fps] (setting at the time of purchase)
- When [EVF Display Speed] is set to [ECO 30fps]
• [Handheld Night Shot] (Scene Guide Mode)
• [Impressive Art], [Toy Effect], [Toy Pop], [Miniature Effect] (Creative Control Mode) - When recording using [Post Focus]
- When recording with [High Speed Video]
- When [HDR] is set to [ON]
- When [Multi Exp.] is set
- When [Quality] is set to RAW, [RAWQ]. [ ] RAW
The illustration is an example of when using Optical Zoom, [i.Zoom], and [Digital Zoom] in Program AE Mode.
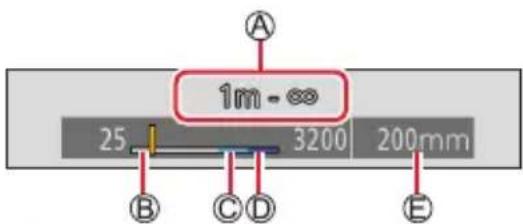
Ⓐ Focus range
© Optical Zoom range
© i.Zoom range
D Digital Zoom range
Current zoom position (Focal lengths the same as those of a 35 mm film camera)
Using the zoom by performing touch operations (Touch zoom)
1 Touch [◀]
2 Touch [T]
• The slide bar is displayed.
3 Perform zoom operations by dragging the slide bar
- The zoom speed varies depending on the touched position.
| [▼]/[ ]Slow zooming | |
| [▼]/[▲] | Fast zooming |
- Touch [↓] again to end touch zoom operations.
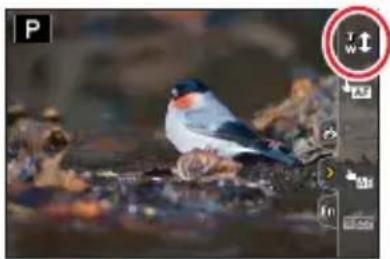
natural_image
Close-up photo of a small bat perched on rocky ground with blurred background (no text or symbols visible)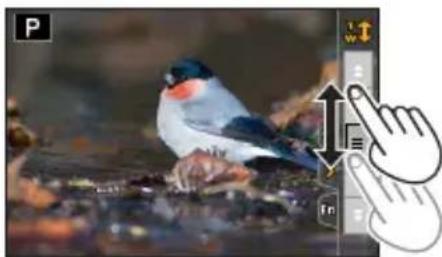
natural_image
Close-up photo of a small bird perched on water, with a finger cursor overlaying the image (no text or symbols visible)Taking pictures with flash
Recording mode: A A P A S M M SCN COL
Open/Close the built-in flash
A To open the flash
Slide the flash open lever.
- Be careful when opening the flash as the flash will jump out.
B To close the flash
Press the flash until it clicks.
- Be careful not to catch a finger or any other part of your body or any object when you close the flash.
- Forcibly closing the flash can damage the camera.
- Be sure to close the built-in flash when not in use.
- The flash setting is fixed to ⏻] (Forced Flash Off) while the flash is closed.
A
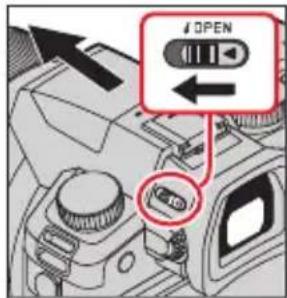
B
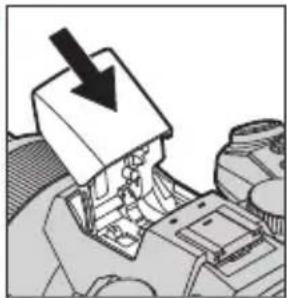
natural_image
Mechanical assembly diagram showing a component with a black arrow pointing to a top part (no text or symbols present)The available flash range
Edges of a picture may become slightly dark if using flash at short distances without using zoom (close to max. Wide). This may be remedied by zooming in a little.
| Max. Wide Max. Tele | |
| Approx. 0.3 m - 13.5 m (0.98 feet - 44 feet) | Approx. 1.0 m - 9.5 m (3.3 feet - 31 feet) |
• These ranges are obtained, the ISO sensitivity is set to [AUTO], and [ISO Auto Upper Limit (Photo)] is set to [AUTO].

Using the flash skillfully
When taking pictures with flash with the lens hood attached, the lower portion of the photo may turn dark and the control of the flash may be disabled because the photo flash may be obscured by the lens hood. We recommend detaching the lens hood.
Avoid doing the following, as the heat or light could cause deformation or discoloration.
- Putting the flash close to objects
• Covering the flash with your hand as it is firing - Closing the flash as it is firing
Do not close the flash immediately after the preliminary flash is operated prior to taking pictures for Forced ON/Red-Eye Reduction and other flash settings. If you close the flash immediately, it will cause a malfunction.
Flash charging may take time if battery is low or if using flash repeatedly. When the flash is being charged, the flash icon flashes red, and you cannot take a picture even when you fully press the shutter button.
Setting the flash functions
Changing the firing mode (Manual flash)
Recording mode: A A P A S M M SCN COL
You can select whether the flash output is set automatically or manually. This item is available only when the built-in flash is being used.
| MENU → [Rec] → [Flash] → [Firing Mode] | |
| [TTL] The camera automatically sets the flash output. | |
| [MANUAL] | You can set the flash ratio manually. Even in the case of dark scenes where the flash output tends to be higher in [TTL], this mode allows you to take a picture as intended. The flash ratio (such as [1/1]) is displayed on the flash icon. |
Setting the flash ratio (When [MANUAL] is selected)
MENU → [Rec] → [Flash] → [Manual Flash Adjust.]
① Press ◀▶ to select an item and press [MENU/SET]
- You can set the flash ratio from [1/1] (flash firing full power) to [1/128] in 1/3 steps.
Changing Flash Mode
Recording mode: A P A S M M SCN COL
Set the flash to match the recording.
MENU → [Rec] → [Flash] → [Flash Mode]
| [8058] : [Forced Flash On] | The flash is activated every time regardless of the recording conditions. |
| [81GK] : [Forced On/Red-Eye]*1 | • Use this when your subject is back-lit or under fluorescent light. |
![LEICA V-LUX 5 - MENU → [Rec] → [Flash] → [Flash Mode] - 1](/content/2026/05/882858/images/f268989767129ad6e2db983bb5b6e974bd5cedc815fa178e45a49fd202a64c2d.jpg) : [Slow Sync.] : [Slow Sync.] | Takes brighter pictures such as pictures of subjects against a nightscape by decreasing the shutter speed when firing a flash. |
![LEICA V-LUX 5 - MENU → [Rec] → [Flash] → [Flash Mode] - 2](/content/2026/05/882858/images/37bf864218850a40f1e3b85d0096633f7ed8ee15a247ca4001d2bb93078ccb57.jpg) : [Slow Sync./Red-Eye]*1 : [Slow Sync./Red-Eye]*1 | • Ideal for taking pictures of people against a nightscape. • Using a slower speed can cause motion blur. We recommend using a tripod. |
![LEICA V-LUX 5 - MENU → [Rec] → [Flash] → [Flash Mode] - 3](/content/2026/05/882858/images/c3069daff638d777c331fd39654bfb0790826cae227428d5a1cd0dcde8db409c.jpg) : Forced Flash Off : Forced Flash Off | Always takes pictures without flash under all recording conditions. • Ideal for taking pictures where the use of flash is prohibited. |
*1 This is available only when [Firing Mode] is set to [TTL]
- In Snapshot Plus Mode, the setting items are [A] and [③] For details about flash settings in Snapshot Mode ([ A] or [ ] A refer to (→58).
The flash is activated twice. The interval between the first and second flash is longer when [∅] or [ ] is set. The subject should not move until the second flash is activated.
- The red-eye reduction effect varies depending on the subject and is affected by factors such as distance from the subject and whether the subject is looking at the camera during the preliminary flash. In some cases, red-eye reduction may be negligible.
Setting the flash functions
Shutter speeds for each flash mode
| Flash Mode | Shutter speed (seconds) |
| 1/60*2- 1/4000 | |
| Flash Mode | Shutter speed (seconds) |
| +S | 1 - 1/4000 |
| +S◎ |
*2 The shutter speed is set to 60 seconds in Shutter-Priority AE Mode. The shutter speed is set to B (Bulb) in Manual Exposure Mode.
- In Snapshot Mode (A) or [ A] shutter speed changes depending on the detected scene.
Flash settings for each Recording mode (○: Available, –: Not available)
| Recording mode | ↓ | ↓◎ | ↓S | ↓S◎ | ↓ | |
| P A | Program AE Mode | ○ ○ | ○ ○ | ○ | ||
| S M | Shutter-Priority AE Mode | ○ ○ | -- ○ | |||
| Manual Exposure Mode | ||||||
| SCN Scene Guide Mode(●: Default settings) | [Clear Portrait] ○ ● -- ○ | |||||
| [Silky Skin] ○ ● -- ○ | ||||||
| [Clear in Backlight] ● -- - ○ | ||||||
| [Sweet Child's Face] ○ ● -- ○ | ||||||
| [Clear Night Portrait] -- - ● ○ | ||||||
| [Soft Image of a Flower] | ● -- - ○ | |||||
| [Appetizing Food] | ● -- - ○ | |||||
| [Cute Dessert] | ● -- - ○ | |||||
| [Freeze Animal Motion] | ● | - | - | - | ○ | |
| [Clear Sports Shot] | ● -- - ○ | |||||
| [Monochrome] | ● ○ | ○ ○ | ○ | |||
The flash is fixed to [④] (Forced Flash Off) in the following cases:
• [Backlit Softness], [Relaxing Tone], [Distinct Scenery], [Bright Blue Sky], [Romantic Sunset Glow], [Vivid Sunset Glow], [Glistening Water], [Clear Nightscape], [Cool Night Sky], [Warm Glowing Nightscape], [Artistic Nightscape], [Glittering Illuminations], [Handheld Night Shot] (Scene Guide Mode)
• During video recording
- When recording 4K photos
- When recording using [Post Focus]
- When using the electronic shutter
- When [HDR] is set to [ON]
- When [Silent Mode] is set to [ON]
- When a picture effect in [Filter Effect] of [Filter Settings] is set
The Scene Guide Mode flash setting is returned to the initial value with each change of scene.
Setting the 2nd curtain sync
Recording mode: A A P A S M M SCN COL
2nd curtain sync is a recording method in which the flash fires just before the shutter closes when you take a picture of a moving subject (such as a car) using the flash with a slow shutter speed.
MENU → [Rec] → [Flash] → [Flash Synchro]
[1ST] 1st curtain sync is the normal recording method when using the flash.
![LEICA V-LUX 5 - MENU → [Rec] → [Flash] → [Flash Synchro] - 1](/content/2026/05/882858/images/b54230d51a6139b04261fbc22d35dac105faba031c280a42eeee619a971f18cb.jpg)
natural_image
Side view of a silver sedan parked indoors (no visible text or symbols)[2ND] The light source is captured in back of the subject and this produces a picture that is vibrant and lively.
![LEICA V-LUX 5 - MENU → [Rec] → [Flash] → [Flash Synchro] - 2](/content/2026/05/882858/images/6e25bc7fe549bcc5a28bea025ec66a271d324af6e8a3f55b7ef5341cc5dd4d15.jpg)
natural_image
Side view of a silver sedan parked in a garage (no visible text or symbols)If you set to [2ND], [2nd] will be displayed in the flash icon on the screen.
When a fast shutter speed is set, the [Flash Synchro] effect may not be sufficiently achieved.
When [2ND] is set, you cannot set the flash setting to [ ] or [ ].
Setting the flash functions
Adjusting the flash output
Recording mode: A A P A S M M □ SCN COL
Adjust the flash output if a picture taken using the flash is too bright or too dark.
MENU → [Rec] → [Flash] → [Flash Adjust.]
1 Press ◀ to set the flash output and press [MENU/SET]
Settings: -3 EV to +3 EV (unit: 1/3 EV)
When you do not want to adjust the intensity of the flash, select [±0 EV] .
When the intensity of the flash is adjusted, [+] or [-] is displayed on the flash icon.
Synchronizing the flash output with the camera during Exposure Compensation
Recording mode: A A P A S M M SCN COL
The flash output is automatically adjusted in accordance with the exposure compensation value.
MENU → [Rec] → [Flash] → [Auto Exposure Comp.]
Settings: [ON] / [OFF]
About Exposure Compensation ( 106)
Recording Video/4K Video
Recording mode: A A P A S M □ SCN COL
Video and 4K video are recorded in the MP4 format. ( 155) Audio is recorded in stereo.
1 Press the video button to start recording
Ⓐ Recording status indicator
⑧ Elapsed recording time
© Remaining recording time
- Recording of video appropriate for each video mode is possible.
- Press the video button briefly.
- The red recording status indicator lights up while video is recording.
2 Press the video button again to end recording
- With recording in a quiet environment, the sound of aperture, focus and other actions may be recorded in video. This is not a malfunction.
The focus operation during recording of video can be set to [OFF] in [Continuous AF]. ( 156)
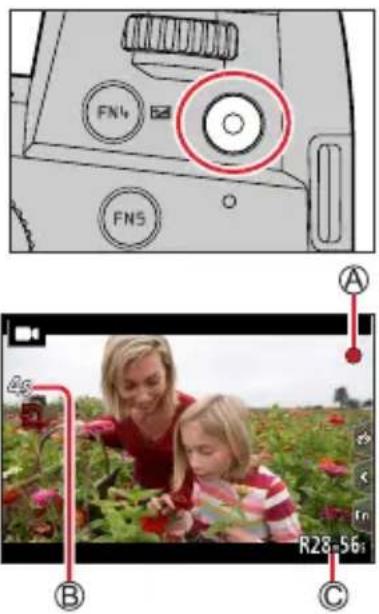

About operation sound when recording ends
If the operation sound of the video button pressed to end recording bothers you, try the following: Record the video about three seconds longer, and then divide the last part of the video using [Video Divide] (→229) in the [Playback] menu.
Recording video in Creative Video Mode
You can record a video by setting the aperture, shutter speed, and ISO sensitivity using touch operation. ( 81)
If the surrounding temperature is high, or a video is recorded continuously, [A] is displayed and recording may be stopped halfway through. Wait until the camera cools down.
Note that if you perform operations such as zoom, using buttons or dials, while recording a video, operation noise may be recorded.
If Extended optical zoom is used before pressing the video button, these settings will be cleared, and the recordable area will be changed significantly.
If the aspect ratio is different for stills and video, the angle of view will change when starting to record a video.
When you set [Rec Area] to [■], the angle of view setting used for recording video is displayed.
The zoom speed will be slower than normal during video recording.
Depending on the type of the card, the card access indication may appear for a while after recording video. This is not a malfunction.
ISO sensitivity is set to [AUTO] (for video) while a video is being recorded. You can set ISO sensitivity and record video in Creative Video Mode.
The below-mentioned video recording modes are set in the following cases:
| Selected Scene Guide Mode | Recording mode at the time of recording video |
| [Clear in Backlight] Portrait Mode | |
| [Clear Nightscape], [Artistic Nightscape], [Handheld Night Shot], [Clear Night Portrait] | Low Light Mode |
This function is not available in the following cases:
• [Glistening Water], [Glittering Illuminations], [Soft Image of a Flower] (Scene Guide Mode)
• [Rough Monochrome], [Silky Monochrome], [Soft Focus], [Star Filter], [Sunshine] (Creative Control Mode)
- When [Post Focus] is set
- When taking pictures with [Time Lapse Shot]
- When taking pictures with [Stop Motion Animation]
Setting the resolution and the frame rate
MENU → Motion Picture] → [Rec Quality]
| [Rec Quality] Picture size Recording frame rate Sensor output Bit rate | ||||||
| [4K/100M/30p]* | 3840×2160 | 30p | 30 fps | 100 Mbps | ||
| [4K/100M/24p]* | 3840×2160 | 24p | 24 fps | 100 Mbps | ||
| [FHD/28M/60p] 19 | 20×1080 | 60p | 60 fps | 28 Mbps | ||
| [FHD/20M/30p] 19 | 20×1080 | 30p | 30 fps | 20 Mbps | ||
| [HD/10M/30p] 1280 | ×720 | 30p | 30 fps | 10 Mbps | ||
* 4K video
- Picture quality increases with increasing bit rates. This camera uses the “VBR” recording method, and the bit rate is changed automatically depending on the subject to record. Therefore, the recording time is shortened when a subject with fast movement is recorded.
- 4K video cannot be set when using [Miniature Effect] (Creative Control Mode).
• To record 4K video, use a UHS Speed Class 3 card.
- When you record 4K video, the angle of view will be narrower than video of other sizes.
- To ensure highly accurate focus, 4K video is recorded at reduced Auto Focus speeds. It may be difficult to focus on the subject with Auto Focus, but this is not a malfunction.
- Limitations on continuous recording ( 27)
■ About the compatibility of the recorded video
Video recorded in [MP4] may be played back with poor picture or sound quality or playback may not be possible even when played back with equipment compatible with these formats. Also, the recording information may not be displayed properly.
- For details on video recorded with [4K/100M/30p] or [4K/100M/24p] in the [MP4] format, refer to “4K video” (→237).
Adjusting the focus while recording video ([Continuous AF])
Recording mode: A P A S M M SCN COL
Focusing varies depending on the setting of focus and the setting of [Continuous AF] in the [Motion Picture] menu.
| MENU → Motion Picture] → [Continuous AF] |
| Focus setting [Continuous AF] Setting | ||
| [AFS]/[AFF]/[AFC] | [ON] | Allow the focus to be constantly adjusted automatically while recording video. |
| [OFF] Fix focus | position at the start of video recording. | |
| [MF] [ON] / [OFF] Allow the focus to be | adjusted manually. | |
When the focus setting is set to [AFS], [AFF], or [AFC], the camera will refocus if the shutter button is pressed halfway while recording video.
When Auto Focus is activated while you are recording video, the focusing operation sound may be recorded under some conditions. If you want to suppress this sound, we recommend taking pictures after setting [Continuous AF] to [OFF].
When using zoom while recording video, it may take some time to focus.
This function is not available in the following cases:
- While [Pull Focus] in [Snap Movie] is in operation.
- When recording with [High Speed Video]
- When recording using [4K Live Cropping]
Taking stills while recording video
Recording mode:

1 Press the shutter button fully while video is recording
- Simultaneous recording indicator is displayed while stills are taken.
• Stills can also be taken via touch function.
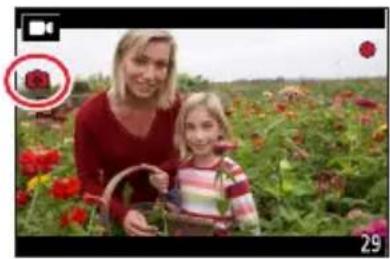
natural_image
Woman and child holding flowers in a field, no visible text or symbolsSetting the video priority or stills priority mode
Recording mode:

MENU

otion Picture] → [Picture Mode in Rec.]
![LEICA V-LUX 5 - otion Picture] → [Picture Mode in Rec.] - 1](/content/2026/05/882858/images/dfe04b4ce9df57f3ac1e87e7e74b1fe01dc132448ce4a0d9fc1d36adf833f198.jpg)
([Video Priority])
- Pictures will be recorded with a picture size determined by the [Rec Quality] setting for video.
- Only JPEG images are recorded when [Quality] is set to [RAW], [RAW]. [RAW]. (When set to [RAW], stills will be recorded in [Quality] of [
- Up to 40 stills can be recorded during recording of the video. (A video with a [Rec Quality] size of [4K]: up to 10 pictures)
![LEICA V-LUX 5 - otion Picture] → [Picture Mode in Rec.] - 2](/content/2026/05/882858/images/3a37f6786eb9913eb3bbb334e2c1588a39a5491e502a2e16d4293056788428ed.jpg)
([Photo Priority])
- Pictures will be recorded with the set picture size and quality.
- The screen will go dark while recording pictures. A still will be recorded in the video during that period, and audio is not recorded.
- Up to 10 stills can be recorded during recording of the video. (A video with a [Rec Quality] size of [4K]: up to 5 pictures)
The aspect ratio of a still is fixed to [16:9].
This function is not available in the following cases:
- When [Rec Quality] is set to video with a frame rate of [24p] (only when [u] ([Photo Priority]) is set)
- When [4K PHOTO] is set (only when [10] ([Photo Priority]) is set)
- When [Snap Movie] is set to [ON]
Recording Snap Movies
Recording mode: A A P A S M □ SCN COL
You can specify the recording time in advance and record video casually like you take snapshots. The function also allows you to shift a focus at the start of recording and add fade in/out effects in advance.
• Video will be recorded with [FHD/20M/30p] in [MP4].
MENU → Motion Picture] → [Snap Movie] → [ON]
- Press the shutter button halfway to exit the menu.
1 Press the video button to start recording
Ⓐ Elapsed recording time
⑧ Set recording time
- Immediately release the video button after pressing it.
- You cannot stop video recording in the middle.
The recording will stop automatically when the set recording time has elapsed.
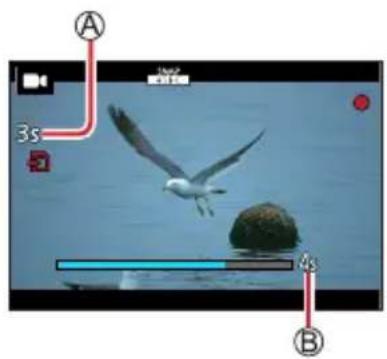
■Reactivating Snap Movie
Set [Snap Movie] to [OFF].
Changing the settings
| MENU → Motion Picture] → [Snap Movie] → [SET] | |
| [Record time] Sets the recording time of video. | |
| [Pull Focus] Allows dramatic imaging expression by shifting focus gradually at the start of recording. (→160) | |
| [Fade] Adds a fade-in (gradual appearance) effect to an image and audio as recording starts or adds a fade-out (gradual disappearance) effect to them as recording ends.[WHITE-IN] / [WHITE-OUT]:Adds a fade-in or fade-out effect that uses a white screen.[BLACK-IN] / [BLACK-OUT]:Adds a fade-in or fade-out effect that uses a black screen.[COLOR-IN] / [COLOR-OUT]:Adds an effect that fades in from black-and-white to color or an effect that fades out from color to black-and-white. Audio will be recorded normally.[OFF] | |
| Video recorded with [WHITE-IN] or [BLACK-IN] are displayed as all-white or all-black thumbnails in Playback Mode.If you assign [Snap Movie] to [Fn Button Set] in [Custom] ([Operation]) menu (→52), you can display a screen that lets you switch [Snap Movie] between [ON]/[OFF] by pressing the assigned function button. If you press [DISP] button while the screen is displayed, you can change the settings for Snap Movie.[Snap Movie] will be set to [OFF] when you connect to Wi-Fi with [Remote Shooting & View].This function is not available in the following cases:[Miniature Effect] (Creative Control Mode)When [4K PHOTO] is setWhen [Post Focus] is setWhen [4K Live Cropping] is setWhen recording with [High Speed Video] |
Setting up [Pull Focus]
Set the frames that specify the positions where the [Pull Focus] starts (first position) and stops (second position).
![LEICA V-LUX 5 - Setting up [Pull Focus] - 1](/content/2026/05/882858/images/9a2708d9b6c5af8d713368e6030c36f6ce3b3aeeb8a3f749c453faa8806bc7b5.jpg)
natural_image
Close-up of a seagull with finger pointing at its beak, overlaid with magnified views of the beak's face (no text or symbols)Touch operation
Touch a subject (first position), drag and drop to the desired location (second position), and release the finger.
- To cancel the frame settings, touch
Button operation
① Press the [button ( )
② Press ▲▼→move the frame, and press [MENU/SET] (First position)
- If you press [DISP] button before pressing [MENU/SET], the frame will return to the center.
③ Repeat step ②(Second position)
• To cancel the frame settings, press [MENU/SET].

A greater effect can be achieved by creating a striking contrast of focus between the start and end positions, for example by shifting focus from the background to foreground, or vice versa.
After setting focus, try to keep the distance between the subject and the camera constant.
When the camera fails to set the frame, it returns to the first position.
When [Pull Focus] is set to [ON]
- Auto Focus Mode will be switched to [icon], a setting specially designed for [Pull Focus].
- If you take a picture, the Auto Focus operation [■] will take place at the first frame position.
When [Metering Mode] is set to [] (Spot), the spot metering target is fixed at the start position (first position) of [Pull Focus].
This function is not available in the following cases:
• In Manual Focus
- When using the Digital Zoom
Viewing your pictures
1 Press the [▶] (Playback) button
![LEICA V-LUX 5 - Press the [▶] (Playback) button - 1](/content/2026/05/882858/images/d58655883fd6c1e1c82e76534c382099423fada1b3341e7d70fe622f7437b975.jpg)
natural_image
Close-up of a computer monitor interface with a play button and circular buttons (no text or symbols visible)2 Press ◀▶ to select a picture to be displayed
- When you press and hold◀, the pictures are displayed one after another.
• Pictures can also be forwarded or rewound by rotating the rear/front dial or dragging the screen horizontally. - You can forward or rewind pictures continuously by keeping your finger on the left or right sides of the screen after forwarding/rewinding a picture. (The pictures are displayed in a reduced size.)
natural_image
Woman lying on a grassy field with trees and flowers, smiling (no text or symbols visible)Ending Playback
Press the [▶] (Playback) button again.
The Playback can also be ended by pressing the shutter button halfway.
The playback screen appears if the camera is turned on while pressing ▶ button. When [Lens Retraction] is set to [ON], the lens barrel is retracted after approx. 15 seconds after the camera is switched to the playback screen from the recording screen.
This camera is compliant with the unified DCF (Design rule for Camera File system) standard formulated by the Japan Electronics and Information Technology Industries Association (JEITA), and with Exif (Exchangeable image file format). Files that are not DCF-compliant cannot be played back.
It may not be possible to properly play back pictures taken using other cameras on this device or it may not be possible to use the functions of this device for those pictures.
Viewing video
This camera was designed to play video in an MP4 format.
• Video is displayed with the video icon 📄].
1 Press ▲ to start playback
Ⓐ Video recording time
- Touch the [▶] in the middle of the screen to play back video.
• Video recorded with [Snap Movie] are played back automatically.
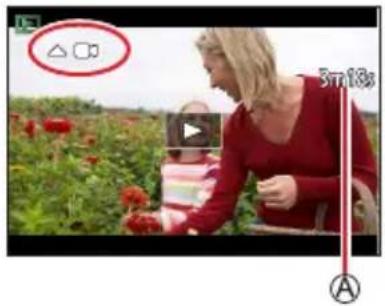
●operations during video playback
| Operation Touch operation Description | ||
| ▲ | ▶/|| | Play / pause |
| Fast rewind* | ||
| Single-frame rewind (while paused) | ||
| Fast forward* | ||
| Single-frame forward (while paused) | ||
| Stop | ||
 |  | Volume up |
 |  | Volume down |
* The fast forward or rewind speed increases if you press ◀▶gain.
●operations during automatic Snap Movie playback
| ▲ | Playback from the beginning |
| ◀ | Returning to the previous picture |
| ▶ | Scrolling to the next picture |
- If you touch the screen, automatic playback will stop.
Video can be viewed on your computer using the software available after registering your camera on the Leica Camera AG home page.
Capturing stills from video
1 Display the picture that you want to capture as a still by pressing ▲to pause a video being played back on the camera
- If you press ▶ while paused, you can make finer adjustments to the positions in a video.
2 Press [MENU/SET]
- The same operation can be performed by touching [+]. - The still is saved with aspect ratio of [16:9] and [Quality] of [+]. The picture size varies depending on the video being played back.
| [Rec Quality] [Picture Size] | |
| [4K] [M] (8M) | |
| [FHD], [HD] [S] (2M) | |
![LEICA V-LUX 5 - Press [MENU/SET] - 1](/content/2026/05/882858/images/f213f89ec9166c3b76590e028ddc12fcb621435ddbab1c0b3dc7153d06e159c2.jpg)
natural_image
A woman and a child standing in a flower field, smiling at the camera (no visible text or symbols)The picture quality becomes slightly lower depending on the [Rec Quality] setting of the original video.
When a still captured from a video is played back, [ ] is displayed.
Switching the playback method
Zooming in and viewing "Playback Zoom"
1 Move the zoom lever toward T side
Ⓐ Current zoom position
• Each time you move the zoom lever toward the T side, the magnification increases through four levels: 1x, 2x, 4x, 8x, and 16x.
| Operation | Touch operation | Description |
 | — | Enlarges/reduces the screen in large steps. |
| — | Pinch out / Pinch in | Enlarges/reduces the screen in small steps. |
 | Drag | Moves the enlarged area (during enlarged display). |
 | — | Forwards/rewinds a picture while maintaining the same zoom magnification and zoom position (during enlarged display). |
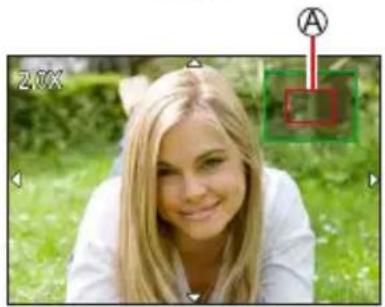
natural_image
Portrait of a smiling woman outdoors with greenery and a red arrow pointing to an area labeled 'A' (no text or symbols on the subject)- You can also zoom in by quickly touching the display twice. (If the display was enlarged, it returns to the same magnification ratio.)
Pictures recorded with [Quality] set to [RAW] can be enlarged up to 8x.
Viewing a list of pictures "Multi Playback"
1 Move the zoom lever toward W side
- Move the zoom lever toward the W side and you can switch the display methods in the following order: 1-picture screen (full-screen) → 12-picture screen → 30-picture screen → Calendar screen. (Move the lever to the T side to return.)
- It is possible to switch the playback screen by touching the following icons.
-[]]: 1-picture screen - [
]: 12-picture screen
- [图标]: 30-picture screen - [
CAL]: Calendar screen (→165)
- The screen can be switched gradually by dragging the screen up or down.
- When you select a picture using the cursor button and press [MENU/SET] on the 12-picture or 30-picture screen, the selected picture is displayed on the 1-picture screen (full-screen). (When you select a video, it is automatically played back.)
Pictures displayed with [!] cannot be played back.
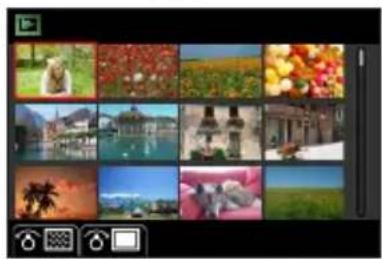
natural_image
Grid of 16 nature and scenic photos including animals, landscapes, and architecture (no text or symbols visible)Viewing pictures by their recording date "Calendar Playback"
1 Move the zoom lever toward the W side to display the calendar screen
2 Use ▲▼ to select recording date and press [MENU/SET]
Ⓐ Selected date
• Pictures are displayed in a 12-picture screen.
- Turn the zoom lever toward the W side to return to the Calendar screen display.
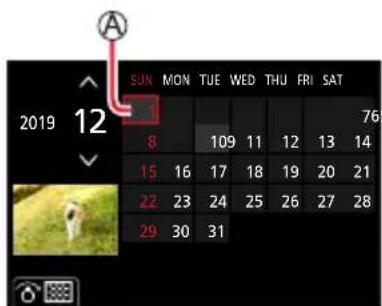
You can display the calendar between January 2000 to December 2099.
Pictures taken without clock settings are displayed with the date 1st January, 2019.
Pictures taken with destination settings made in [World Time] are displayed in the calendar screen using the appropriate date for the destination's time zone.
Viewing group pictures
You can consecutively play back multiple pictures in a group or play back group pictures one by one.
 | Group picture saved using [4K PHOTO Bulk Saving] |
 | Group pictures recorded using Focus Bracket |
 | Group pictures recorded using [Time Lapse Shot] |
 | Group pictures recorded using [Stop Motion Animation] |
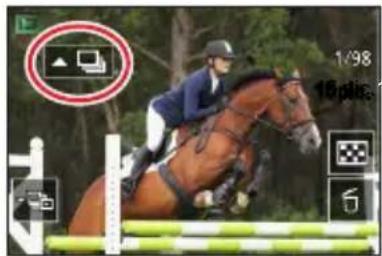
- You can delete or edit pictures in group units. (For example, if you delete one of pictures in a group, all pictures in that group will be deleted.)
Pictures will not be grouped if they are recorded without setting [Clock Set].
Playing back group pictures consecutively
1 Press ▲
- The same operation can be performed by touching the group picture icon ([▲], [▲], [▲]).
- When you play back group pictures one by one, the option settings are displayed.
[From the first picture]: Play back the group pictures consecutively from the first picture in a group.
[From the current picture]: Play back the group pictures consecutively from the picture currently played back.
Operations during continuous playback
| Operation | Touch operation | Description | Operation | Touch operation | Description |
| ▲ |  | Continuous playback / Pause | ▼ |  | Stop |
| ◀ |  | Fast rewind playback Fast forward playba | ▶ | [GHDB] | |
 | Returning to the previous picture (while paused) |  | Scrolling to the next picture (while paused) |
Viewing group pictures
Playing back group pictures one by one
1 Press ▼
- The same operation can be performed by touching [ ] / [ ]
2 Use ◀ to scroll through the pictures
- Pressing▼ again or touching [ ] will return you to the normal playback screen. - You can use the same operations for pictures stored in a group as in normal still playback. (Multi Playback, Playback Zoom, deletion of pictures, etc.)
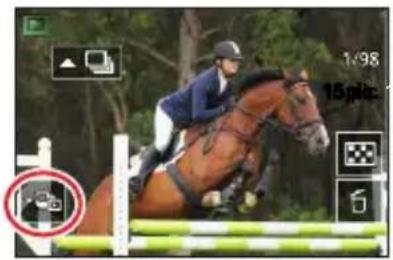
Deleting pictures
Deleted pictures cannot be recovered.
[Delete Single]
1 Press [button to delete displayed picture • The same operation can be performed by touching
2 Use ▲ to select [Delete Single] and press [MENU/SET]
To delete multiple (up to 100 ^* )/To delete all pictures
* A picture group is handled as 1 picture. (All the pictures in the selected picture group are deleted.)
1 Press [icon] button while viewing a picture
2 Use ▲ to select [Delete Multi]/[Delete All] and press [MENU/SET]
- You can select [Delete All Non-rating] in [Delete All] if there are pictures that have been set as [Rating].
(When [Delete Multi] is selected)
3 Use ▲▼ to select picture and press [MENU/SET] (repeat)
Ⓐ Picture selected
- To cancel Press [MENU/SET] again.
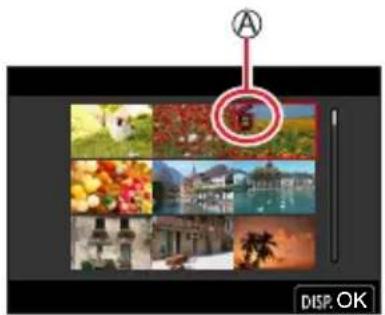
natural_image
Mobile phone screenshot showing a collage of scenic and scenic photos with no visible text or symbols on the images themselves.4 Press the [DISP] button to execute
- May take time depending on number of pictures deleted.
Menu list
Menus to be displayed in each recording mode
A [Snapshot Mode]
• [Snapshot Mode] (→57)
• [iHandheld Night Shot] (→59)
• [iHDR] (→60)
M [Creative Video]
• [Exposure Mode] (→81)
• [High Speed Video] (→82)
• [4K Live Cropping] (→83)
C [Custom Mode]
You can select your preferred custom setting from [Set1], [Set2], and [Set3]. (→86)
[Panorama Shot]
• [Direction] (→70)
• [Picture Size] (→70)
SCN [Scene Guide]
• [Scene Switch] (→72)
[Creative Control]
• [Filter Effect] (→75)
• [Simultaneous Record w/o Filter] ( 75)
[Rec] →170
[Motion Picture] →185
[Custom] →189
[Setup] →204
[My Menu] →214
[Playback] →215
[Rec]
• [Aspect Ratio] ( 170)
• [Picture Size] (→171)
• [Quality] (→171)
• [AFS/AFF*] (→88)
• [AF Sensitivity(Photo)] (→89)
• [Photo Style] (→173)
• [Filter Settings] (→175)
• [Color Space] (→177)
• [Metering Mode] (→177)
• [Highlight Shadow*] (→178)
• [i.Dynamic] (→179)
• i.Resolution*
• [Flash] (→149)
• [Red-Eye Removal] (→179)
• [ISO Auto Upper Limit (Photo)] (→180)
• [Min. Shtr Speed] (→180)
• [Long Shtr NR] (→180)
• [Diffraction Compensation] (→181)
• [Stabilizer] (→141)
• [i.Zoom*] (→144)
• [Digital Zoom] (→145)
• [Burst Rate] (→114)
• [4K PHOTO] (→116)
• [Self Timer] (→137)
• [Time Lapse/Animation] ( 132)
• [Silent Mode] (→181)
• Shutter Type (→182)
• [Bracket] (→138)
• [HDR] (→183)
• [Multi Exp.] (→184)
* Menu items are common for both [Rec] and [Motion Picture] menus. If a setting in one menu is changed, the setting with the same name in other menu will also be changed automatically.
[Aspect Ratio]
Recording mode: A A P A S M ▶ M □ SCN COL
This allows you to select the aspect ratio of the pictures to suit printing or the playback method.
MENU → [Rec] → [Aspect Ratio]
[4:3] Aspect ratio of a 4:3 TV
[3:2] Aspect ratio of standard film cameras
[16:9] Aspect ratio of high-definition TV, etc.
[1:1] Aspect ratio of a square image
[Picture Size]
Recording mode: A A P A S M M SCN COL
The higher the numbers of pixels, the finer the detail of the pictures will appear even when they are printed onto large sheets.
| MENU → iRec] → [Picture Size] | ||||
| [Aspect Ratio] 4:3 3:2 16:9 1:1 | ||||
| [Picture Size] | [L] 17.5M4864×3648 | [L] 20M5472×3648 | [L] 17M5472×3080 | [L] 13.5M3648×3648 |
| [EM] 9M3456×2592 | [EM] 10M3888×2592 | [EM] 8M3840×2160 | [EM] 6.5M2592×2592 | |
| [EX] 4.5M2432×1824 | [EX] 5M2736×1824 | [EX] 2M1920×1080 | [EX] 3.5M1824×1824 | |
The picture size will be fixed to [4K] when recording 4K photos or recording in [Post Focus].
[Quality]
Recording mode: A PASM M SCN COL
This function allows you to select the file format, e.g. JPEG and/or RAW, and in the case of JPEG, the compression rate. RAW is especially suited for the subsequent comprehensive editing of the image data using respective software, which is available after registering your camera on the Leica Camera AG homepage. The JPEG setting [+] delivers higher image quality than [+] due to its lower compression rate, while the latter has the advantage of smaller files.
| MENU → [Rec] → [Quality] |
| Settings File format Description | ||
| JPEG | Gives priority to picture quality and saves pictures in JPEG file format. | |
| Saves pictures in JPEG file format using standard picture quality. This setting is useful when you want to increase the number of recordable pictures without changing the number of pixels. | ||
| [RAW] | RAW + JPEG | Saves pictures in both RAW and JPEG file format ([+] or [+]) simultaneously. |
| [RAW] | ||
| [RAW] RAW | Saves pictures in | RAW file format. |

About the RAW file format
The camera saves data without any picture processing in a RAW format. RAW picture files can be viewed or edited on this camera or on a computer with relevant editing software installed.
- You can develop the RAW file pictures using [RAW Processing] in the [Playback] menu. (→220)
A RAW still is always recorded at [3:2] (5472×3648).
If you delete a picture recorded in [RA] the camera, the corresponding RAW and JPEG pictures are also deleted.
When you play back a picture recorded with [RA] the gray area is displayed according to the aspect ratio of the picture during recording.
The setting is fixed to [■ when recording 4K photos or recording in [Post Focus].
You cannot set to [RA]W■■ orRA[W■]. in the following cases:
• [Handheld Night Shot] (Scene Guide Mode)
[Photo Style]
Recording mode:

You can adjust the colors and picture quality according to the concept of the picture that you want to create.
| MENU → [Rec] / [Motion Picture] → [Photo Style] | ||
| STD. | [Standard] Standard setting. | |
| VIVD | [Vivid] Setting with slightly high contrast and saturation. | |
| NAT | [Natural] Setting with slightly low contrast. | |
| MONO | [Monochrome] | Setting that creates a picture using monochrome shades of gray only, such as black and white. |
| MONO HC | [Monochrome HC] | Setting that creates a monochrome picture using rich shades of gray with deep solid black tones. |
| MONO HC+ | [Monochrome HC+] | Setting that creates a dynamic monochrome picture with emphasized highlights and shadows. |
| SCNY | [Scenery] | Setting that creates a picture using vivid colors for the blue sky and green. |
| PORT | [Portrait] Setting that produces the look of a healthy complexion. | |
| CUST | [Custom] | Setting for using colors and picture quality that were registered in advance. |
| CNED | [Cinelike D] | Setting that gives priority to the dynamic range by using a gamma curve designed to create film-like images. Suited for editing. |
| CNEV | [Cinelike V] | Setting that gives priority to the contrast by using a gamma curve designed to create film-like images. |
In Snapshot Plus Mode:
- Only [Standard] or [Monochrome] can be set.
- The setting resets to [Standard] when the camera is switched to another recording mode or turned on/off.
– Picture quality cannot be adjusted.
Only picture quality adjustment can be set in the Scene Guide Mode. ( 174)
Adjusting the picture quality
① Press ◀▶ select the type of Photo Style
② Press ▲ to select an item and press to adjust
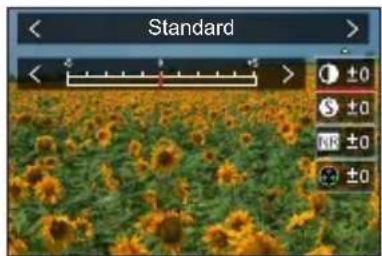
natural_image
Field of sunflowers under 'Standard' lighting control panel (no text or symbols on field)| [Contrast] | [+] Increases the contrast in a picture. | |
| [-] Decreases the contrast in a picture. | ||
| [Sharpness] | [+] Enhances the outlines in a picture. | |
| [-] Softens the outlines in a picture. | ||
| [Noise Reduction] | [+] | Increases the noise reduction effect to reduce noise.This setting may slightly lower the resolution. |
| [-] | Lowers the noise reduction effect to achieve a picture quality with clearer resolution. | |
| [Saturation]*1 | [+] Gaudy coloring | |
| [-] Subdued coloring | ||
| [Color Tone]*1 | [+] Bluish coloring | |
| [-] Yellow wish coloring | ||
| [Filter Effect]*2 | [Yellow] | Enhances the contrast of a subject. (Effect: Low)Records a blue sky clearly. |
| [Orange] | Enhances the contrast of a subject. (Effect: Medium)Records a blue sky with vibrant colors. | |
| [Red] | Enhances the contrast of a subject. (Effect: High)Records a blue sky with even more vibrant colors. | |
| [Green] | Applies subdued coloring for the skin and lips of a person. Emphasizes green leaves and makes them brighter. | |
| [Off] — | ||
| [Grain Effect]*2 | [Low]/ [Standard]/ [High] | Sets the graininess in a picture. |
| [Off] — | ||
*1 [Color Tone] is displayed only when [Monochrome], [Monochrome HC] or [Monochrome HC+] is selected. Otherwise, [Saturation] is displayed.
*2 Displayed only when [Monochrome], [Monochrome HC] or [Monochrome HC+] is selected.
- When the picture quality is adjusted, [+] will be displayed in the [Photo Style] icon.
③ Press [MENU/SET]
Registering the setting for the adjusted picture quality to [Custom]
① Perform the picture quality adjustment in Step ② of "Adjusting the picture quality" and press the [DISP] button
The [Grain Effect] setting is not applied to the recording screen.
[Grain Effect] is not available in the following cases.
- Panorama Shot Mode
- When recording video
- When recording 4K photos
- When recording using [Post Focus]
[Filter Settings]
Recording mode: A A P A S M M SCN COL
You can apply picture effects (filters) that are available for Creative Control Mode to images in other modes, such as Aperture-Priority AE Mode or Panorama Shot Mode. (→75)
MENU → [Rec] / ■ [Motion Picture] → [Filter Settings] → [Filter Effect]
Settings: [ON] / [OFF] / [SET]
With touch screen operations
① Touch [ ]
② Touch the item you want to set
[∅] : Picture effects ON or OFF
[EXPS: Picture effects (Filter)
[ ] : Adjusting the picture effect
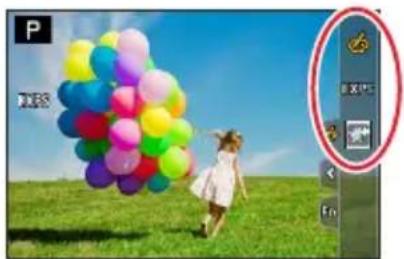
natural_image
Child walking on a grassy field holding a large colorful balloon, with a blue sky and camera interface panel visible (no text or symbols on main image)[Rough Monochrome], [Silky Monochrome], [Soft Focus], [Star Filter] and [Sunshine] are not available in the following cases.
- Creative Video Mode
• During video recording
The following functions are not available in Panorama Shot Mode.
– [Toy Effect], [Toy Pop], [Miniature Effect], [Sunshine]
When recording panorama pictures, the following effects are not applied to the recording screen.
– [Rough Monochrome], [Silky Monochrome], [Soft Focus], [Star Filter]
When recording a panorama picture in a scene with low brightness, you may not be able to achieve the desired results if [High Key] is used in the Panorama Shot Mode.
The available ISO sensitivity settings will be limited up to [3200].
The ISO sensitivity for [High Dynamic] will be fixed to [AUTO].
When using [Filter Effect], you cannot use menus or recording functions which are not available in Creative Control Mode.
This function is not available in the following cases:
- When recording with [High Speed Video]
- When recording using [4K Live Cropping]
Taking two stills with and without picture effects
([Simultaneous Record w/o Filter])
You can take two stills at the same time by pressing the shutter button once; one with effects and one without effects.
MENU → Rec] / [Motion Picture] → [Filter Settings]
→ [Simultaneous Record w/o Filter]
Settings: [ON] / [OFF]
- The camera will take a still with the effects applied and then a still without the effects.
• After taking the picture, [Auto Review] will display only the still with the effects applied.
This function is not available in the following cases:
- Panorama Shot Mode
- When using [Burst]
- When recording 4K photos
- When recording using [Post Focus]
- Taking stills while a video is being recorded (only when [1, 1] ([Video Priority]) is set)
- When [Quality] is set to RAW, [RAW] or [ ] RAW
- When recording using [Bracket]
- When using [Time Lapse Shot]
- When using [Stop Motion Animation]
[Color Space]
Recording mode: A P A S M M SCN COL
You can set the method for reproducing the colors to correctly display the recorded pictures on the screens of a PC or printer, etc.
| MENU → [Rec] → [Color Space] |
| [sRGB] Sets the | sRGB color space. This setting is widely used for devices such as PCs. |
| [AdobeRGB] | Sets the AdobeRGB color space.AdobeRGB color space has a wider color reproduction range than sRGB color space. Therefore, AdobeRGB color space is mainly used for business applications such as commercial printing. |
Select [sRGB] if you do not have expert knowledge about AdobeRGB color space. The setting is fixed to [sRGB] while recording video, recording 4K photos, or recording in [Post Focus].
[Metering Mode]
Recording mode: A A P A S M M SCN COL
You can change the metering method used for measuring brightness.
| MENU → [Rec] / [Motion Picture] → [Metering Mode] |
| [Metering Mode] Brightness measurement position Conditions | ||
| (Multiple) | Whole screen | Normal usage (produces balanced pictures) |
| (Center weighted) | Center and surrounding area Subject in center | |
| (Spot) | Center of [+] (spot metering target) 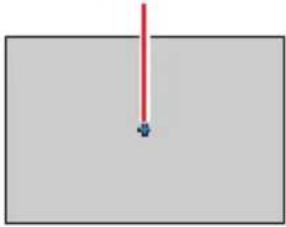 | Great difference between brightness of subject and background (e.g. person in spotlight on stage, backlighting) |
If you set the spot metering target on the edge of the screen, the metering may be affected by the brightness around the location.
[Highlight Shadow]
Recording mode:

You can adjust the highlights and shadows in a picture while confirming the brightness of these areas on the screen.
1 Set the menu
| MENU → [Rec] / [Motion Picture] → [Highlight Shadow] | |
| ☐ ([Standard]) No adjustments. | |
| ☐ ([Higher contrast]) | Makes the highlighted areas brighter and shadowed areas darker. |
| ☐ ([Lower contrast]) | Makes the highlighted areas darker and shadowed areas brighter. |
| ☐ ([Brighten shadows]) Makes the shadowed areas brighter. | |
| ☐ / ☐ (Custom) | You can set a custom registration shape. |
2 Turn the front dial to adjust the brightness of the highlighted areas and turn the rear dial to adjust the brightness of the shadowed areas
Ⓐ Highlighted area
⑧ Shadowed area
© Preview display
- Adjustments can also be made by dragging the graph.
• To register your preferred settings, press to select the registration target icon (Custom 1, Custom 2, and Custom 3).
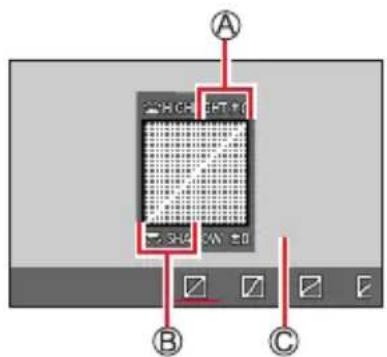
3 Press [MENU/SET]
You can press the [DISP] button on the brightness adjustment screen to switch the screen display.
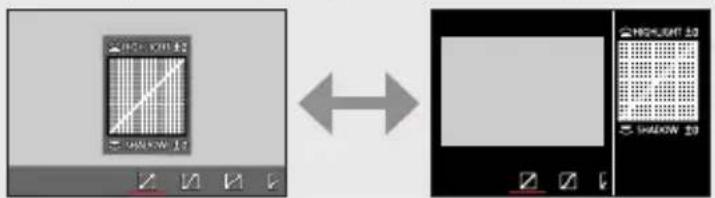
The settings adjusted in [☐], [☑], [☐], or [☐] will be restored to the default settings when the camera is turned off.
[i.Dynamic]
Recording mode: A A P A S M M SCN COL
Automatically adjusts contrast and exposure to give more lifelike colors when there is significant contrast between background and subject.
MENU → [Rec] / [Motion Picture] → [i.Dynamic]
Settings: [AUTO] / [HIGH] / [STANDARD] / [LOW] / [OFF]
You may not see the effect depending on the recording conditions.
This function is not available in the following cases:
- When [HDR] is set to [ON]
- When [Sensitivity] is set to [H.16000], [H.20000] or [H.25000]
[i.Resolution]
Recording mode: A A P A S M M SCN COL
You can use the camera's Intelligent Resolution technology to record stills with sharper outlines and clearer resolution.
MENU → [Rec] / [Motion Picture] → [i.Resolution]
Settings: [HIGH] / [STANDARD] / [LOW] / [OFF]
[Red-Eye Removal]
Recording mode: A A P A S M M SCN COL
Automatically detects red-eye and corrects still data when recording with flash red-eye reduction ([#or [ ])
MENU → [Rec] → [Red-Eye Removal]
Settings: [ON] / [OFF]
When this function is set to [ON], the flash icon changes to [☐]. Depending on the circumstance, it may not be possible to correct red-eye.
[ISO Auto Upper Limit (Photo)]
Recording mode: A A P A S M ▶M □SCN COL
You can set the upper limit of ISO sensitivity when ISO sensitivity is set to [AUTO] or [B] _so
MENU → [Rec] → [ISO Auto Upper Limit (Photo)]
Settings: [AUTO] / [200] / [400] / [800] / [1600] / [3200] / [6400] / [12500]
[ISO Auto Upper Limit (Photo)] cannot be set in the following cases:
- [Clear Nightscape], [Cool Night Sky], [Warm Glowing Nightscape], [Handheld Night Shot] (Scene Guide Mode)
[Min. Shtr Speed]
Recording mode: A A P A S M ▶ M □ SCN COL
Sets the minimum value for the shutter speed to be used when ISO sensitivity is set to [AUTO] or [B]so
MENU → [Rec] → [Min. Shtr Speed]
Settings: [AUTO] / [1/16000] to [1/1]
The shutter speed may be slower than the setting value under recording conditions in which the correct exposure is not achieved.
[Long Shtr NR]
Recording mode: A A P A S M M □ SCN COL
The camera can automatically eliminate the noise made when taking pictures with a slower shutter speed (e.g. to record night scenes).
MENU → [Rec] → [Long Shtr NR]
Settings: [ON] / [OFF]
While the camera eliminates the noise, [Long shutter noise reduction ongoing] is displayed for the same period as the shutter speed for the signal processing time.
This function is not available in the following cases:
• During video recording
- When recording 4K photos
- When recording using [Post Focus]
- When using the electronic shutter
[Diffraction Compensation]
Recording mode: A A P A S M M SCN COL
The camera raises the resolution by correcting the blurriness caused by diffraction when the aperture is closed.
MENU → [Rec] / [Motion Picture] → [Diffraction Compensation]
Settings: [AUTO] / [OFF]
Noise in the periphery of the picture may stand out with higher ISO sensitivity.
[Silent Mode]
Recording mode: A A P A S M ▶ M □ SCN COL
Disabling the beeps and flash at the same time.
MENU → [Rec] → [Silent Mode]
Settings: [ON] / [OFF]
- This mode will mute sounds from the speaker and disable the flash and AF Assist Lamp.
The settings for the following functions are fixed:
- [Flash Mode]: [Forced Flash Off]
- [Beep Volume] (Off)
Even when this mode is set to [ON], the following lamps/indicators will light or flash.
- Self-timer indicator
- WIRELESS connection lamp
The operation sounds of this camera such as the lens aperture sound are not muted.
[Shutter Type]
Recording mode:

You can take pictures using two types of shutter modes: the mechanical shutter and electronic shutter.
| Mechanical shutter Electronic shutter | ||
| Flash ○ - | ||
| Shutter Speed(seconds) | B (Bulb)*1,60 - 1/4000 | 1 - 1/16000 |
| Shutter sound | Mechanical shutter sound+Electronic shutter sound*2 | Electronic shutter sound*2 |
*1 This setting is available only in Manual Exposure Mode.
*2 You can use Shutter Vol. and [Shutter Tone] to adjust the volume of the electronic shutter sound. (→206)
MENU → [Rec] → [Shutter Type]
| [AUTO] | The shutter mode automatically switches based on the recording conditions and shutter speed.• The mechanical shutter mode has higher priority over the electronic shutter mode because the mechanical shutter has less function-related restrictions when recording with a flash, etc. |
| [MSHTR] Uses only the mechanical shutter mode to take a picture. | |
| [ESHTR] Uses only the electronic shutter mode to take a picture. | |
When [E] is displayed on the screen, recording is performed with an electronic shutter.
If you take a picture of a moving subject using the electronic shutter, the subject in the picture may be skewed in some cases.
When you take a picture under a fluorescent or LED lighting fixture using the electronic shutter, the recorded picture may have horizontal stripes. If you use a slower shutter speed, the horizontal stripes may be reduced.
[HDR]
Recording mode: A A P A S M M SCN COL
The camera can combine 3 stills taken at different exposures into a single properly exposed picture with rich gradation. The individual pictures used to create the HDR picture are not saved. You can minimize the loss of gradations in bright areas and dark areas when, for example, the contrast between the background and the subject is large. A combined HDR picture is saved in JPEG format.
MENU → [Rec] → [HDR]
Settings: [ON] / [OFF] / [SET]
Changing the settings
| [Dynamic Range] | [AUTO]: Takes pictures after automatically setting the adjustment range of the exposure based on the contrast of a subject.[±1EV] / [±2EV] / [±3EV]: Takes pictures using the adjustment range of the exposure being set. |
| [Auto Align] | [ON]: Automatically adjusts the displacement of pictures caused by jitter, etc. We recommend using this setting to take pictures with a handheld camera.[OFF]: Does not adjust the displacement of pictures. We recommend using this setting when you use a tripod. |
After the shutter button has been pressed, do not move the camera during the burst operation.
Since a burst of stills are combined after they have been recorded, it will be a few moments before you will be able to record another picture.
A subject that was in motion when it was recorded may be recorded as an afterimage.
When [Auto Align] is set to [ON], the angle of view narrows slightly.
When you take pictures using a flash, the flash mode is fixed to [④(Forced Flash Off).
This function will not work for stills while video is being recorded.
This function is not available in the following cases:
- When using [Burst]
- When recording 4K photos
- When recording using [Post Focus]
- When recording using [Bracket]
- When [Quality] is set to RAW, [RAVQ]. [ ] RAW
- When using [Time Lapse Shot]
- When [Auto Shooting] of [Stop Motion Animation] is set to [ON]
[Multi Exp.]
Recording mode: A A P A S M M SCN COL
You can create an effect similar to the operation of up to four times of exposure on a single picture.
MENU → [Rec] → [Multi Exp.]
1 Press ▲ to select [Start] and press [MENU/SET]
2 Decide on your composition and take the first picture
• After recording the first picture, press the shutter button halfway to proceed to the next recording.
- Press ▲ to select the item and press [MENU/SET]. You can perform the following operations.
– [Next]: Proceed to the next recording.
- [Retake]: Delete the result of the last shot and take another picture.
- [Exit]: Exit Multi Exposure and save the picture that was taken.
3 Record the second, third, and fourth pictures
- When you press [FN7] button while taking pictures, the pictures that you took are saved and Multi Exposure is closed.
4 Press ▼ to select [Exit] and press [MENU/SET]
- You can also end the operation by pressing the shutter button halfway.
![LEICA V-LUX 5 - Press ▼ to select [Exit] and press [MENU/SET] - 1](/content/2026/05/882858/images/31354321ba6302ca100821e7508cb7b8f9601f60809facd7964ce2a445987c89.jpg)
natural_image
Close-up of white daffodermis flowers with a black control panel (Next, Retake, Exit) on black background![LEICA V-LUX 5 - Press ▼ to select [Exit] and press [MENU/SET] - 2](/content/2026/05/882858/images/1739e75f4eb4ceec061660c59cb57f683e0e79ceb20e0d05b32d9a0b2595581f.jpg)
natural_image
Close-up of white daffodils with a 'Retake' and 'Exit' buttons overlay (no other text or symbols)Changing the settings
| [Auto Gain] | If you select [OFF], all exposure results are superimposed as they are. Compensate the exposure as necessary, depending on the subject. |
| [Overlay] | If you select [ON], you can apply Multi Exposure to previously recorded pictures. After [Start] is selected, pictures on the card will be displayed. Select a RAW image, and press [MENU/SET] to proceed to recording. |
When you take the second and subsequent pictures, you cannot perform zoom operation.
Information for the picture taken last will be used as recording information of pictures taken using Multi Exposure.
You can perform [Overlay] on RAW file pictures recorded using this camera only.
This function is not available in the following cases:
- When taking pictures with [Time Lapse Shot]
- When taking pictures with [Stop Motion Animation]
[Motion Picture]
• [Rec Quality] ( 155)
• [Snap Movie] ( 158)
• [AFS/AFF*] (→88)
• [Continuous AF] (→156)
• [Photo Style] (→173)
• [Filter Settings*] (→175)
• [Metering Mode] (→177)
• [Highlight Shadow] (→178)
• [i.Dynamic] (→179)
• i.Resolution*
• [ISO Auto Upper Limit (Video)] (→82)
• [Diffraction Compensation] (→181)
- [Stabilizer] ( 141)
• [Flkr Decrease] (→185)
• [Level Shot] (→186)
• [i.Zoom*] (→144)
• [Digital Zoom] (→145)
• [Picture Mode in Rec.] (→157)
• [Sound Rec Level Disp.] (→186)
• [Sound Rec Level Adj.] (→186)
• [Sound Rec Level Limiter] (→187)
• [Wind Noise Canceller] (→187) /
[Wind Cut] ( 187)
• [Zoom Mic] (→188)
* Menu items are common for both [Rec] and [Motion Picture] menus. If a setting in one menu is changed, the setting with the same name in other menu will also be changed automatically.
[Flkr Decrease]
Recording mode: A A P A S M M SCN COL
The shutter speed can be fixed to reduce the flicker or striping in the video.
MENU → Motion Picture] → [Flkr Decrease]
Settings: [1/50] / [1/60] / [1/100] / [1/120] / [OFF]
[Level Shot]
Recording mode: A A P A S M M SCN COL
Level Shot function automatically detects the camera's tilt while recording video, and horizontally corrects the recording video so it will not be tilted.
MENU → Motion Picture → [Level Shot]
Settings: [ON] / [OFF]
If you record while walking, or if the camera's tilt is large, it may not be possible to horizontally correct the video.
The angle of view becomes slightly narrow when video recording starts.
Stills taken while recording video will not be horizontally corrected.
This function is not available in the following cases:
- When recording with [High Speed Video]
- When recording using [4K Live Cropping]
- When [Operation Mode] of [Stabilizer] is set to [OFF]
- When [Rec Quality] is set to [4K/100M/30p] or [4K/100M/24p]
[Sound Rec Level Disp.]
Recording mode: A P A S M M SCN COL
The sound recording level is displayed on the recording screen.
MENU → Motion Picture] → [Sound Rec Level Disp.]
Settings: [ON] / [OFF]
When [Sound Rec Level Limiter] is set to [OFF], [Sound Rec Level Disp.] is fixed to [ON]
[Sound Rec Level Adj.]
Recording mode: A P A S M M □ SCN COL
Adjust the sound input level to 19 different levels (-12 dB to +6 dB).
MENU → Motion Picture] → [Sound Rec Level Adj.]
Displayed dB values are approximate.
[Sound Rec Level Limiter]
Recording mode:

The camera adjusts the sound input level automatically, minimizing the sound distortion (crackling noise) when the volume is too high.
![MENU → [Motion Picture] → [Sound Rec Level Limiter]](/content/2026/05/882858/images/a03bf933675b3df434d08f650382b7ef377f348e71511ea001371fe32071e4cb.jpg)
Settings: [ON] / [OFF]
[Wind Noise Canceller]
Recording mode:

This will reduce the wind noise coming into the built-in microphone while maintaining sound quality.
![MENU → Motion Picture] → [Wind Noise Canceller]](/content/2026/05/882858/images/90f45b5d215fd0ddb00ac47abc363303e42e8c5aeaff0f60b88224fcffeddf10.jpg)
Settings: [HIGH] / [STANDARD] / [OFF]
- [HIGH] effectively reduces the wind noise by minimizing the low-pitched sound when a strong wind is detected.
- [STANDARD] extracts and reduces only the wind noise without deteriorating the sound quality.
You may not see the full effect depending on the recording conditions.
This function works only with the built-in microphone. When an external microphone is connected, [Wind Cut] is displayed.
[Wind Cut]
Recording mode:

The camera will effectively reduce the wind noise when recording sound with an external microphone.

Settings: [HIGH] / [STANDARD] / [LOW] / [OFF]
This item is available only when using an external microphone.
Setting [Wind Cut] may alter the usual sound quality.
While the external microphone is connected, [ ] is displayed on the screen.
When the external microphone is connected, [Sound Rec Level Disp.] ( 186) is automatically set to [ON], and the sound recording level is displayed on the screen.
Menu list
[Zoom Mic]
Recording mode: A P A S M M SCN COL
Coupled to the zoom operation, it will more clearly record far sounds during enlarging image, and surrounding sounds with wide-angle.
MENU → Motion Picture] → [Zoom Mic]
Settings: [ON] / [OFF]
When set to [ON] and performing zoom, the operation sound may be recorded enhanced in accordance with the surrounding sounds. Also, audio recording level will be lower compared to when [OFF]. The stereo effect of the audio is reduced during enlarging image.
[Custom]
![LEICA V-LUX 5 - [Custom] - 1](/content/2026/05/882858/images/e9ac24937f9ed07fc6f14b42c532a0de3cf0a312dee268d6330f8424bd714f0e.jpg)
[Exposure]
• [ISO Increments] (→190)
• [Extended ISO] (→190)
• [Exposure Comp. Reset] (→190)
![LEICA V-LUX 5 - [Exposure] - 1](/content/2026/05/882858/images/2949548fa5d3f747530716962f1a86a11f4397f4459310aa8464aeb69aab9fc7.jpg)
[Focus / Release Shutter]
• [AF/AE Lock] (→105)
• [AF/AE Lock Hold] (→190)
• [Shutter AF] (→190)
• [Half Press Release] (→190)
• [Quick AF] (→190)
• [Eye Sensor AF] (→191)
• [Pinpoint AF Setting] (→191)
• AF Assist Lamp (→191)
• [Direct Focus Area] (→191)
• [Focus/Release Priority] (→192)
• [Focus Switching for Vert / Hor] ( 192)
• [Loop Movement Focus Frame] (→192)
• [AF Area Display] (→192)
• [AF+MF] (→193)
• [MF Assist] (→193)
• [MF Assist Display] (→193)
![LEICA V-LUX 5 - [Focus / Release Shutter] - 1](/content/2026/05/882858/images/d1cdad76a9310c33da0f195f8bb7d6792e9dd87a2412ebb52bfd0f495b516878.jpg)
[Operation]
• [Fn Button Set] ( 52)
• [ISO Displayed Setting] (→193)
• [Exposure Comp. Disp. Setting] (→194)
• [Q.MENU] (→51)
• [Dial Set.] (→40)
• [Control Ring] (→41)
• [Operation Lock Setting] (→194)
• [Video Button] (→194)
• [Touch Settings] (→194)
• [Zoom lever] (→195)
• [Zoom Compose Assist] (→36)
![LEICA V-LUX 5 - [Operation] - 1](/content/2026/05/882858/images/223fefdad7412adf6472464e28ab82f6babbba6e03c94da65361868d2412724e.jpg)
[Monitor / Display]
• [Auto Review] (→195)
• [Monochrome Live View] (→196)
• [Constant Preview] ( 196)
• [Peaking] (→196)
• [Histogram] (→197)
• [Guide Line] (→197)
• [Center Marker] (→197)
• [Highlight] (→198)
• [Zebra Pattern] (→198)
• [Expo.Meter] (→199)
• [MF Guide] (→199)
• [EVF/Monitor Disp. Set] (→42)
• [Monitor Info. Disp.] (→43)
• [Rec Area] (→199)
• [Remaining Disp.] (→199)
• [Menu Guide] (→199)
![LEICA V-LUX 5 - [Monitor / Display] - 1](/content/2026/05/882858/images/6ea4ac09384d7dd03bcf4ee1b7898209696a844ba30ee31b4aaa64855cf32642.jpg)
[Lens / Others]
• [Lens Position Resume] (→200)
• [Lens Retraction] (→200)
• [Face Recog.] (→200)
• [Profile Setup] (→203)
MENU → [Custom] → [Exposure]
[ISO Increments]
You can change the setting to increase ISO sensitivity by 1 EV or 1/3 EV.
[Extended ISO]
You can extend the numeric values that can be set for ISO Sensitivity. ( 107)
[Exposure Comp. Reset]
If the recording mode is changed or the camera is turned off, the exposure compensation value setting is reset.
MENU → Custom] → [Focus / Release Shutter]
[AF/AE Lock Hold]
Focus and exposure stays locked even if you press and release the [AE/AF LOCK] button (or the function button where [AF/AE LOCK] is registered). Press the button again to cancel the lock.
[Shutter AF]
Set whether or not the focus is adjusted automatically when the shutter button is pressed halfway.
[Half Press Release]
The shutter will immediately fire when the shutter button is pressed halfway.
[Quick AF]
The focus is automatically adjusted when camera blurring is small even when the shutter button is not pressed. (Increases battery consumption.)
This function is not available in the following cases:
- Preview Mode
- When the lighting is low
MENU → Custom] → [Focus / Release Shutter]
[Eye Sensor AF]
Adjusts the focus automatically when the eye sensor is activated.
[Eye Sensor AF] may not work when the lighting is low.
[Pinpoint AF Setting]
| [Pinpoint AF Time] | Sets the time for which the screen is enlarged when the shutter button is pressed halfway with Auto Focus Mode set to [+] . |
| [Pinpoint AF Display] | Sets whether to display the enlarged screen that appears when Auto Focus Mode is set to [+] in a window or full screen. |
[AF Assist Lamp]
Illuminates the AF Assist Lamp when the shutter button is pressed halfway when it is too dark to facilitate focusing.
The AF Assist Lamp has an effective distance of 1.5 m (4.9 feet).
Remove the lens hood.
The setting is fixed to [OFF] in the following cases:
- [Distinct Scenery], [Bright Blue Sky], [Romantic Sunset Glow], [Vivid Sunset Glow], [Glistening Water], [Clear Nightscape], [Cool Night Sky], [Warm Glowing Nightscape], [Artistic Nightscape], [Handheld Night Shot] (Scene Guide Mode)
- When [Silent Mode] is set to [ON]
[Direct Focus Area]
Moves the AF area or MF assist using the cursor button while recording.
When [●], [■], [◆], or [■] is selected, you can move the AF area, when [■] is selected, you can move the lock start position, and when [+] is selected, you can move the focus position.
Perform the setting of functions assigned to the cursor buttons using the Quick menu ( 50) or function buttons ( 52).
[Direct Focus Area] is fixed to [OFF] in the following cases:
• [Glistening Water] (Scene Guide Mode)
- Creative Control Mode
- When recording using [4K Live Cropping]
Menu list
MENU → Custom] → [Focus / Release Shutter]
[Focus/Release Priority]
You can set whether to give higher priority to focusing or shutter release timing when you take pictures using Auto Focus mode.
You can set the priority for each focus mode ([AFS/AFF], [AFC]) separately.
| [FOCUS] No picture is taken unless focusing is achieved. | |
| [BALANCE] | A picture is taken with an appropriate balance between focusing and shutter release timing. |
| [RELEASE] A picture is taken even if the subject is out of focus. | |
[Focus Switching for Vert / Hor]
The camera saves the focus positions of a picture separately when it is recorded by holding the camera vertically and horizontally. The camera saves the following positions of the picture taken the previous time.
- AF area position (When [■], [■] and [+] are set)
- Position displayed by MF Assist
[Loop Movement Focus Frame]
You can move a focus area from one edge to the opposite edge of the screen in a loop when the AF area position or MF Assist area display position is set.
[AF Area Display]
You can perform the AF area display setting when the Auto Focus Mode is set to (49-area-focusing) or Custom Multi.
| [ON] | Displays the AF area on the recording screen.·When the default AF area is selected in [ ][49-area-focusing) or [C1], [C2], or [C3] of Custom Multi-function, the AF area is not displayed. |
| [OFF] | Displays the AF area on the recording screen for only a few seconds after the AF area is set. |
The [ON] setting operates as [OFF] in the following cases.
- When recording video
- Creative Video Mode
- When recording 4K photos
Menu list
MENU → Custom] → [Focus / Release Shutter]
[AF+MF]
You can manually perform fine focusing during AF Lock (pressing the shutter button halfway when the focus mode is set to [AFS] or setting AF Lock using the [AF/AE LOCK]).
[MF Assist]
Sets the display method of MF Assist (enlarged screen).
| The screen is enlarged by rotating the control ring or by pressing [button ( ). | |
| The screen is enlarged by rotating the control ring. | |
| The screen is enlarged by pressing [button ( ). | |
| [OFF] The screen will not be enlarged. | |
MF Assist is not displayed in the following cases:
• During video recording
- When recording with [1] ([4K Pre-Burst]) of the 4K Photo function
- When using the Digital Zoom
[MF Assist Display]
Sets whether to display the MF Assist (enlarged screen) in a window or full screen.
MENU → [Custom] → [Operation]
[ISO Displayed Setting]
[Front/Rear Dials]
Set a function to assign to the dials on the ISO sensitivity setting screen.
![LEICA V-LUX 5 - [Front/Rear Dials] - 1](/content/2026/05/882858/images/28aa237f8f4b357e7d96f55bb1ce9c3b3d272b33f5d8d9bd56d36bcba013490e.jpg)
![LEICA V-LUX 5 - [Front/Rear Dials] - 2](/content/2026/05/882858/images/a46a04a31dbff4443558ca546bd98f5ff77c7d53fdd65365e47bac583da5d39e.jpg)
![LEICA V-LUX 5 - [Front/Rear Dials] - 3](/content/2026/05/882858/images/792332157fd0eab3505bbf113aba43f26cd876bbe4d8dcb6562d0396b3d79429.jpg)
![LEICA V-LUX 5 - [Front/Rear Dials] - 4](/content/2026/05/882858/images/7b19be2f4e3801d08ccf992aec4b1e435f13e7b621a43a9e513984ef029d1194.jpg)
![LEICA V-LUX 5 - [Front/Rear Dials] - 5](/content/2026/05/882858/images/3e36c6b289c6d714edaa677da692acbf56ee1df4ef2f2a32b5624bed80023f64.jpg)
MENU → [Custom] → [Operation]
[Exposure Comp. Disp. Setting]
[Cursor Buttons (Up/Down)]
Set a function to assign to ▲▼on the exposure compensation screen.
Settings:[ ] Exposure Bracket] / [OFF]
[Front/Rear Dials]
Set a function to assign to the dials on the exposure compensation screen.
![LEICA V-LUX 5 - [Front/Rear Dials] - 1](/content/2026/05/882858/images/3cfa3923acc910b291ccee81399d6d5cca0b1fe8cfd77aa57742c0221c172278.jpg)
![LEICA V-LUX 5 - [Front/Rear Dials] - 2](/content/2026/05/882858/images/8b6da8e383c5f7bf6a0e5e6ef59e2214f478ac780e2b955c112b3e793d39b94d.jpg)
![LEICA V-LUX 5 - [Front/Rear Dials] - 3](/content/2026/05/882858/images/5df1243e8a9e65d752b275bee8a9008ab46e9c2a835f08e5f9047e14f6f8510d.jpg)
![LEICA V-LUX 5 - [Front/Rear Dials] - 4](/content/2026/05/882858/images/db2a26f273ef63dce52a8050a2cc3b55cbbd818c9c641e8d0c54d75be2d244cb.jpg)
![LEICA V-LUX 5 - [Front/Rear Dials] - 5](/content/2026/05/882858/images/b4353dec2f1e35c6daafaa3d9805afe2ba6901dbc3e9028c85f556fc2a9bdd6d.jpg)
[Exposure Comp.]/[Exposure Comp.]
[Flash Adjust.]/[Exposure Comp.]
[OFF]/[Exposure Comp.]
[Exposure Comp.]/[Flash Adjust.]
[Exposure Comp.]/[OFF]
[Operation Lock Setting]
You can set an object for which operation is disabled when [Operation Lock] is assigned to the function button using [Fn Button Set] ( 52) in the [Custom] ([Operation]) menu.
[Cursor] Disables the operation of the cursor button and [MENU/SET] button.
[Touch Screen] Disables the touch operation using the touch panel.
[Dial] Disables the operation of the rear dial, front dial and control ring.
[Video Button]
Enabling/disabling the video button.
[Touch Settings]
Enabling/disabling the touch operation.
| [Touch Screen] All touch operations. | |
| [Touch Tab] | Operations of tabs, such as [◀] displayed on the right side of the screen. |
| [Touch AF] | Operation to optimize the focus [AF] or both the focus and brightness [AF+AE] for a touched subject. |
| [Touch Pad AF] | Operation to move the AF area by touching the monitor when the viewfinder is in use. (→99) |
Menu list
MENU → [Custom] → [Operation]
[Zoom lever]
Changing the zoom operation settings.
| Q (Zoom) | The zoom operates in the normal way. |
| Q (Step Zoom) | Each time zoom is operated, the zoom stops at the position for one of the preset focal lengths.❸ Focus range❹ Current zoom position• This setting does not work when recording video or 4K photos with [][4K Pre-Burst]).![LEICA V-LUX 5 - [Zoom lever] - 1](/content/2026/05/882858/images/708ba6ee360c39441c3d7ec18f1adcd710c1d37a74ef787fc512089f876c18eb.jpg) |
MENU → Custom] → [Monitor / Display]
[Auto Review]
| [Duration Time (photo)] | Set the time to display the pictures you have taken after taking stills. |
| [Duration Time (4K PHOTO)] | Set whether to display the pictures you have taken after recording 4K photos. |
| [Duration Time (Post Focus)] | Set whether to display the pictures you have taken after recording using [Post Focus]. |
| [Playback Operation Priority] | Allows you to switch the playback screen or to delete pictures when the [Auto Review] function is activated. |
When [Duration Time (photo)] is set to [HOLD], pictures are displayed until you press the shutter button halfway. In this case, [Playback Operation Priority] is fixed to [ON].
MENU → [Custom] → [Monitor / Display]
[Monochrome Live View]
You can display the recording screen in black and white.
When using the HDMI output during recording, the image is not displayed in black and white. This does not affect recorded pictures.
[Constant Preview]
You can check the effects of the chosen aperture and shutter speed on the recording screen in Manual Exposure Mode. In [SET], you can set whether or not to use [Constant Preview] on the MF Assist display.
This function is disabled when the flash is used.
[Peaking]
When you perform Manual Focus operation, this function automatically adds color to the portions of the image that are in Focus.
When [Detect Level] in [SET] is set to [HIGH], portions to be highlighted are reduced, allowing you to achieve a more precise focus. Changing the [Detect Level] setting also changes the [Display Color] setting as follows.
![LEICA V-LUX 5 - [Peaking] - 1](/content/2026/05/882858/images/c070e2778a3885f25df227cf747bc7c5e526165dc83f938ff034cc91946074fa.jpg)
other
| [Detect Level] [HIGH] | [LOW] | Color | |---|---|---| | [Blue] | (Light blue) [ ] (Blue) | Blue | | [Yellow] | (Yellow)[ ] (Orange) | Orange | | [Green] | (Yellow Green) | Green | | [Pink] | (Pink)[ ] (Red) | Red | | [White] | (White)[ ] (Gray) | Gray |Each time [PEAK] in [<] is touched, the setting is switched in order of [PEAK L] ([Detect Level]: [LOW]) → [PEAK H] ([Detect Level]: [HIGH]) → [OFF]. This function is not available in the following case: • [Rough Monochrome] (Creative Control Mode)
MENU → Custom] → [Monitor / Display]
[Histogram]
You can display the histogram.
When set to [ON], you can move the display position of the histogram by pressing ▲▼.◀◀
- Direct touch operation is also possible from the recording screen.
Displays distribution of brightness in picture – e.g. if the graph peaks at the right, this means there are several bright areas in the picture. A peak in the center represents correct brightness (correct exposure). This can be used as a reference for exposure correction, etc.
(Example)
![LEICA V-LUX 5 - [Histogram] - 1](/content/2026/05/882858/images/4400cfab099495f93eaf86ddb4d701b7e063f7fae70ee0c8e57aef3c0fab17e7.jpg)
bar
| Time Point | Value | | ---------- | ----- | | 1 | 0 | | 2 | 1 | | 3 | 2 | | 4 | 3 | | 5 | 4 | | 6 | 5 | | 7 | 6 | | 8 | 7 | | 9 | 8 | | 10 | 9 | | 11 | 10 | | 12 | 11 | | 13 | 12 | | 14 | 13 | | 15 | 14 | | 16 | 15 | | 17 | 16 | | 18 | 17 | | 19 | 18 | | 20 | 19 | | 21 | 20 | | 22 | 21 | | 23 | 22 | | 24 | 23 | | 25 | 24 | | 26 | 25 | | 27 | 26 | | 28 | 27 | | 29 | 28 | | 30 | 29 | | 31 | 30 | | 32 | 31 | | 33 | 32 | | 34 | 33 | | 35 | 34 | | 36 | 35 | | 37 | 36 | | 38 | 37 | | 39 | 38 | | 40 | 39 | | 41 | 40 | | 42 | 41 | | 43 | 42 | | 44 | 43 | | 45 | 44 | | 46 | 45 | | 47 | 46 | | 48 | 47 | | 49 | 48 | | 50 | 49 | | 51 | 50 | | 52 | 51 | | 53 | 52 | | 54 | 53 | | 55 | 54 | | 56 | 55 | | 57 | 56 | | 58 | 57 | | 59 | 58 | | 60 | 59 | | 61 | 60 | | 62 | 61 | | 63 | 62 | | 64 | 63 | | 65 | 64 | | 66 | 65 | | 67 | 66 | | 68 | 67 | | 69 | 68 | | 70 | 69 | | 71 | 70 | | 72 | 71 | | 73 | 72 | | 74 | 73 | | 75 | 74 | | 76 | 75 | | 77 | 76 | | 78 | 77 | | 79 | 78 | | 80 | 79 | | 81 | 80 | | 82 | 81 | | 83 | 82 | | 84 | 83 | | 85 | 84 | | 86 | 85 | | 87 | 86 | | 88 | 87 | | 89 | 88 | | 90 | 89 | | 91 | 90 | | 92 | 91 | | 93 | 92 | | 94 | 93 | | 95 | 94 | | 96 | 95 | | 97 | 96 | | 98 | 97 | | 99 | 98 | | Note: The actual values may vary due to the random nature of the data generation. The provided values are just an example. I have used a placeholder for the actual values.Dark ← OK → Bright
When the histogram is not the same as that of the recorded picture under the following conditions, histogram will be displayed in orange:
- During Exposure Compensation.
- When the flash fires.
- When the correct exposure is not achieved, such as when the lighting is low.
[Guide Line]
Sets the pattern of the guidelines to be displayed while recording.
When you select [☐] you can move the position of the guideline by pressing
You can also set the position directly by touching [ ] on the guideline of the recording screen.
The guideline is not displayed during panorama picture recording.
![LEICA V-LUX 5 - [Guide Line] - 1](/content/2026/05/882858/images/17c42cddd77478ed1035341d408671a40d48aa929487bd7984811d7e1cb9efe3.jpg)
[Center Marker]
A cross [+] is displayed to indicate the center of the recording screen.
MENU → [Custom] → [Monitor / Display]
[Highlight]
You can set overexposed areas to flash on the screen when the [Auto Review] function is activated or during playback.
To reduce overexposed areas, record a picture by setting negative exposure compensation using the histogram display and so on as a reference.
This feature is disabled during 4K photo playback, playback of pictures recorded in [Post Focus], Multi Playback, Calendar Playback, or Playback Zoom.
This does not affect recorded pictures.
![LEICA V-LUX 5 - [Highlight] - 1](/content/2026/05/882858/images/6e14494b13172917773fed893b78353c57d8ea63bf51d61f2d5c169e4da83b3f.jpg)
natural_image
Close-up of a blooming rose with black-and-white speckled pattern (no text or symbols)[Zebra Pattern]
You can check the area in a picture, which could result in overexposure, by displaying such an area using a zebra pattern.
![LEICA V-LUX 5 - [Zebra Pattern] - 1](/content/2026/05/882858/images/50c003567d9df081c652bb70dc251ac4a6be11b30c042083a292e4b95df9909f.jpg)
natural_image
Close-up of a textured surface with purpleish-brown and beige patches, possibly biological or material sample (no text or symbols visible)![LEICA V-LUX 5 - [Zebra Pattern] - 2](/content/2026/05/882858/images/01a3dae13b23d94c62396d7b0874994cd32c39e8feeeb4c5dca9488e1c420205.jpg)
natural_image
Close-up of a textured surface with purple granular substance and hatched pattern (no text or symbols)Select [SET] to set the brightness to be displayed for each zebra pattern.
- The range of brightness you can select from is [50%] to [105%]. The [OFF] setting is available for [Zebra 2]. When [100%] or [105%] is selected, only the overexposed areas are displayed with the zebra pattern. When a smaller numeric value is set, the range of brightness to be displayed by each zebra pattern will increase.
To reduce overexposed areas, record a picture by setting negative exposure compensation using the histogram display and so on as a reference.
The displayed zebra pattern is not recorded.
When [Zebra Pattern] is assigned to the function button using [Fn Button Set] ( 52) in the [Custom] ([Operation]) menu, every time you press the assigned function button, the setting will switch in the following order: [Zebra 1] [Zebra 2] [Zebra OFF]. When [Zebra 2] is set to [OFF], you can switch the setting quickly in the following order: [Zebra 1] [Zebra OFF].
Menu list
MENU → [Custom] → [Monitor / Display]
[Expo.Meter]
You can display the exposure meter.
Ⓐ Exposure meter
When you set this function to [ON], an exposure meter is displayed during Program Shift, aperture setting, and shutter speed setting.
Proper exposure is not possible in the range indicated in red.
If the exposure meter is not displayed, press the [DISP] button to switch the display of the monitor.
The exposure meter will turn off if no operation is performed for approximately 4 seconds.
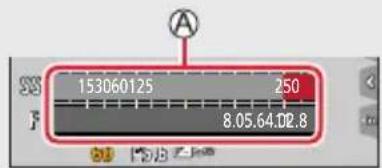
[MF Guide]
The MF guide is displayed during Manual Focus. You can check whether the point of focus is to the near side or the far side.
![LEICA V-LUX 5 - [MF Guide] - 1](/content/2026/05/882858/images/2a991c7244c3d24aff43a2c83638bc159d097c8155fc87de82a89936aa4903f8.jpg)
Ⓐ Indicator for ∞(infinity)
[Rec Area]
Switching the angle of view setting used for recording stills and video.
![LEICA V-LUX 5 - [Rec Area] - 1](/content/2026/05/882858/images/e4a8f95583ab3f9e43feeb79561afa17ec1f58853283ebf0e4c9bfbca5873ae8.jpg)
![LEICA V-LUX 5 - [Rec Area] - 2](/content/2026/05/882858/images/71d42c79069aea5243d057aadb669fe0a1bc798538ecc0fda95be62308eff1e4.jpg)
Indicated as the angle of view when recording stills.
Indicated as the angle of view when recording video.
The recording area indicated is an approximation.
[Rec Area] is fixed to [■] when recording 4K photos or recording in [Post Focus].
[Remaining Disp.]
Switching the display between the number of recordable pictures that you can take and the available recording time.
[Menu Guide]
You can display the selection screen when the mode dial is switched to [SCN]. COL
MENU → [Custom] → [Lens / Others]
[Lens Position Resume]
Remember the zoom position and focus position when the camera is turned off.
[Lens Retraction]
Sets whether or not to retract the lens barrel a little while after the playback screen appears.
[Face Recog.]
The Face Recognition function recognizes a face similar to a registered face and automatically adjusts focus and exposure for the face with higher priority. Even if a person you want to focus on is standing at the back or corner in a group photo, the camera will automatically recognize the person and record this person's face clearly.
Settings: [ON] / [OFF] / [MEMORY]
How the Face Recognition function works
During recording
- The camera recognizes a registered face and adjusts focus and exposure.
- When registered faces that have set names are recognized, the names are displayed (max. 3 people).
During playback
• The name and age are displayed.
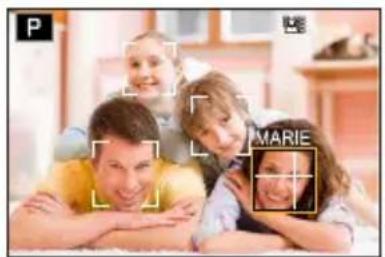
natural_image
Three smiling children lying on the floor, with a camera lens highlighting the face (no text or symbols present)MENU → [Custom] → [Lens / Others]
Saving faces
Up to 6 people's faces can be saved along with such information as name and birthdate.
① Use ▼ to select [MEMORY] and press [MENU/SET]
② Use ▲▼ to select [New] and press [MENU/SET]
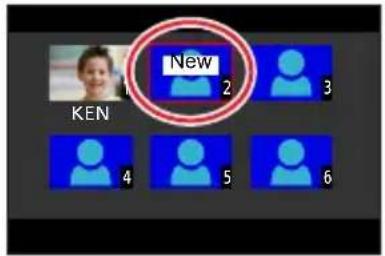
③ Align the face with the guide and record
- Faces of subjects other than people (e.g. pets) cannot be saved.
- When is pressed or [i] is touched, an explanation is displayed.
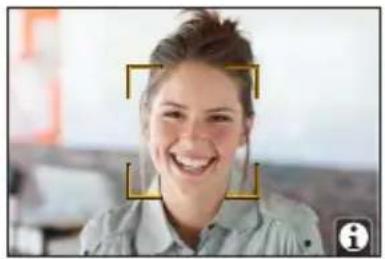
natural_image
Portrait of a smiling woman in a collared shirt, framed by yellow bounding boxes (no text or symbols visible)④ Use ▲ to select the item for editing and press [MENU/SET]
| [Name] Set the name. • For details on how to enter characters, refer to “Entering Text” (→56) |
| [Age] Set the birthdate. |
| [Add Images] Up to 3 faces of the person can be saved.1 Use ▶▶ select [Add] and press [MENU/SET] • When a saved face is selected with the cursor button, a screen to confirm deletion is displayed. Select [Yes] to delete the face.2 Record the picture (step 3) |
Editing or deleting information about saved persons
① Use ▼ to select [MEMORY] and press [MENU/SET]
② Use ▲▼ to select the picture of the person to be edited or deleted and press [MENU/SET]
③ Use ▲ to select the item and press [MENU/SET]
| [Info Edit] | Edit name or other saved information. (Step 4 of “Saving faces”) |
| [Priority] Set priority order for focus and exposure.1 Use ▲▼to select the saved order and press [MENU/SET] | |
| [Delete] Delete information and face pictures of saved persons. | |
MENU → [Custom] → [Lens / Others]
Recording tips when saving faces
- Make sure the subject's eyes are open and mouth closed; have the subject face the camera directly, and make sure the outline of the face, the eyes and eyebrows are not hidden by hair.
- Make sure there are no heavy shadows on the face. (During registration, the flash is not used.)
Good example for registering a face

natural_image
Portrait of a woman with shoulder-length brown hair wearing a black blazer (no text or symbols visible)If the camera seems to have difficulty recognizing faces when recording
- Save additional pictures of the same person's face, indoors and outdoors or with different expressions or angles.
- Save additional pictures at the place you are recording.
- If a saved person is no longer recognized, re-register that person.
- In some cases, the camera cannot recognize or will incorrectly recognize saved faces depending on their expression or the environment.
[Face Recog.] functions only when Auto Focus mode is set to [S]
Only the first picture of the burst recording will contain Face Recognition information.
The name of the person recognized in the first picture is displayed in the case of group pictures.
This function is not available in the following cases:
• [Miniature Effect] (Creative Control Mode)
• During video recording
- When recording 4K photos
- When recording using [Post Focus]
- When using [Time Lapse Shot]
MENU → [Custom] → [Lens / Others]
[Profile Setup]
You can set a name or birthday of a baby or pet before taking a picture to record the name or age in months/years in the picture.
Settings: [^1] ([Baby1]) / [^2] ([Baby2]) / [_^3] ([Pet]) / [OFF] / [SET]
Setting the name and age in months/years
① Use ▼ to select [SET] and press [MENU/SET]
② Use ▲▼ select [Baby1], [Baby2] or [Pet] and press [MENU/SET]
③ Use ▲▼ select [Age] or [Name] and press [MENU/SET]
④ Use ▼ to select [SET] and press [MENU/SET]
Enter the [Age].
Enter the [Name].
- For details on how to enter characters, refer to "Entering Text" (→56)
Canceling the display of the name and age in months/years
Set [Profile Setup] to [OFF].
[Profile Setup] is not available for 4K photo recording or recording in [Post Focus].
You cannot record the name or age in months/years in the following cases:
• During video recording
• Stills that are taken while recording video
[Setup]
MENU → [Setup]
• [Cust.Set Mem.] ( 85)
• [Clock Set] ( 31)
• [World Time] ( 204)
• [Travel Date] ( 205)
• [Wi-Fi] (→205)
• [Bluetooth] (→206)
• [Wireless Connection Lamp] (→206)
• [Beep] (→206)
• [Economy] ( 207)
• [Monitor Display Speed] (→208)
• [EVF Display Speed] (→208)
• [Monitor Display] / [Viewfinder] (→208)
• [Monitor Luminance] ( 209)
• [m/ft] (→209)
• [Eye Sensor] (→209)
• [USB Mode] ( 209)
• [TV Connection] (→210)
• [Language] (→211)
• [Version Disp.] (→211)
• [Folder / File Settings] (→211)
• [No.Reset] (→213)
• [Reset] (→213)
• [Reset Network Settings] (→213)
• [Level Gauge Adjust.] (→214)
• [Approved Regulations] (→214)
• [Format] (→26)
[World Time]
Sets the times for the region where you live and your travel destination. - You can set [Destination] after setting [Home].
Settings: [Destination] / [Home]
1 Use ▲▼ to select [Destination] or [Home] and press [MENU/SET]
2 Use ◀▶ select area and press [MENU/SET]
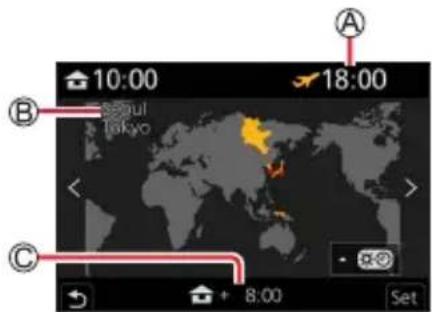
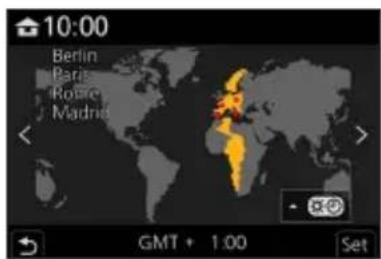
When [Destination] has been selected When [Home] has been selected
Ⓐ Current time at selected destination
⑧ City/area name
© Difference with home time
MENU → [Setup]
to set daylight savings
Press ▲ in step 2. (Press again to release the setting)
- When daylight savings is set, the current time is advanced by 1 hour. If the setting is canceled, the time automatically returns to the current time.
When you come back from your travel destination
Select [Home] in step 1 and press [MENU/SET].
If you cannot find your destination in the area displayed on the screen, set based on difference with home time.
[Travel Date]
[Travel Setup]
If you set your travel schedule and record pictures, the day of your trip on which the picture was taken will be recorded.
record [Location]
Once the [Travel Setup] is set, you can set the location.
- For details on how to enter characters, refer to "Entering Text" (→56)
To print [Location] or the number of days that have passed, use [Text Stamp] ( 226).
The travel date is calculated from the set departure date and the date set in the camera's clock. When destination is set in [World Time], days elapsed are calculated based on local destination time.
When [Travel Setup] is set to [OFF], the number of days elapsed is not recorded. It is not displayed even if [Travel Setup] is set to [SET] after recording.
When the current date passes the return date, [Travel Setup] is automatically canceled.
[Location] cannot be recorded while recording video, recording 4K photos, or recording in [Post Focus].
[Wi-Fi]
[Vi-Fi Function]
[Vi-Fi Setup]
Menu list
MENU → [Setup]
[Bluetooth]
[Bluetooth]
[Remote Wakeup]
[Returning from Sleep Mode]
[Auto Transfer]
[Location Logging]
[Auto Clock Set]
[Vi-Fi network settings]
Saves a wireless access point.
- The wireless access point used for the Wi-Fi connection is automatically saved.
- Up to 17 wireless access points can be saved. If you try to save more than 17 access points, the oldest saved access points will be deleted.
- Performing [Reset Network Settings] will delete saved wireless access points.
[Wireless Connection Lamp]
The lamp lights while the wireless function is operating.
Settings: [ON] / [OFF]
[Beep]
Sets the beep sounds or shutter sounds.
[Beep Volume]
[Shutter Tone]
When [Silent Mode] is set to [ON], [Beep] is not available.
MENU → [Setup]
[Economy]
[Sleep Mode]
The camera is automatically turned off if the camera has not been used for the time selected on the setting.
- When you want to use the camera again, either press the shutter button halfway or turn the camera back on.
[Sleep Mode(Wi-Fi)]
The camera is automatically turned off if the camera has not been used for approx.
15 minutes with no Wi-Fi connection.
- When you want to use the camera again, either press the shutter button halfway or turn the camera back on.
[Auto EVF/Monitor Off]
The monitor/viewfinder is automatically deactivated if the camera has not been used for the time selected on the setting.
• To reactivate the monitor/viewfinder again, press any button.
This function is not available in the following cases:
- During video recording/playback
- When recording with [F1X] ([4K Pre-Burst]) of the 4K Photo function
- When recording in [Multi Exp.]
- When connected to computer/printer
• During Slide Shows - When using [Time Lapse Shot]
- When [Auto Shooting] of [Stop Motion Animation] is set to [ON]
- While the HDMI output is being used for recording.
MENU → [Setup]
[Monitor Display Speed] / [EVF Display Speed]
Sets the display speed of the monitor or viewfinder.
| [ECO 30fps] Minimizes power consumption and the operating time is extended. | |
| [60fps] | You can display a moving subject in fluid motion. This setting is ideal for recording fast-moving subjects. |
When [Monitor Display Speed] or [EVF Display Speed] (or both) is set to [ECO 30fps], Digital Zoom is not available.
Cannot set to [ECO 30fps] in the following cases:
- Creative Video Mode
- When recording 4K photos
- When recording using [Post Focus]
[Monitor Display Speed] and [EVF Display Speed] are disabled while the HDMI output is being used for recording.
The [Monitor Display Speed]/[EVF Display Speed] setting does not affect the recorded picture.
[Monitor Display] / [Viewfinder]
Adjust brightness and color of the monitor or viewfinder.
| [Brightness] Adjusts the brightness. | |
| [Contrast] Adjusts the contrast. | |
| [Saturation] Adjusts the vividness of colors. | |
| [Red Tint] Adjusts red hues. | |
| [Blue Tint] Adjusts blue hues. |
It will adjust the monitor when the monitor is in use, and the viewfinder when the viewfinder is in use.
Some subjects may look different from their actual appearance, but the recorded picture will not be affected.
MENU → [Setup]
[Monitor Luminance]
Sets the monitor brightness according to the ambient light level.
![LEICA V-LUX 5 - [Monitor Luminance] - 1](/content/2026/05/882858/images/d15435ea40b5eb9468121404d1731141e18519f5fb01e4863aa9d98a9ffb4bdd.jpg) | (Auto) | During recording, the brightness is adjusted automatically according to how bright it is around the camera.During playback, the brightness is the same as when you last recorded.(If you have not recorded once since turning on the camera, a standard brightness is used.) |
![LEICA V-LUX 5 - [Monitor Luminance] - 2](/content/2026/05/882858/images/6827518c91778693aebc4fe3761212d8b123c0e2a68bf8a2adab2c9127157fb2.jpg) | (Mode 1) The brightness is increased. | |
![LEICA V-LUX 5 - [Monitor Luminance] - 3](/content/2026/05/882858/images/fd9653af8c1865867f2b1de1830162205a06ed36bdeba384f304739929c1f1b2.jpg) | (Mode 2) The brightness is standard. | |
![LEICA V-LUX 5 - [Monitor Luminance] - 4](/content/2026/05/882858/images/fc2e2b0124dc0de1183b3665a4021272d74e6a7c2007043487acc70dbdb4c45b.jpg) | (Mode 3) The brightness is decreased. |
Some subjects may look different from their actual appearance, but the recorded picture will not be affected.
Setting [A] or [ ] reduces the operating time.
[m/ft]
Allows selecting how distance is displayed, in ft. or m.
[Eye Sensor]
| [Sensitivity] Use this setting to set the sensitivity of the eye sensor. | |
| [EVF/Monitor Switch] | Use this setting to switch the display between the viewfinder and monitor.[EVF/MON AUTO] (Automatic switching between viewfinder and monitor) / [EVF] (Viewfinder display) / [MON] (Monitor display)After the display is switched using the [EVF] button, the setting of [EVF/ Monitor Switch] will also change. |
[USB Mode]
Select communication method for when connecting camera to a computer or printer with USB cable (supplied).
![LEICA V-LUX 5 - [USB Mode] - 1](/content/2026/05/882858/images/acbdb33dbb0608cee9f422cd6cbffc059d7bbbd6089035ff4c7b0c91cf5865bf.jpg) | [Select on connection] | Select communication method each time you connect to a computer or PictBridge-compatible printer. |
![LEICA V-LUX 5 - [USB Mode] - 2](/content/2026/05/882858/images/3d4ce50997bdff87c8abfcb595d308d9badab1db90da8d54698af45d1336ea5f.jpg) | [PC(Storage)] Select when connecting to a computer. | |
![LEICA V-LUX 5 - [USB Mode] - 3](/content/2026/05/882858/images/d145d10133ffea98567a3c20d0cd1856f9ef5cecf39e3cae35778b5b35141a6c.jpg) | [PictBridge(PTP)] Select when connecting to a PictBridge-compatible printer. | |
MENU → [Setup]
[TV Connection]
[HDMI Mode (Play)]
Set the format for the output.
| [AUTO] Automatically sets the output resolution based on information from a connected TV. | |
| [4K/30p] | Outputs pictures with a output resolution of 3840×2160 pixels using a progressive scan method for the number of effective scanning lines (2,160 lines). |
| [1080p] | Outputs pictures using a progressive scan method for the number of effective scanning lines (1,080 lines). |
| [1080i] | Outputs pictures using an interlace scan method for the number of effective scanning lines (1,080 lines). |
| [720p] | Outputs pictures using a progressive scan method for the number of effective scanning lines (720 lines). |
| [480p] | Outputs pictures using a progressive scan method for the number of effective scanning lines (480 lines). |
If no image appears on the TV with [AUTO], switch the setting to one other than [AUTO] to set a format supported by your TV. (Please read the operating instructions for the TV.)
[HDMI Info Display (Rec)]
Set whether to display recording information when you take pictures while you monitor them on a TV or other device by connecting the camera via HDMI micro cable. ( 239)
[HDTV Link]
If you select [ON], operations of the camera and the HDTV Link compatible equipment connected to the camera with an HDMI micro cable are automatically linked, enabling you to control the camera with the remote control of the HDTV Link compatible equipment. (→240)
Menu list
MENU → [Setup]
[Language]
Set the language displayed on the screen.
If you set a different language by mistake, select [G] from the menu icons to set the desired language.
[Version Disp.]
Check the firmware version of the camera.
When you press [MENU/SET] while the version is displayed, software information for this unit, such as the license, is displayed.
[Folder / File Settings]
Set the names of a folder and file for storing images.
| Folder name File name | |
![LEICA V-LUX 5 - [Folder / File Settings] - 1](/content/2026/05/882858/images/6813a507945ec70a269ad5e342490c1a1bae32be548a66ad5b15479b54460acb.jpg) | ![LEICA V-LUX 5 - [Folder / File Settings] - 2](/content/2026/05/882858/images/a927a9b68cf04e53dfa45ce9d3c0598a72c4f3651c9e4e6cea741538fa042c73.jpg) |
| 1 Folder number (3-digits, 100–999)2 User-defined 5-digit number | 1 Color space ([L]: sRGB, [ _ ]: AdobeRGB)2 User-defined 3-digit number3 File number (4-digits, 0001–9999)4 File extension |
Menu list
MENU → [Setup]
| [Select Folder] | Selects a folder for storing images.• The number of files that can be stored is displayed for the folder name. | |
| [Create a New Folder] | Creates a new folder by advancing the folder number.• When no folder for storing images is available on a card, the folder number reset screen is displayed. | |
| [OK] | Creates a new folder using the same user-defined 5-digit number comprising a folder name as the current setting. | |
| [Change] | Creates a new folder by entering a new user-defined 5-digit number comprising a folder name to change the current folder name.• Characters that can be set: uppercase alphanumeric characters, numbers, and [ _ ]• For details on how to enter characters, refer to “Entering Text” (→56) | |
| [File Name Setting] | [Folder Number Link] | Sets the same number in the folder name to a user-defined 3-digit number in a file name. |
| [User Setting] | Sets a file name by entering a new user-defined 3-digit number.• Characters that can be set: uppercase alphanumeric characters, numbers, and [ _ ]• For details on how to enter characters, refer to “Entering Text” (→56) | |
Up to 1,000 files can be stored in a single folder.
The serial numbers from 0001 to 9999 are assigned to the files stored in the order in which pictures are taken. When a folder destination is changed, the file is stored with the file number following the preceding file number.
In the following cases, a new folder is automatically created by advancing the folder number when the next file is saved.
- When 1,000 files are stored in a folder
- When a file consisting of the file number of "9999" is stored in a folder
When folders with numbers from 100 to 999 already all exist, you cannot create a new folder. We recommend saving all necessary pictures to your computer or other devices and formatting the card.
MENU → [Setup]
[No.Reset]
Reset picture file numbers. (The folder number is updated and the file number starts from 0001.)
- To reset folder number to 100: First, format the card, and reset the file numbers using [No.Reset]. Then, select [Yes] on the folder number reset screen.
A folder number between 100 and 999 can be assigned. Numbers cannot be reset once folder number reaches 999. In this case, save all necessary pictures to your computer, and format the card ( 26).
[Reset]
The following settings are reset to the default:
Recording settings
Setup settings ([Wi-Fi Setup] and [Bluetooth] settings)
Custom settings ([Face Recog.] and [Profile Setup] settings)
Setup/custom settings (except for [Wi-Fi Setup], [Bluetooth], [Face Recog.] and [Profile Setup] settings)
When the setup/custom settings are reset, the following settings are also reset:
• The [World Time] setting
• The [Travel Date] setting (Departure date, Return date, [Location])
- The settings of [Rotate Disp.], [Picture Sort] and [Delete Confirmation] in the [Playback] menu
Folder numbers and clock settings will not be reset.
[Reset Network Settings]
Network settings are reset to the default, such as equipment information you have registered using [Wi-Fi Setup] or [Bluetooth].
Menu list
MENU → [Setup]
[Level Gauge Adjust.]
[Adjust.]
Hold the camera in a horizontal position, and press [MENU/SET]. The level gauge will be adjusted.
Level Gauge Value Reset]
Restores the default level gauge setting.
[Approved Regulations]
Display approved regulations.
[My Menu]
[My Menu Setting]
You can save frequently used menus and display them on [My Menu]. Up to 23 menus can be saved.
MENU → [My Menu] → [My Menu Setting]
| [Add] Select and save a menu to be displayed on [My Menu]. | |
| [Sorting] | Change the order of the menus to be displayed on [My Menu]. Select the menu whose order you want to change and set the new location. |
| [Delete] | Delete a saved menu from the [My Menu] display.[Delete Item]: Select and delete a menu.[Delete All]: Delete all saved menus. |
| [Display from My Menu] | Set the initial display for the menu screen.[ON]: Displays [My Menu][OFF]: Displays the menu used last |
[Playback]
• [Slide Show] ( 216)
• [Playback Mode] ( 217)
• [Protect] (→218)
• [Rating] ( 218)
• [Title Edit] ( 219)
• [Face Rec Edit] (→219)
• [RAW Processing] (→220)
• [4K PHOTO Bulk Saving] (→222)
• [Light Composition] (→223)
• [Sequence Composition] (→224)
• [Clear Retouch] (→225)
• [Text Stamp] (→226)
• [Resize] ( 227)
• [Cropping] (→228)
• [Rotate] ( 228)
• [Video Divide] (→229)
• [Time Lapse Video] (→229)
• [Stop Motion Video] (→230)
• [Rotate Disp.] (→230)
• [Picture Sort] (→230)
- [Delete Confirmation] (→231)
It may not be possible to set or edit pictures taken with other cameras.
How to select an image(s) after selecting [Single] or [Multi]
When [Single] and [Multi] are not available, select a picture in the same way as if [Single] were selected.
[Single]
① Use ◀ to select a still and press [MENU/SET]
- If [Set/Cancel] is displayed at the right bottom of the screen, the setting is canceled when [MENU/SET] is pressed again.
![LEICA V-LUX 5 - [Single] - 1](/content/2026/05/882858/images/144e7a0b058f3d0f9bb954b480b80f7aae35d56cd030a547a4e0527408dcc7f6.jpg)
natural_image
A fluffy gray wolf resting on a red sofa, no visible text or symbols.[Multi]
When a screen similar to the one on the right is displayed:
① Use ▲▼ to select a still and press [MENU/SET] (repeat)
• To cancel → Press [MENU/SET] again.
② Press [DISP] button to execute
![LEICA V-LUX 5 - [Multi] - 1](/content/2026/05/882858/images/3a73c73b4f8b328db2fdcc87d17147208713469b47a04bf374f420d378c17c54.jpg)
natural_image
Grid of six nature photos showing animals, landscapes, and buildings (no text or symbols)When a screen similar to the one on the right is displayed:
① Use ▲▼ to select a still and press [MENU/SET] (repeat)
• To cancel → Press [MENU/SET] again.
![LEICA V-LUX 5 - [Multi] - 2](/content/2026/05/882858/images/06ff68e60038dd0c1dacc56d9f9c5d29f3a57971ffb507474dc2612dea04ab8e.jpg)
natural_image
Grid of six nature photos with numbered labels, no visible text or symbols on the images themselves[Slide Show]
Automatically plays back recorded pictures, one after another. You can organize slide shows composed of only stills or only video. Recommended when viewing on a TV screen.
MENU → [Playback] → [Slide Show]
1 Use ▲ to select the item and press [MENU/SET]
- If you select [Picture Only], 4K burst files and pictures recorded using [Post Focus] will also be played back.
- Only an in-focus representative image will be played back from pictures recorded using [Post Focus].
2 Use ▲ to select [Start] and press [MENU/SET]
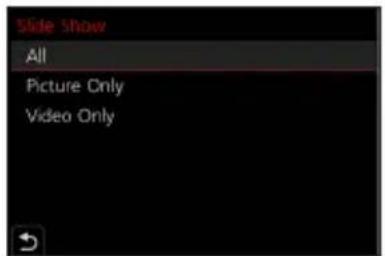
●operations during Slide Show
| Operation Touch operation Description | ||
| ▲ | ▶/11 | Play / Pause |
| ◀ | ◀◀ | Previous |
| ▶ | ▶▶ | Next |
| ▼ | ■ | Stop |
![LEICA V-LUX 5 - Use ▲ to select [Start] and press [MENU/SET] - 2](/content/2026/05/882858/images/17c413182043f492543c07b7af2e4045e6913df6eefbed39a5c75a1911779ee0.jpg) | + | Volume up |
![LEICA V-LUX 5 - Use ▲ to select [Start] and press [MENU/SET] - 3](/content/2026/05/882858/images/c57486676b080be079d7e58e9ac91b672e5cbd8f67f30efbc1e61cbc6c07f456.jpg) | — | Volume down |
Menu list
change settings
Select [Effect] or [Setup] and press [MENU/SET].
| [Effect] This allows you to select the screen effects when switching from one picture to the next. | |
| [Setup] [Duration] [Duration] can be set only when [Effect] is set to [OFF]. | |
| [Repeat] [ON] / [OFF] | |
| [Sound] [AUTO]: With stills, music will play back, and with video, audio will play back.[Music]: Music effect will play back.[Audio]: Audio is played back from video.[OFF]: Music and audio will not play back. |
During slide shows of 4K burst files, pictures recorded in [Post Focus], or group pictures, effects will stay turned off even if [Effect] is set.
When you play back the following pictures in a slide show, the [Duration] setting is disabled.
- Video
- 4K burst files
• Pictures recorded using [Post Focus] - Panorama pictures
- Group pictures
[Playback Mode]
Selects the picture and playback mode. ([Normal Play], [Picture Only], [Video Only])
MENU
[Playback]
[Playback Mode]
1 Use ▲ to select the item and press [MENU/SET]
- If you select [Picture Only], 4K burst files and pictures recorded using [Post Focus] will also be played back.
Menu list
[Protect]
Set protection to disable picture deletion. Prevents deletion of important pictures.
MENU → [Playback] → [Protect]
1 Select picture ( 215)
To clear all
Select [Protect] → [Cancel] → [Yes], and then press [MENU/SET]
![LEICA V-LUX 5 - [Protect] - 1](/content/2026/05/882858/images/1db79baeef19536fccec30378f6fa265e206649d0e23987f14f85067eede1870.jpg)
Nothing can be deleted from the memory card if the write-protect switch on the card is set to the "LOCK" position.
The picture is erased when formatting, even if it is protected.
May not be effective when using other devices.
[Rating]
You can label the pictures in five levels (ratings). Once you have set a [Rating], the following operations will be available.
- Delete all pictures except the rated pictures.
- You can check the rating level of the pictures by displaying the details of the file in Windows 10, Windows 8.1, and Windows 8 (only JPEG pictures).
MENU → [Playback] → [Rating]
1 Select picture ( 215)
2 Use ◀ to set the Rating levels (1 to 5) and press [MENU/SET]
(Repeat steps 1 and 2 to perform the setting with [Multi].)
To clear all
Select [Rating] → [Cancel] → [Yes], and then press [MENU/SET]
When you have performed [Rating] for group pictures, the setting applies to all pictures in the group, and the number rating set is shown on the rating settings icon of the first picture. If the total number of pictures is 1,000 or higher, [999+] is displayed.
Only when [Playback Mode] is set to [Normal Play], you can select [Cancel].
[Title Edit]
You can enter characters (titles etc.) on a recorded picture. Once the text is saved, it can be stamped in prints using [Text Stamp] ( 226).
MENU → [Playback] → [Title Edit]
1 Select a still ( 215)
• is displayed for pictures with stamped text.
2 Enter characters
- For details on how to enter characters, see "Entering Text" (→56)
- To delete texts, delete all the characters in the character input screen.
You can set up to 100 pictures at one time with [Multi].
This function is not available in the following cases:
- Video
- 4K burst files
• Pictures recorded using [Post Focus] - Stills recorded with the [Quality] setting [RAW*], [RAVQF[ ] RAW
[Face Rec Edit]
Edit or delete the recognition information for pictures with incorrect information.
MENU → [Playback] → [Face Rec Edit] → [REPLACE] or [DELETE]
1 Use ◀ to select picture and press [MENU/SET]
2 Use ◀▶ select a person and press [MENU/SET]
- If [DELETE], go to step4.
3 Use ▲▼ to select the person to replace for another and press [MENU/SET]
4 Use ◀ to select [Yes] and press [MENU/SET]
When Face Recognition information is deleted, it cannot be restored.
Edit the Face Recognition information in group units for a picture group. (You cannot edit the information for each picture in a group.)
You can edit only the first picture in a group.
[RAW Processing]
You can use the camera to edit stills that were recorded in RAW format. The created stills are saved in JPEG format.
MENU → [Playback] → [RAW Processing]
1 Press ◀▶ select RAW file and press [MENU/SET]
2 Press ▲ to select the item and then press [MENU/SET] to set
- The following items can be set. The settings used during recording are applied at the time of setting.
![LEICA V-LUX 5 - Press ▲ to select the item and then press [MENU/SET] to set - 1](/content/2026/05/882858/images/17566e5338ceff060910db423344d069058868d1f3df5ebdcae3fd88603fa4b3.jpg)
natural_image
Baby looking up at a wall-mounted screen displaying two baby photos, with a red-and-white curtain in the background (no visible text or symbols)| [White Balance] | You can select White Balance to make adjustments. When you select an item with [IMAGE] you can edit the pictures using the same settings that were applied for recording. |
| [Brightness correction] | You can correct brightness in the range from -2 EV to +2 EV. |
| [Photo Style] You can select the [Photo Style] effects. | |
| [i.Dynamic] You can select the [i.Dynamic] settings. | |
| [Contrast] You can adjust the contrast. | |
| [Highlight] You can adjust the brightness of a highlighted area. | |
| [Shadow] You can adjust the brightness of a shadowed area. | |
| [Saturation] / [Color Tone] | You can adjust the saturation. (You can adjust the coloring when [Monochrome], [Monochrome HC] or [Monochrome HC+] is selected for [Photo Style].) |
| [Filter Effect] | You can select a Filter effect. (Only when [Monochrome], [Monochrome HC] or [Monochrome HC+] is selected for [Photo Style].) |
| [Grain Effect] | You can set the graininess. (Only when [Monochrome], [Monochrome HC] or [Monochrome HC+] is selected for [Photo Style].) |
| [Noise Reduction] You can set noise reduction. | |
| [i.Resolution] You can select the [i.Resolution] settings. | |
| [Sharpness] You can adjust the impression of resolution. | |
| [More Settings] | Use ▲▼to select items and press [MENU/SET] to perform the following operations.[Reinstate Adjustments]: You can restore the settings to the ones used during recording.[Color Space]: You can select [Color Space] from either [sRGB] or [AdobeRGB].[Picture Size]: You can select the picture size ([L], [M], or [S]) of a JPEG file when saving pictures. |
3 Press [MENU/SET] to finalize the setting
- The screen in step2reappears. To set another item, repeat steps 2 to 3.
4 Press ▲ to select [Begin Processing] and press [MENU/SET]
Setting each item
When you select an item, the setting screen appears.
| Operation | Touch operation | Description |
| Drag Used | to make adjustments | |
| ▲ | [WB K Set] | Used to display the color temperature setting screen(Only when [White Balance] is set to [K]) |
| ▼ | [Adjust.] | Used to display the White Balance fine adjustment screen(Only when [White Balance] is set) |
| [DISP] [DISP.] | Used to display the comparison screen | |
| [MENU/SET] [Set] | Used to finalize an adjustment you just made and to return to the item selection screen | |
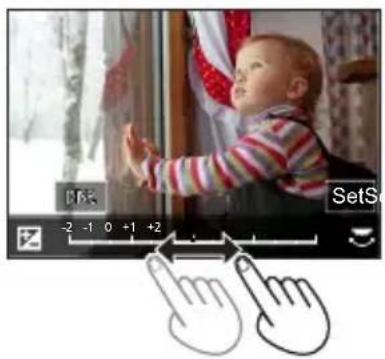
natural_image
Photo of a baby hanging from a window with a flag, accompanied by two finger icons below (no text or symbols on the image itself)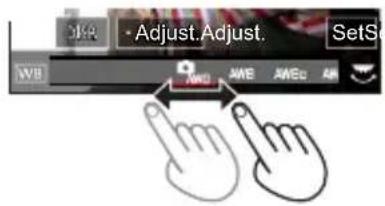
- If you have selected [Noise Reduction], [i.Resolution], or [Sharpness], the comparison screen is not displayed.
- Pictures can be enlarged by operating the zoom lever.
- You can also zoom in by quickly touching the display twice. (If the display was enlarged, it returns to the original magnification ratio.)
The following operating methods are available to make adjustments on the comparison screen.
Ⓐ Current setting
| Operation | Touch operation | Description |
| Drag Used to make adjustments | ||
| [DISP] [DISP.] Used to return to the setting screen | ||
| [MENU/SET] [Set] | Used to finalize an adjustment you just made and to return to the item selection screen | |
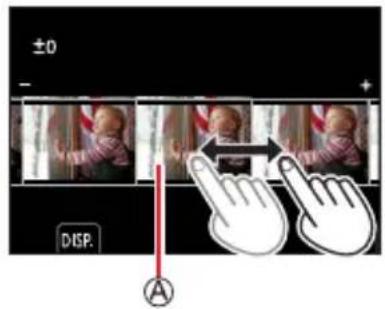
- If you touch the picture at the center, it will be enlarged. If you touch [→], the picture will be reduced to the original size.
A RAW image recorded on this camera is always recorded with the aspect ratio set to [3:2] (5472×3648), but if you perform [RAW Processing] from the [Playback] menu, the picture will be processed with the aspect ratio fixed as that at the time of recording.
The [White Balance] setting of stills recorded using [Multi Exp.] is fixed to the setting used during recording.
Edit group pictures one by one. The edited pictures will be newly saved separately from the original group pictures.
When an HDMI micro cable is connected, [RAW Processing] is disabled.
You can perform RAW processing on pictures recorded using this unit only.
[4K PHOTO Bulk Saving]
You can bulk save 5 seconds' worth of 4K recording from a 4K burst file.
MENU → [Playback] → [4K PHOTO Bulk Saving]
1 Use ▶▶ select the 4K burst files and press [MENU/SET]
- If the burst time is 5 seconds or less, all the frames can be saved as a picture.
2 Select the first frame to be bulk saved as a picture ( 120, 121)
The picture will be saved in JPEG format as a single burst picture group.
[Light Composition]
Select multiple frames from 4K burst files that you wish to merge. Parts of the image that are brighter than the preceding frame will be superimposed on the preceding frame to merge the frames into one picture.
![LEICA V-LUX 5 - [Light Composition] - 1](/content/2026/05/882858/images/9fbca6d99df78b1417c0b13c5a515db79d7391a57b632b7d9e0a8430de046661.jpg)
natural_image
Nighttime cityscape featuring Big Ben and illuminated twin towers with a large fireworks display (no text or symbols visible)![LEICA V-LUX 5 - [Light Composition] - 2](/content/2026/05/882858/images/f33c7b3da8bb6386515365d6c30ec7d08d255fcfc36351c7874260156bd3d011.jpg)
![LEICA V-LUX 5 - [Light Composition] - 3](/content/2026/05/882858/images/4b7a28361f0cab0a7b96741243dc574f70fc81574aa0e770e39c407e5247a541.jpg)
natural_image
Night view of Big Ben with fireworks over a river, illuminated by two towers (no text or symbols visible)![LEICA V-LUX 5 - [Light Composition] - 4](/content/2026/05/882858/images/7d24e153bb54169d0bb01ac22904238196ab82cea1c286605ced72428cf8766b.jpg)
![LEICA V-LUX 5 - [Light Composition] - 5](/content/2026/05/882858/images/1127f562c777e3b43a103e5d17b4eaf3e70b9b2ebb5b436e7396ad8ce88cb36a.jpg)
natural_image
Night view of Big Ben illuminated at dusk with fireworks exploding in the sky (no text or symbols visible)![LEICA V-LUX 5 - [Light Composition] - 6](/content/2026/05/882858/images/72e75e1e6125fe261c7d0357f085fff950ff157f074728a28315f66514a6fb79.jpg)
![LEICA V-LUX 5 - [Light Composition] - 7](/content/2026/05/882858/images/6d83ceccddc92a6da226a28d9eafd2863e2a116397b2e2a89b56230bd5295a3c.jpg)
natural_image
Night view of Big Ben illuminated with fireworks over a river, no visible text or symbolsMENU → [Playback] → [Light Composition]
1 Use ◀▶ select the 4K burst files and press [MENU/SET]
2 Choose the merging method and press [MENU/SET]
[Composite Merging]: Selecting frames to merge
① Drag the slide bar or use ▲▼ to select the frames to merge
② Press [MENU/SET]
- The selected frames are stored, and the display goes to the preview screen.
- Use ▲ to select items and press [MENU/SET] to perform the following operations.
– [Next]: Lets you select more frames for merging.
– [Reselect]: Discards the frame selected immediately before and lets you select a different image.
③ Repeat steps ①- to select more frames to merge (up to 40 frames)
④ Press ▼ to select [Save] and press [MENU/SET]
[Range Merging]: Selecting a range to merge
① Select the frame of the first picture and then press [MENU/SET]
- The selection method is the same as in step① of [Composite Merging] setting.
② Select the frame of the last picture and then press [MENU/SET]
![LEICA V-LUX 5 - MENU → [Playback] → [Light Composition] - 1](/content/2026/05/882858/images/dfc215cfcfb470b0739268b0e10e99f2e4049043eaf84aecaec3a3de1cf9c0b9.jpg)
natural_image
Night cityscape with Big Ben and illuminated buildings under a dark sky, fireworks visible in the sky (no text or symbols)Pictures are saved in JPEG format. Recording information (Exif information) of the first frame such as shutter speed, aperture, and ISO sensitivity are also saved.
[Sequence Composition]
Select multiple frames from a 4K burst file to create a sequence composition of a moving subject into one picture.
![LEICA V-LUX 5 - [Sequence Composition] - 1](/content/2026/05/882858/images/d82d309e8c0b8bf18299654b51d1503f1b394ed6403b804c92b08b8d8a1aa194.jpg)
natural_image
Sequence of photos showing a person jumping on grassy ground with a bird, before and after a blue sky (no text or symbols)MENU → [Playback] → [Sequence Composition]
1 Use ◀▶ select the 4K burst files and press [MENU/SET]
2 Select frames to merge
Select the frames so that the moving subject will not overlap on the preceding or subsequent frames. (The sequence composition may not be created properly if the subject overlaps.)
① Drag the slide bar or use ▲▼ to select the frames to merge
② Press [MENU/SET]
- The selected frames are stored, and the display goes to the preview screen.
-
Use ▲ to select items and press [MENU/SET] to perform the following operations.
-
[Next]: Lets you select more frames for merging.
– [Reselect]: Discards the frame selected immediately before and lets you select a different image.
③ Repeat steps ①- to select more frames to merge (from 3 to 40 frames)
④ Press ▼ to select [Save] and press [MENU/SET]
![LEICA V-LUX 5 - MENU → [Playback] → [Sequence Composition] - 1](/content/2026/05/882858/images/cf16b72de006f6837497fbb9203cfd04bf74afd3853ffdd7070b5138741d876b.jpg)
natural_image
Person mid-jump in a grassy field with city skyline in background (no visible text or symbols)![LEICA V-LUX 5 - MENU → [Playback] → [Sequence Composition] - 2](/content/2026/05/882858/images/5b3f73e847fecbf6a1a48eff4a1dc5dea2bb7e3ab61d21ba379e1d98fe3bdd64.jpg)
Tips for [Sequence Composition]
We recommend using a tripod to take pictures for [Sequence Composition].
Pictures are saved in JPEG format. Recording information (Exif information) of the first frame such as shutter speed, aperture, and ISO sensitivity are also registered.
[Clear Retouch]
You can erase unnecessary parts recorded on the pictures taken.
- The erasure operation can only be performed by touch. [Clear Retouch] automatically enables the touch operation.
![LEICA V-LUX 5 - [Clear Retouch] - 1](/content/2026/05/882858/images/e0c8b9749ced483d95f68120002c44e533b6132a188b35bf98b4cb5d0d39e000.jpg)
natural_image
Two side-by-side photos showing a yellow flowering tree under blue sky, one with red outline and arrow, the other with red streaks (no text or symbols)MENU → [Playback] → [Clear Retouch]
1 Use ◀▶ select a still and press [MENU/SET]
2 Drag your finger over the part you want to erase
• The parts to be erased are colored.
- Touching [Undo] will return the colored part back to its previous state.
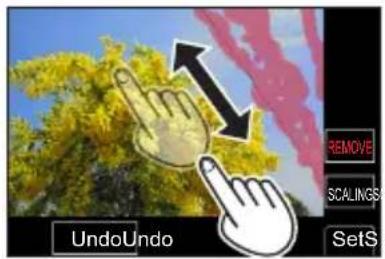
![LEICA V-LUX 5 - MENU → [Playback] → [Clear Retouch] - 2](/content/2026/05/882858/images/b1dfd42800452f47129c76ef33f4d9dd8a89056f25d918858b373907a00f4fa1.jpg)
Erasing details (enlarging the display)
① Touch [SCALING]
- On the touch screen, pinch out your two fingers to zoom in, and pinch in your two fingers to zoom out.
- Dragging the screen allows you to move the enlarged part.
② Touch [REMOVE]
- This will bring you back to the operation of dragging your finger over the part you want to erase. The part you want to erase can be dragged even while the picture is enlarged.
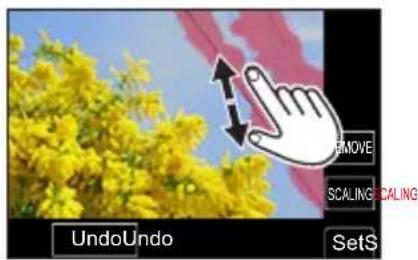
3 Touch [Set]
4 Touch [Save] or press [MENU/SET]
Pictures may appear unnatural because the background of deleted parts is artificially created.
Edit group pictures one by one. The edited pictures will be newly saved separately from the original group pictures.
Not available when the viewfinder is in use.
When an HDMI micro cable is connected, [Clear Retouch] is disabled.
This function is not available in the following cases:
- Panorama pictures
• Video - 4K burst files
• Pictures recorded using [Post Focus] - Stills recorded with the [Quality] setting [AW]
[Text Stamp]
You can stamp the recording date and time, names, travel destination, travel dates, etc. on the recorded stills.
MENU → [Playback] → [Text Stamp]
1 Select a still ( 215)
• 📋 appears on screen if the picture is stamped with text.
2 Use ▼to select [Set] and press [MENU/SET]
| [Shooting Date] [W/O TIME]: Stamp recording date[WITH TIME]: Stamp recording date and time | |
| [Name] | : Stamp name saved in Face Recognition: Stamp name saved in [Profile Setup] |
| [Location] Stamp location registered in [Setup] menu's [Travel Date] | |
| [Travel Date] Stamp number of days that have elapsed since the travel date set in [Setup] menu's [Travel Date] | |
| [Title] Stamp text saved in [Title Edit] | |
3 Press [◀] button
4 Use ▲ to select [OK] and press [MENU/SET]
Do not request date printing in store or make date printing on printer for stills with date stamps. (Date printing may be overlapped.)
You can set up to 100 pictures at one time with [Multi].
The picture quality may be coarser.
If you stamp text on the pictures in a group, the edited pictures will be newly saved separately from the original group pictures.
This function is not available in the following cases:
• Video
- 4K burst files
• Pictures recorded using [Post Focus]
- Stills recorded with the [Quality] setting [AW]
- Panorama pictures
• Stills that other texts had already been stamped
• Stills taken without setting clock
[Resize]
Picture size can be resized to facilitate e-mail attachment and use in web pages, etc.
MENU → [Playback] → [Resize]
1 Select a still and size
[Single]
① Use ◀▶ select a still and press [MENU/SET]
② Use ▲ to select size and press [MENU/SET]
[Multi] (up to 100 pictures)
① Use ▲ to select size and press [MENU/SET]
② Use ▲▼t▲elect a still and press [MENU/SET] (repeat)
• To cancel → Press [MENU/SET] again.
③ Press the [DISP] button to execute
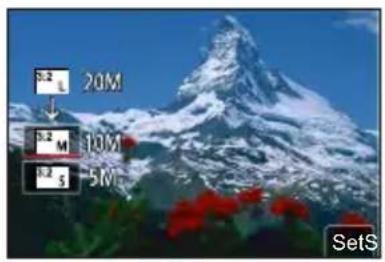
![LEICA V-LUX 5 - [Multi] (up to 100 pictures) - 2](/content/2026/05/882858/images/8da2b9d6772f98de1123611a7e9202e789a946aff2e0e110b2b4f58908838b56.jpg)
natural_image
Grid of six nature and landscape photos labeled 1 to 6, displayed in a viewer interface (no text or symbols on images)Picture quality is reduced after resizing.
This function is not available in the following cases:
- Video
- 4K burst files
• Pictures recorded using [Post Focus]
• Stills recorded with the [Quality] setting [AW] - Panorama pictures
- Group pictures
• Stills already stamped with other text
[Cropping]
Enlarge your stills and crop unwanted areas.
MENU → [Playback] → [Cropping]
1 Use ◀▶ to select a still and press [MENU/SET]
2 Select area to crop and press [MENU/SET]
| Operation Touch operation Description | ||
![LEICA V-LUX 5 - MENU → [Playback] → [Cropping] - 1](/content/2026/05/882858/images/2f2ca69bf4eaaa7dbbee713ad0cdcf3812d7e34f8d8c0acb4030c8e320b9ff1c.jpg) | ![LEICA V-LUX 5 - MENU → [Playback] → [Cropping] - 2](/content/2026/05/882858/images/e169bf6b3025c13ba7d3b7fe55145e656b2be4ab8b2cbe5f1de388b4fb52f06e.jpg) | Enlarges the picture |
![LEICA V-LUX 5 - MENU → [Playback] → [Cropping] - 3](/content/2026/05/882858/images/caa40f373f7f91c05edcf0607f4e1616759e21a312cc1fb5fc8797f7aa59f6b3.jpg) | ![LEICA V-LUX 5 - MENU → [Playback] → [Cropping] - 4](/content/2026/05/882858/images/9c2509b39d13f28af160c9881a42bddb08eca1c7eaf5128ffd85d9bc0f38b6d1.jpg) | Reduces the picture |
![LEICA V-LUX 5 - MENU → [Playback] → [Cropping] - 5](/content/2026/05/882858/images/b4322022accae1044cfd2097ceb037f2335f0db73c60d648d746eed809643495.jpg) | Drag Moves the enlarged area | |
Edit group pictures one by one. The edited pictures will be newly saved separately from the original group pictures.
Original Face Recognition information will not be copied when stills are cropped.
Picture quality is reduced after cropping.
This function is not available in the following cases:
- Video
- 4K burst files
• Pictures recorded using [Post Focus] - Stills recorded with the [Quality] setting [AW]
- Panorama pictures
• Stills already stamped with other text
[Rotate]
You can manually rotate the picture in 90-degree increments.
- You cannot select [Rotate] when [Rotate Disp.] is set to [OFF].
MENU → [Playback] → [Rotate]
1 Use ◀▶ select picture and press [MENU/SET]
2 Use ▲ to select the rotation direction and press [MENU/SET]
[ ] Rotate a picture 90 degrees clockwise.
[←]: Rotate a picture 90 degrees counterclockwise.
![LEICA V-LUX 5 - MENU → [Playback] → [Rotate] - 1](/content/2026/05/882858/images/3e9420d02b668d0f491bcdb2ff9e89317c1c5e9b83973776ef91f8932b27e9f6.jpg)
natural_image
Close-up of a sunflower with green leaves and a red horizontal line, showing two white arrows pointing to the flower's center (no text or symbols)[Video Divide]
A single video can be split into 2 parts. This is convenient when you want to keep just the necessary scenes, or if you wish to delete unnecessary scenes to create more storage space on your memory card while traveling.
MENU → [Playback] → [Video Divide]
1 Use ◀ to select a video to split and press [MENU/SET]
2 Press at the point where you want to split a video to pause it
- If you press ▶ while paused, you can make finer adjustments to the splitting position.
3 Press ▼ • There will be no copy of the original video saved after splitting.
(There will only be the 2 video that were created after the split.)
![LEICA V-LUX 5 - [Video Divide] - 1](/content/2026/05/882858/images/191972be27b0ef53df17dbfd006005230b2008a0696fdaef349ccd4eb24738ce.jpg)
natural_image
Woman and child in a flower field, smiling at the camera (no visible text or symbols)Do not turn off the camera or remove the battery/memory card while the video splitting function is working. Doing so could delete the entire video.
Video cannot be divided at a location close to the start or end of the video.
This function is not available in the following case:
• Video with a short recording time
[Time Lapse Video]
You can create a video from the pictures in a group that was recorded using [Time Lapse Shot].
MENU → [Playback] → [Time Lapse Video]
1 Use ▶ to select the [Time Lapse Shot] picture group and press [MENU/SET]
2 Create a video after selecting a production method
- For details, refer to step5 and the subsequent steps (→133).
[Stop Motion Video]
You can create a video from the pictures in a group that was recorded using [Stop Motion Animation].
MENU → [Playback] → [Stop Motion Video]
1 Use ▶ to select a stop motion animation group and press [MENU/SET]
2 Create a video after selecting a production method
• For details, refer to step7 and the subsequent steps ( 136).
[Rotate Disp.]
This mode allows you to display pictures vertically if they were recorded holding the camera vertically.
MENU → [Playback] → [Rotate Disp.] → [ON]
When you play back pictures on a PC, they cannot be displayed in the rotated direction unless the OS or software is compatible with Exif. Exif is a file format for stills which allows recording information, etc. to be added. It was established by “JEITA (Japan Electronics and Information Technology Industries Association)”.
[Picture Sort]
You can set the display sequence used for playing back pictures on this camera.
MENU → [Playback] → [Picture Sort]
| [FILE NAME] | Displays pictures in the folder name or file name sequence. This display format allows you to find the storage location of a picture on a card more easily. |
| [DATE/TIME] | Displays pictures according to the date and time that the pictures were taken in chronological order. When the pictures are taken using several cameras and stored on the same card, this display format allows you to find a specific picture more easily. |
Pictures may not be displayed according to the [DATE/TIME] sequence immediately after a card is inserted into this camera. In that case, wait a while, and the pictures will be displayed in the [DATE/TIME] sequence.
Menu list
[Delete Confirmation]
This sets which option, [Yes] or [No], will be highlighted first when the confirmation screen for deleting a picture is displayed.
It is set to ["No" first] when the camera leaves the factory.
MENU → [Playback] → [Delete Confirmation]
["Yes" first] [Yes] is highlighted first, so deletion can be done quickly.
["No" first] [No] is highlighted first. Accidental deletion of pictures is avoided.
The Wi-Fi®/Bluetooth® function
Camera operation via smartphone
- Shutter button operation via smartphone (remote recording)
- Playing back or saving images stored on the camera, or uploading them on social media sites
Expanding the scope of applications by connecting the camera to a smartphone compatible with Bluetooth Low Energy
- Pairing (connection setup)
- Turning the camera on/off via smartphone
• [B] (Bulb) recording
• Transferring recorded images to a smartphone automatically - Writing location information of a smartphone on a recorded image
- Synchronizing the camera's clock with a smartphone
- This manual uses the term “smartphone” for both smartphones and tablets unless it is necessary to distinguish between them.
Connecting the camera to a smartphone
You can remotely operate the camera using a smartphone. The "Leica FOTOS" app must be installed on your smartphone.
Installing the smartphone/tablet app "Leica FOTOS"
The “Leica FOTOS” app is an application provided by Leica Camera AG that allows your smartphone to perform the following operations of a Wi-Fi-compatible Leica compact digital camera.
| For Android^TM apps For iOS apps | ||
| Supported OS Android 6.0 or later iOS 11.0 or later | (The Bluetooth function cannot be used with the iPad 2) | |
| Installation procedure | 1 Connect your Android device to a network2 Select “Google Play ^TM Store”*3 Enter “Leica FOTOS” into the search box4 Select “Leica FOTOS” and install it• The icon will be added to the menu.  * Not available in China. To download in China, please visit the site below: www.leica-camera.com * Not available in China. To download in China, please visit the site below: www.leica-camera.com | 1 Connect the iOS device to the network2 Select “App Store”3 Enter “Leica FOTOS” into the search box4 Select “Leica FOTOS” and install it• The icon will be added to the menu.  |
QR Code Scan the following QR code with the mobile device. | ||
- Use the latest version.
- Supported OS versions as of July 2019. Supported OS versions may be changed without prior notice.
- The correct function of the app depends on the smartphone used.
- When downloading the app on a mobile phone network, high packet communication fees may be incurred depending on the details of your contract.
- Some of the screens and information provided in this document may be different depending on the supported operating system and "Leica FOTOS" version.
Connection
First-time connection to a mobile device
The connection is established via Bluetooth. A pairing of the camera and the mobile device is required for a first-time connection to a mobile device.
In the camera
1 Set the menu
MENU → [Setup] → [Bluetooth] → [Bluetooth] → [SET] → [Pairing]
- The camera enters pairing standby mode and displays its device name.
On the mobile device
1 Activate Bluetooth
2 Launch the Leica FOTOS app
3 Select the camera model
4 Follow the Leica FOTOS in-app instructions
The pairing process may take a few minutes to complete.
Each mobile device only needs to be paired with the camera once. The process adds the device to the list of known devices.
Connecting to known devices
1 Enable the Bluetooth function
MENU → [Setup] → [Bluetooth] → [Bluetooth] → [ON]
2 Follow the Leica FOTOS in-app instructions
- The camera connects to the mobile device automatically.
Should there be more than one known device in the vicinity of the camera, then it will automatically connect to the first device responding. A favorite mobile device cannot be specified.
We recommend removing rarely used devices from the list of known devices to prevent unwanted connections.
Disconnect and reconnect (i.e. deactivating and reactivating Bluetooth in the camera) if the wrong device was connected.
Removing devices from the list of known devices
1 Set the menu
MENU → ↗ [Setup] → [Bluetooth] → [Bluetooth] → [SET] → [Delete]
2 Select the smartphone you want to delete
The pairing process will have to be repeated to reconnect a deleted device to the camera. When it takes time to set up pairing between a smartphone and a camera, delete the pairing information of both devices and register them again. This may enable the devices to be recognized properly.
Remote camera control
You can take pictures and record video remotely via the mobile device, and can also change image settings or transfer data to the mobile device. A list of available functions and instructions for their use can be found in the Leica FOTOS app.
Remote camera activation
The camera can be activated remotely from off or standby if this function is activated in the camera. The Bluetooth function must be active.
1 Set the menu
MENU → ↗ [Setup] → [Bluetooth] → [Remote Wakeup] → [ON]
Important information
- Remote activation will activate the camera even if it was switched off via the main switch.
- Accidental remote camera activation may result in unwanted pictures taken and high power consumption.
- A third-party device can – provided it has been paired with the camera – access the camera remotely if your own mobile device is not currently connected or its Bluetooth function is deactivated. This poses a danger of unauthorized access to your data or camera functions.
Solution
- Ensure that the function is disabled.
- Disable the function as soon as it is no longer needed.
4K video
Viewing on TV screen
When you connect this unit to a 4K-compatible TV and play back a video recorded with [Rec Quality] of [4K], you can enjoy high-resolution 4K video. Although resolution output will be lower, you can also play back 4K video by connecting to a high-definition TV and other devices that do not have 4K support.
natural_image
Illustration of a camera connected to a computer monitor (no text or symbols)Preparation
- Set [HDMI Mode (Play)] ( 210) to [AUTO] or [4K/30p].
- When connecting to a TV that does not support 4K video, select [AUTO].
① Connect this unit to a 4K-compatible TV using an HDMI micro cable and display the playback screen ( 238)
- When the [HDTV Link] setting on the camera is set to [ON] and the camera is connected to a HDTV Link (HDMI)-compatible TV, it automatically switches its input and the playback screen is displayed. For details, refer to ( 240) .
- Read the operating instructions for the TV.
Viewing 4K video on a PC screen
- To play back and edit 4K video, a high-performance PC environment is required.
natural_image
Illustration of a laptop computer with visible keyboard, resting on screen (no text or symbols)Storing 4K video
You can only dub 4K video to a Blu-ray disc or DVD with the specific compatibility.
Storing 4K video on your PC
You can use the software available for downloading after registering your camera on the Leica Camera AG homepage to import 4K video to a PC.
- For details, refer to the software instructions.
Viewing on a TV screen
Preparation
Turn off both camera and TV.
1 Connect camera to TV
Check the plug direction and insert it straight in. (If the cable is inserted in the wrong direction, the plug could become deformed and cause faulty operation.) Also, do not insert into the wrong jack. Doing so may cause damage to this camera.
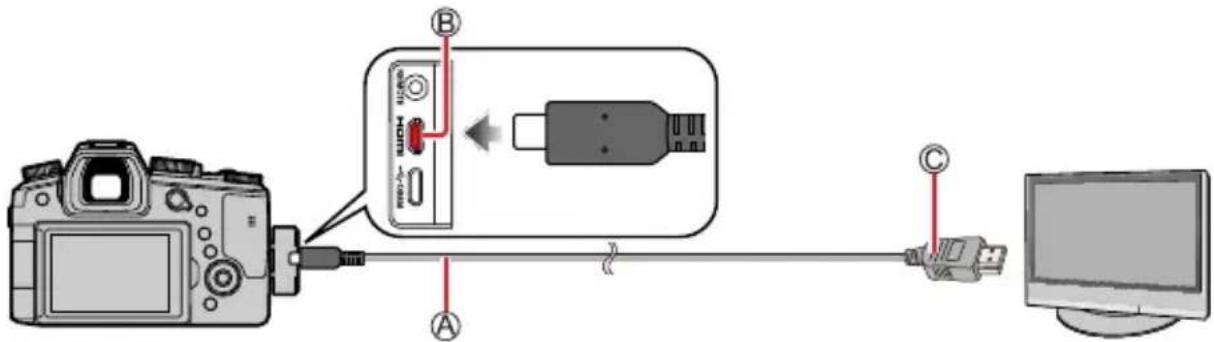
Ⓐ HDMI micro cable
Use a "High Speed HDMI micro cable" with the HDMI logo.
Cables that do not comply with the HDMI standards will not work.
"High Speed HDMI micro cable" (Type D - Type A plug, up to 2 m (7') long)
B [HDMI] jack
© To HDMI video/audio input jack
2 Turn on the TV and switch the TV input source to match the connection jack
3 Turn on the camera and press the [▶] (Playback) button
Bars may appear at the sides or at the top and bottom of the screen, depending on the aspect ratio setting.
Change the screen mode on your TV if the picture is displayed with the top or bottom cut off.
Depending on the TV to be connected, video files or 4K burst files may not be played back correctly.
Check the [HDMI Mode (Play)]. (→210)
To play back 24p video, set [HDMI Mode (Play)] to [AUTO]. Otherwise, the picture is not output at 24 frames per second.
Pictures are not displayed on the camera screen. Also, sound is not produced from the camera's speaker.
HDMI output will be canceled if a USB cable (supplied) is connected simultaneously.
Read the operating instructions for the TV.
Recording while monitoring camera images
When using the HDMI output, you can take pictures while monitoring the camera image on a TV, etc.
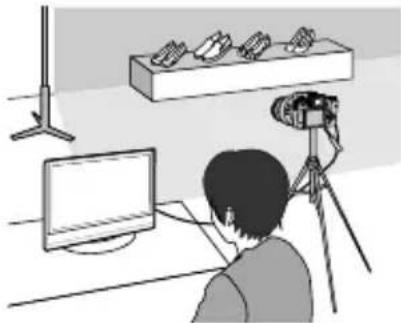
natural_image
Illustration of a person using a camera to observe a computer setup with a shelf and stand (no text or symbols visible)Switching the information displayed
You can change the display shown during HDMI output using [HDMI Info Display (Rec)] in [TV Connection] on the [Setup] menu.
[ON]: The camera display is output as is.
[OFF]: Only images are output.
When using the Auto Focus Mode [+] or MF assist, the screen cannot be enlarged in windowed mode.
If you use the HDMI output during recording, the aspect ratio setting is fixed to [16:9].
An electronic sound or shutter sound will not sound.
Some of setting screens are not output through the HDMI connection.
This function is not available in the following cases:
• During video recording
- During panorama picture recording
- When recording 4K photos
- When recording using [Post Focus]
HDTV Link (HDMI)
What is HDTV Link (HDMI)?
HDTV Link is a function that automatically links this camera to HDTV compatible devices via HDMI micro cables for easy operation with the HDTV remote control. (Some operations are not available.)
HDTV Link (HDMI) is an exclusive function added to the industry-standard HDMI control functions known as HDMI CEC (Consumer Electronics Control). Operation is not guaranteed when connecting to other HDMI CEC-compatible devices. Refer to your product's instructions to verify compatibility with HDTV Link (HDMI).
Preparation
Set [HDTV Link] to [ON] ( 210).
1 Connect the camera to an HDTV Link (HDMI)-compatible TV with an HDMI micro cable ( 238)
2 Turn on the camera and press the [▶ (Playback) button
3 Operate with the remote control for the TV
Turning the camera OFF
- The camera can be turned off at the same time as the TV using the remote control.
Automatic input select
- When the camera and TV are connected by HDMI micro cable, the camera is turned ON, and the camera's [▶] (Playback) button is pressed, the television input automatically switches to the camera's screen. The television can also be switched on via the camera from Standby Mode (if "Power on link" on the TV is set to "on", provided, it has this function).
Operations via the camera buttons will be limited.
To play back the audio of the video in a slide show, set the [Sound] in the Slide Show setting screen to [AUTO] or [Audio].
Use a "High Speed HDMI micro cable" with the HDMI logo.
Cables that do not comply with the HDMI standards will not work.
"High Speed HDMI micro cable" (Type D - Type A plug, up to 2 m (7') long)
Compatible HDMI micro cables are available from specialist photo dealers. Make absolutely sure to use only cables compatible with this camera.
If HDTV Link (HDMI) does not function correctly ( 262)
Copying the recorded image data to a computer
Copying stills and video
Preparation
- Turn on the camera and computer.
1 Connect camera to computer
- Check the plug direction and insert it straight in. (If the cable is inserted in the wrong direction, the plug could become deformed and cause faulty operation.) Also, do not insert into the wrong jack. Doing so may cause damage to this camera. - Do not use any other USB cables except a genuine Leica USB cable of the supplied type. Using cables other than the above may cause a malfunction.
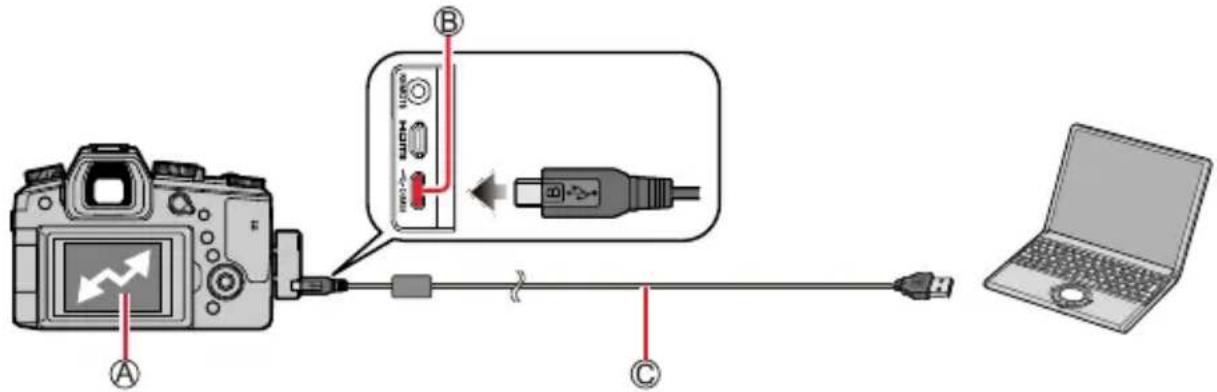
Ⓐ [Access]
- Do not disconnect the USB cable (supplied) while [Access] is displayed.
® [USB/CHARGE] jack
© USB cable (supplied)
2 Use ▲ to select [PC(Storage)] and press [MENU/SET]
- If you set the [USB Mode] to [PC(Storage)] in the [Setup] menu in advance, the camera will be automatically connected to the PC without displaying the [USB Mode] selection screen.
3 Copy the images to the computer using the software available for downloading after registering your camera on the Leica Camera AG homepage
Before inserting or removing a card, turn the camera off and disconnect the USB cable. Otherwise, data may be destroyed.
Use a sufficiently charged battery.
When the battery begins to run out during communication, a warning beep sounds. Remove the USB cable safely. Otherwise, data may be destroyed.
Copying to your computer without using software
You can save pictures to use on your computer by dragging and dropping folders and files into separate folders on your computer.
- The card of this unit contains the following files (folder structure).
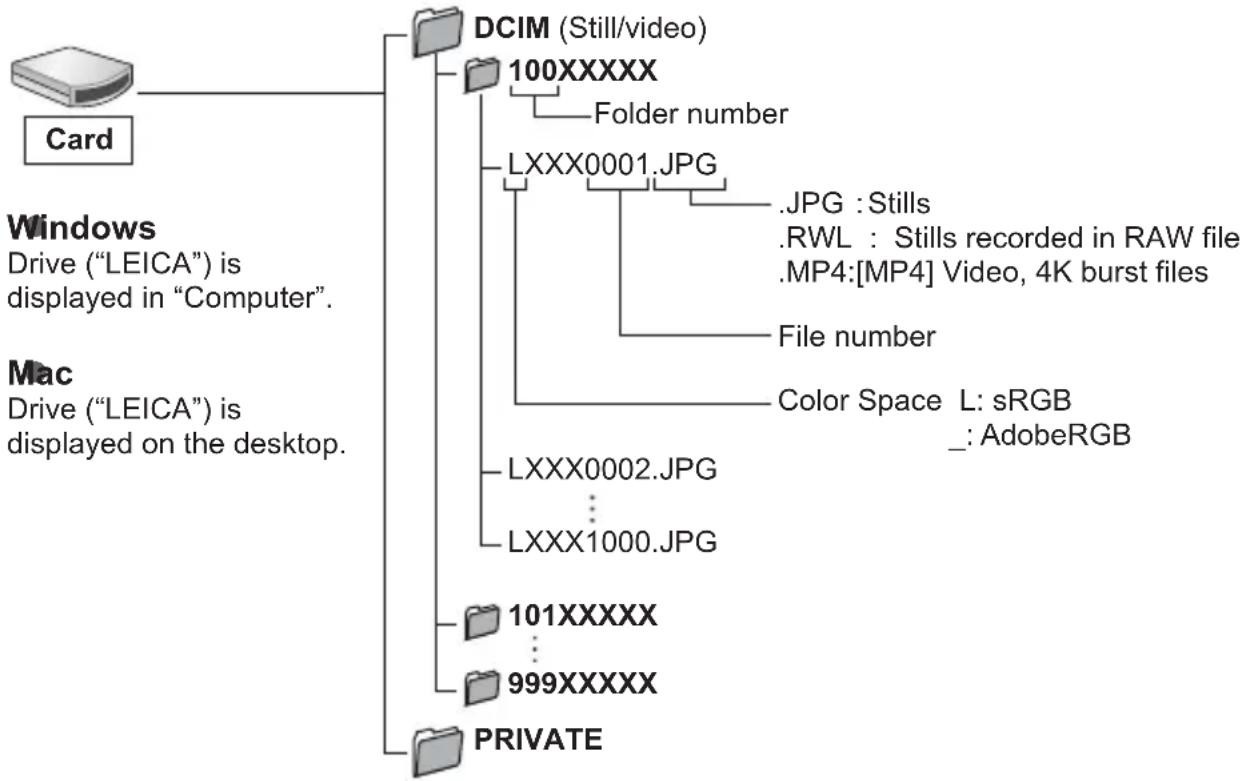
flowchart
graph TD
    A["Card"] --> B["DCIM (Still/video)"]
    A --> C["100XXXXX"]
    C --> D["Folder number"]
    C --> E["LXXX0001.JPG"]
    E --> F[".JPG : Stills"]
    E --> G[".RWL : Stills recorded in RAW file"]
    E --> H[".MP4:[MP4"] Video, 4K burst files]
    E --> I["File number"]
    I --> J["Color Space L: sRGB"]
    I --> K["_: AdobeRGB"]
    A --> L["Mac Drive ("LEICA") is displayed on the desktop."]
    L --> M["LXXX0002.JPG"]
    M --> N["LXXX1000.JPG"]
    L --> O["101XXXXX"]
    L --> P["999XXXXX"]
    L --> Q["PRIVATE"]
Some computers can read directly from the card taken from the camera, others require the use of an external card reader. For details, refer to the instructions of the respective devices.
If the computer being used does not support SDXC Memory Cards, a message prompting you to format may appear. (Doing so would cause all recorded image data to be erased, so make sure to select [NO].)
With an external card reader, make sure it supports the type of card being used.
Storing recorded stills and video in the recorder
You can connect the camera to a Blu-ray recorder or DVD recorder that is compatible and store pictures from the camera to the device.
Preparation
- Turn on the camera and recorder.
1 Connect camera to recorder
- Check the plug direction and insert it straight in. (If the cable is inserted in the wrong direction, the plug could become deformed and cause faulty operation.) Also, do not insert into the wrong jack. Doing so may cause damage to this unit. - Do not use any other USB cables except a genuine Leica USB cable of the supplied type. Using cables other than the above may cause a malfunction.
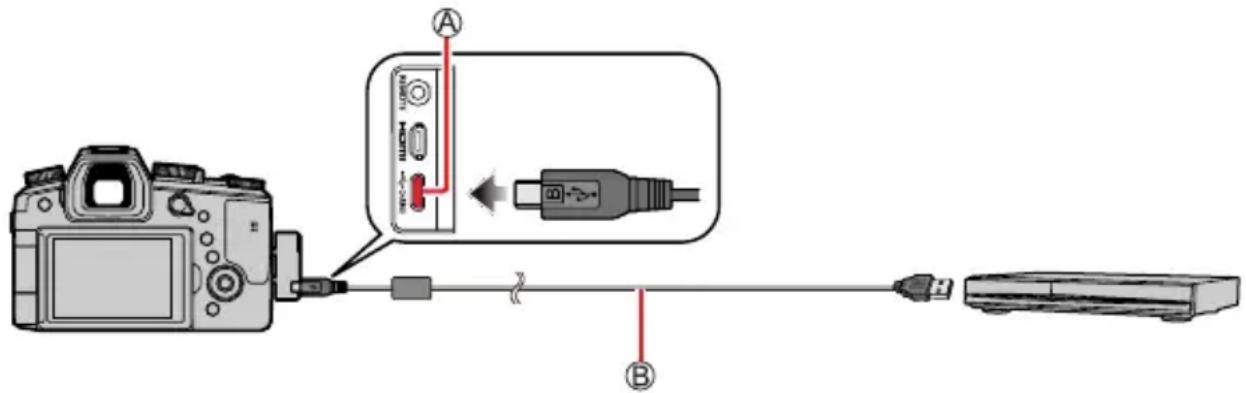
Ⓐ [USB/CHARGE] jack
© USB cable (supplied)
2 Use ▲ to select [PC(Storage)] and press [MENU/SET]
- If you set the [USB Mode] to [PC(Storage)] in the [Setup] menu in advance, the camera will be automatically connected to the recorder without displaying the [USB Mode] selection screen.
3 Dub by operating the recorder
- For details on dubbing and playback procedures, refer to the operating instructions for the recorder.
- Some recorders may not support certain modes, such as the 4K video mode.
Use a sufficiently charged battery. When the battery begins to run out during communication, a warning beep sounds. In this case, stop the transfer immediately. Otherwise, the data may be damaged.
Before inserting or removing a card, turn the camera off and disconnect the USB cable.
Printing
You can connect a camera directly to a PictBridge-compatible printer for printing.
Preparation
- Adjust the print quality or other settings on your printer, as needed.
- Turn on the camera and printer.
1 Connect camera to printer
- Check the plug direction and insert it straight in. (If the cable is inserted in the wrong direction, the plug could become deformed and cause faulty operation.) Also, do not insert into the wrong jack. Doing so may cause damage to this unit.
- Do not use any other USB cables except a genuine Leica USB cable of the supplied type. Using cables other than the above may cause a malfunction.
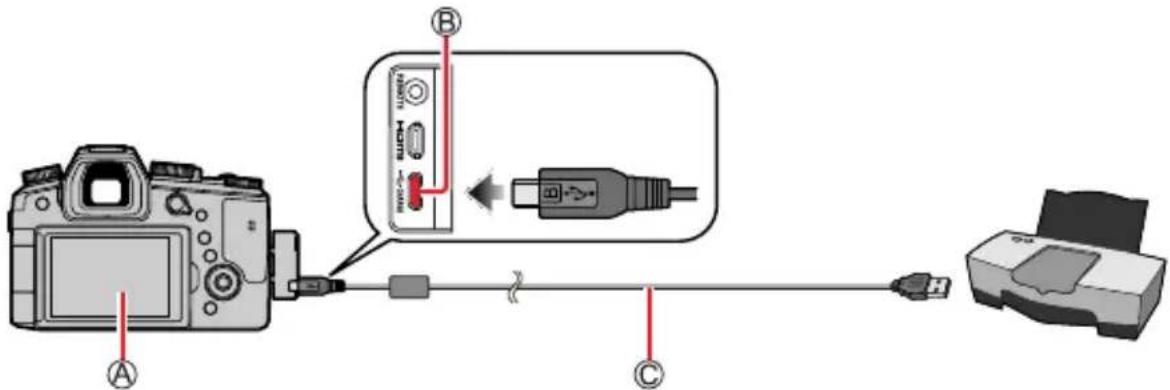

- Do not disconnect the USB cable (supplied) when the cable disconnection icon [icon] is displayed (may not be displayed with some printers).
® [USB/CHARGE] jack
© USB cable (supplied)
2 Use ▼to select [PictBridge(PTP)] and press [MENU/SET]
3 Use ◀ to select a picture and press [MENU/SET]
4 Use ▲ to select [Print start] and press [MENU/SET]
Printing multiple pictures
Multiple pictures are printed at one time.
1 Press ▲ to select [Multi Print] in step 3 of "Printing" (→244)
2 Use ▲ to select the item and press [MENU/SET]
| [Multi Select] | 1 Scroll between pictures with ▲▼, Select pictures to print with [MENU/SET] (Press [MENU/SET] again to release selection.)2 Press the [DISP] button to execute |
| [Select All] Print all pictures. | |
| [Rating] Print pictures selected as [Rating]. | |
3 Use ▲ to select [Print start] and press [MENU/SET]
Use a sufficiently charged battery. When the battery begins to run out during communication, a warning beep sounds. Cancel printing and disconnect USB cable (supplied).
Before inserting or removing a card, turn the camera off and disconnect the USB cable.
Some printers can print directly from the camera's memory card. For details, see the manual for your printer.
A yellow “●” displayed during printing indicates an error message.
Print may be divided into several pictures if printing a large amount of pictures. (Remaining sheets display may differ from the number of pictures set for printing.)
Video, 4K burst files, and pictures recorded with [Post Focus] cannot be printed.
Stills recorded in a RAW file cannot be printed. (The stills recorded in JPEG file format at the same time as the RAW file can be printed.)
Printing
Print settings on the camera
Setting options include the number of printed pictures and their size. Make settings before selecting [Print start].
| [Print with Date] [ON] / [OFF] | |
| [Num.of prints] Sets | number of pictures (up to 999 pictures). |
| [Paper Size] Sets the | paper size. |
| [Page Layout] | Sets whether or not to add borders and how many pictures to be printed on each sheet of paper. |
If the printer does not support date printing, the date cannot be printed on the picture.
When setting [Print with Date] to [ON], check the date printing settings on the printer (printer settings may be prioritized).
Items may not be displayed if incompatible with printer.
To print to paper sizes/layout not supported by this camera, set to [icon] and make settings on the printer. (Consult your printer's operating manual.)
Printing with date and text
Time and date can be set to be printed on the picture when taking the picture by activating the [Text Stamp] function in the [Playback] menu. (→226)
Printing date without [Text Stamp]
Printing in store:
Only the recording date can be printed. Request date printing in store.
- The characters entered for [Age] or [Name] of [Profile Setup] or [Face Recog.], [Location] in [Travel Date], and [Title Edit] cannot be printed at a store.
Using printer:
Recording date can be printed by setting [Print with Date] ( 246) to [ON] when connecting to a printer compatible with date printing.
List of monitor/viewfinder displays
The screen display of the monitor/viewfinder indicates the camera's operating state.
- The following images are examples of when [Monitor Disp. Set] is set to [☐☐☐] (monitor style) in the monitor.
- The information displayed, such as histograms, magnifications, and numeric values, are only for reference purposes.
In recording
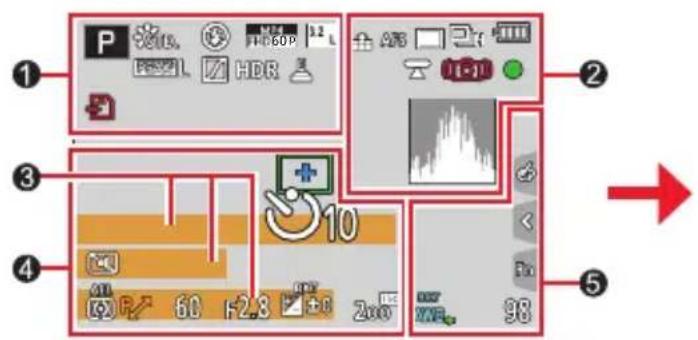
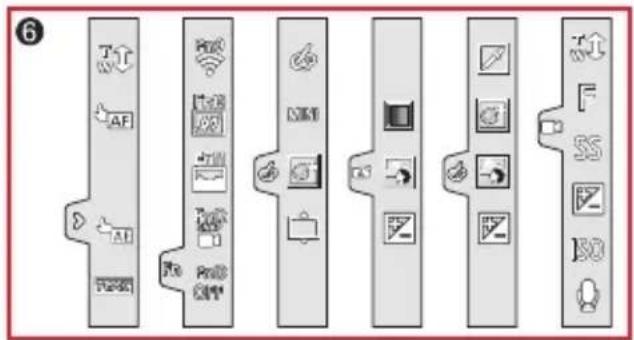
1
| Recording mode (→38) | |
| C1 | Custom Set (→85) |
| [Photo Style] (→173) | |
| Flash setting (→148, 149, 151) | |
| [Rec Quality] (→155) | |
| [Snap Movie] (→158) | |
| [Aspect Ratio] (→170)/ [Picture Size] (→171) | |
| Image size (Panorama Shot Mode) (→69) | |
| Picture effect (Filter) adjustment display (→76, 175) | |
| EXPS | Types of picture effects (Filter) (→175) |
| Card (displayed only during recording) (→25) |
| XXmXXs | Elapsed recording time*1(→153) |
| Simultaneous recording indicator (→157) | |
| EVF/MONAUTO | Automatic switching between viewfinder and monitor (→34) |
| PEAK H PEAK L | [Peaking] (→196) |
| [Highlight Shadow] (→178) | |
| HDR | [HDR] (→183)/[iHDR] (→60) |
| [Multi Exp.] (→184) | |
| E | Electronic shutter (→182) |
| Picture-taking during video recording (Photo Priority)(→157) | |
| Overheat indicator (→258) |
List of monitor/viewfinder displays
②
| RAW | [Quality] (→171) |
| 120fps [High Speed Video] (→82) | |
| AFS AFF AFC MF | Focus mode (→88, 102) |
| BKT AFS | Focus Bracket (→140) |
| [AF Mode] (→90) | |
| [Pull Focus] (→160) | |
| [Face Recog.] (→200) | |
| AFL AF Lock (→105) | |
| Burst (→114) | |
| [4K PHOTO] (→116) | |
| [Post Focus] (→127) | |
| [Time Lapse Shot] (→132) | |
| [Stop Motion Animation] (→135) | |
| [Self Timer] (→137) | |
| Remaining battery (→22) | |
| Macro recording (→101) | |
| [Level Shot] (→186) | |
| [Stabilizer] (→141) | |
| Jitter alert (→141) | |
| Focus (Lights green.) (→37)/Recording state (Lights up in red.) (→153) | |
| Focus (Under low illumination) (→87) | |
| Focus (Starlight AF) (→87) | |
| Wi-Fi connection status | |
| Bluetooth connection status | |
| GPS | Location Logging |
| Histogram (→197) | |
3
| Name*2 (→203) |
| Travel elapsed days*3 (→205) |
| Age in years/months *2 (→203) |
| Location*3 (→205) |
| Current date/time*3Travel destination setting *3: →204) |
| Exposure meter (→199) |
| Zoom (→145) |
4
| AF area (→96) | |
| + | Spot metering target (→177) |
| + | [Center Marker] (→197) |
| _10 _2 | [Self Timer] (→137) |
| [Zoom Mic] (→188) | |
| Audio recording level display (→186) | |
| External Microphone (→187) | |
| [Silent Mode] (→181) | |
| LMT OFF | [Sound Rec Level Limiter] ([OFF]) (→187) |
| AEL AE Lock (→105) | |
| [Metering Mode] (→47, 177) | |
| Program Shift (→62) | |
| 60 Shutter speed (→37) | |
| F2.8 | Aperture value (→37) |
| F2.8 | Aperture Bracket (→140) |
| Exposure Compensation (→106) | |
| Exposure Bracket (→139) | |
| Brightness (exposure) (→61, 80) | |
| Manual Exposure Assist (→65) | |
| ± 0 | ISO sensitivity (→107) |
List of monitor/viewfinder displays
5
| AWBc AWBw | White Balance (→109) |
| BKT AWB+ | White Balance Bracket (→112) |
| White Balance Fine Adjustment (→111) | |
| Coloring (→61) | |
| 98 | Number of recordable pictures (→26) |
| r20 | Maximum number of pictures that can be taken continuously (→114) |
| RXXmXXs | Available recording time*1 (→27) |
6
| Touch tab (→194) | ||
| T↑w↓ | Touch zoom (→146) | |
| Touch Shutter (→46) | ||
| Touch AF (→46) | ||
| [Touch AE] (→47) | ||
| [Peaking] (→196) | ||
| Fn9Fn10Fn11Fn12Fn13OFF | Function buttons (→53) | |
| Coloring (→61) | |
| Defocus control function(→61, 80) | |
| Brightness (exposure)(→61, 80) | |
| Type of defocus ([Miniature Effect]) (→78) | |
| [One Point Color] (→79) | |
| [Sunshine] (→79) | |
| Picture effect (Filter)adjustment display(→76, 175) | |
| (→61)(→80)(→81) | Picture effects ON or OFF(→175) |
| MINI | Picture effects (Filter)(→175) |
| F | Aperture value (→81) |
| SS | Shutter speed (→81) |
| ISO | ISO sensitivity (→81) |
| [Sound Rec Level Adj.](→186) |
*1 [m] and [s] indicate "minute" and "second".
*2 This is displayed for about 5 seconds when the camera is turned on and the [Profile Setup] setting is selected.
*3 This is displayed for about 5 seconds when the camera is turned on, after setting the clock and after switching from Playback Mode to Recording mode.
List of monitor/viewfinder displays
On-screen recording information
![P 1/60 F2.8 ISO ±0 200 0 ±0 AFS OFF Fn STD AWB+ iOFF [ 98 ]](/content/2026/05/882858/images/6d0cab01c37dc88489135a78de44118cdb97de66a969345fe9da24225a83311b.jpg)
1
| Recording mode (→38) | |
| 1/60 Shutter speed (→37) | |
| F2.8 Aperture value (→37) | |
| Remaining battery (→22) |
2
| ISO 200 | ISO sensitivity (→107) |
| ±0 -...+ | Exposure Compensation (→106) |
| Exposure Bracket (→139) | |
| Brightness (exposure) (→61, 80) | |
| Manual Exposure Assist (→65) | |
| ←←⊗←S←S⊗ | [Flash] (→148, 149, 151) |
3
| ☐ | Single (→113) |
| ☐H ☐H ☐M ☐L | Burst (→114) |
| ☐+K ☐+K ☐+K | [4K PHOTO] (→116) |
| ☐ | [Post Focus] (→127) |
| ☐ | [Time Lapse Shot] (→132) |
| ☐ | [Stop Motion Animation] (→135) |
| 10 10 2 | [Self Timer] (→137) |
| AFS AFF AFC MF | Focus Mode (→88, 102) |
| [AF Mode] (→90) | |
| [Quality] (→171) | |
| [Aspect Ratio] (→170)/ [Picture Size] (→171) | |
| Wi-Fi/Bluetooth | |
| Fn ^ | Function button setting (→52) |
4
| [Photo Style] (→173) | |
| AWB AWBcAWBw | White Balance (→109) |
| BKTAWB+ | White Balance Bracket (→112) |
| White Balance Fine Adjustment(→111) | |
| iOFF | [i.Dynamic] (→179) |
| [Metering Mode] (→47, 177) | |
| 98 | Number of recordable pictures(→26) |
| r20 | Maximum number of picturesthat can be taken continuously(→114) |
| RXXmXXs | Available recording time*(→27) |
*[m] and [s] indicate "minute" and "second".
List of monitor/viewfinder displays
In playback
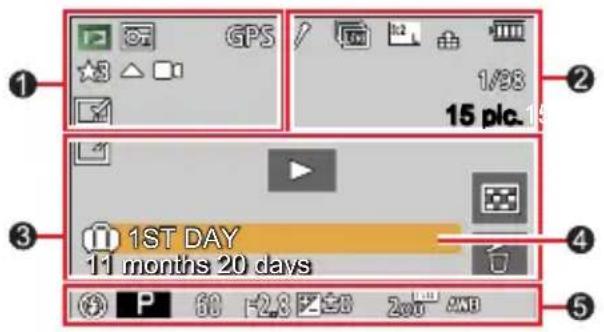
1
| Playback Mode (→217) | |
| Protected picture (→218) | |
| GPS | With location information |
| ★3 | [Rating] (→218) |
| Cable disconnect prohibit icon (→244) | |
| Video playback (→162) | |
| Panorama picture playback (→71) | |
| Continuous playback of picture group (→166) | |
| Save pictures from the 4K burst file (→119) | |
| Save a picture from pictures recorded using [Post Focus] (→129) | |
| Group pictures recorded using Focus Bracket (→166) | |
| Text stamped display (→226) | |
| XXmXXs | Elapsed playback time*1 |
②
| Icon indicating the presence of a marker (→120, 121, 122) | |
| 4K Photo (4K burst file) (→116) | |
| [Post Focus] (→127) | |
| [Focus Stacking] (→130) | |
| [Aspect Ratio] (→170)/ [Picture Size] (→171) | |
| [Rec Quality] (→155) | |
| [Snap Movie] (→158) | |
| [Quality] (→171) | |
| 120fps [High Speed Video] (→82) | |
| Remaining battery (→22) | |
| 1/98 Picture number/Total pictures | |
| Wi-Fi connection status | |
| 15 pic. Number of group pictures | |
| XXmXXs | Video recording time*1 (→162) |
List of monitor/viewfinder displays
3
| Clear Retouch completed icon (→225) | |
| Acquiring information icon | |
| Playback (Video) (→162) | |
| 1ST DAY | Travel elapsed days (→205) |
| Picture Group Display (→167) | |
| [Silent Mode] (→181) | |
| Multi Playback (→165) | |
| Delete (→168) |
4
| Name*2 (→201, 203) |
| Location*2 (→205) |
| Title *2 (→219) |
| Age in years/months (→201, 203) |
5
Recording information
*1[m] and [s] indicate "minute" and "second".
*2 It is displayed in order of [Title], [Location], [Name] ([Baby1]/[Baby2], [Pet]), [Name] ([Face Recog.]).
List of monitor/viewfinder displays
Detailed information display
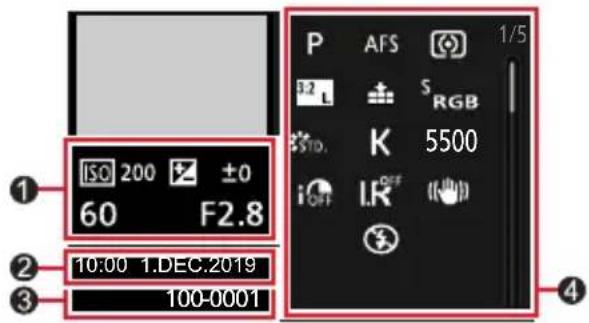
Photo style, Highlight shadow display
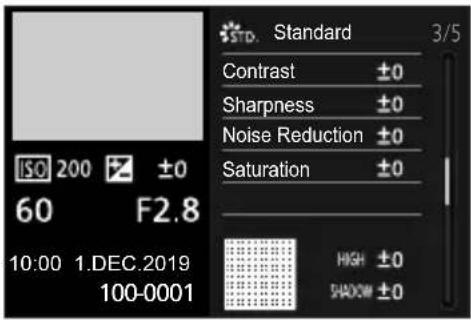
Lens information display
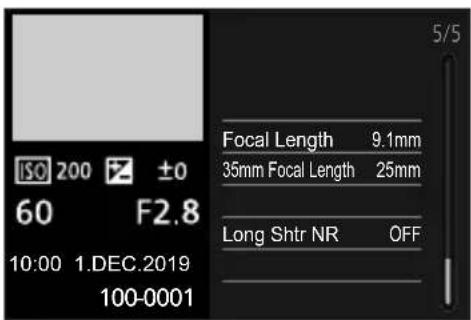
1
Recording information (Basic)
②
Recording date/time
World time ( 204)
Histogram display
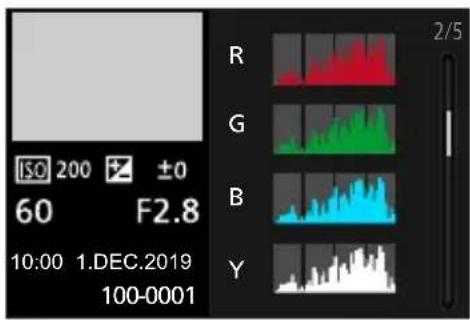
White balance display
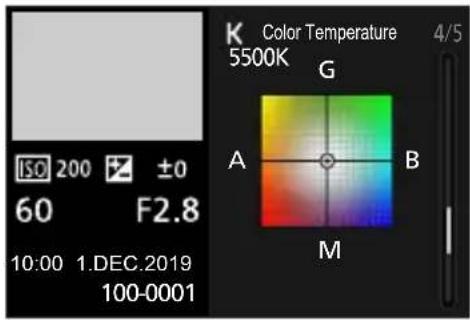
3
100-0001 Folder/File number ( 242)
4
Recording information (Advanced)
| 5500 | White Balance (color temperature) (→109) |
| iOFF | [i.Dynamic] (→179) |
| HDRON | [HDR] (→183)/[iHDR] (→60) |
| I.ROFF | [i.Resolution] (→179) |
Message displays
The following explains the meaning of major messages displayed on the screen, and how to respond to them.
Memory cards
[Memory Card Error] / [Format this card?]
- Save needed data on a computer or other device, and then use [Format] on the camera. (→26)
- Try with a different card.
[Read Error] / [Write Error] / [Please check the card]
- Check whether card has been inserted correctly (→24).
- Turn off the camera and remove the card. Reinsert the card and turn the camera on again.
- Try with a different card.
[Recording was cancelled due to the limitation of the writing speed of the card]
- The speed class of a required card varies depending on [Rec Quality] of a video. 4K photo recording requires a card that meets a particular speed class rating. Be sure to use a card of the recommended speed class (→25).
- If recording stops even when using a card of the recommended speed class ( 25), the data writing speed has dropped. If this happens, we recommend backing up the data on the memory card and formatting it ( 26). Depending on the type of the card, recording may stop in the middle.
[Memory Card Error] / [This memory card cannot be used]
- Use a compatible card. ( 25)
Battery
[This battery cannot be used]
- Use a genuine Leica battery. Consult your dealer or your nearest Leica Customer Care center if the display still remains.
- Wipe any dirt away from the battery terminal.
Wi-Fi function
[Failed to connect wireless access point] / [Connection failed] / [No destination found]
- The wireless access point information set on this unit is wrong. Check the authentication type, encryption type, and encryption key.
- Radio waves from other devices may block the connection to a wireless access point. Check other devices that are connected to the wireless access point and devices that use the 2.4 GHz band.
[Connection failed. Please retry in a few minutes.] / [Network disconnected. Transfer stopped.]
- Radio waves from the wireless access point are getting weak. Perform the connection closer to the wireless access point.
- Depending on the wireless access point, connection may be automatically disconnected after specific time has passed. Reconnect the connection again.
[Connection failed]
- Change the access point to connect to in the smartphone Wi-Fi settings to this camera.
Others
[Some pictures cannot be deleted] / [This picture cannot be deleted]
- Non-DCF pictures (→161) cannot be deleted. Save needed data on a computer or other device, and then use [Format] on the camera. (→26)
[Cannot be set on this picture]
- [Title Edit], [Text Stamp], and other functions cannot be used for pictures that are not compliant with the DCF standard ( 161) .
[A folder cannot be created]
- A folder cannot be created because available folder numbers have been already assigned. Save all necessary pictures to your computer or other devices and format the card (→26). After you format the card, execute [No.Reset] in the [Setup] menu to reset the folder number to 100. (→213)
[Please turn camera off and then on again] / [System Error]
- Turn the camera on again. (Consult your dealer or your nearest Leica Customer Care center if the display still remains.)
Q&A
Troubleshooting
① Try checking these items ( 256 - 263) first.
If the problem persists,
② Performing [Reset] in the [Setup] menu may resolve the issue ( 213).
Battery, power
The battery charge indicator is flashing.
- Charging is being performed in a place with extremely high or low temperature.
→ Reconnect the USB cable (supplied) and retry charging in a place where ambient temperature is 10 °C to 30 °C (50 °F to 86 °F) (temperature conditions also apply to the battery itself). - Charging is not possible if the power supply capacity of the computer is low.
The camera is not working after it is turned on.
The camera turns off automatically after it is turned on.
- Battery needs recharging.
→ Charge the battery. (→18)
The camera turns off automatically.
• [Economy] is activated. ( 207)
The battery depletes too quickly.
• [4K PHOTO] is set to 📄[4K] ([4K Pre-Burst]).
→ When][([4K Pre-Burst]) has been selected, the battery drains faster. Select [ ] ([4K Pre-Burst]) only when recording.
- The Wi-Fi connection has been on for a long time.
→ The battery is used up faster with a Wi-Fi connection. Turn off the camera as often as possible using [Economy] ( 207) or other methods.
Recording
Striping or flicker may appear in fluorescent lighting and LED lighting.
- This is characteristic of MOS sensors which serve as the camera's pickup sensors. This is not a malfunction.
- If you are taking stills using the electronic shutter, the striping may be reduced by setting a slower shutter speed. (→64)
- When noticeable flicker or striping is seen in pictures taken in fluorescent or LED lighting in video recording mode, you can reduce the flicker or striping by setting up [Flkr Decrease] (→185) and adjusting the shutter speed. You can set the shutter speed manually in the Creative Video Mode. (→81)

natural_image
Close-up of a gray tabby cat with large eyes, partially obscured by a blurred background (no text or symbols visible)Cannot record pictures. The shutter will not operate immediately when the shutter button is pressed.
- When [Focus/Release Priority] is set to [FOCUS], the camera will not record until proper focusing is achieved. ( 192)
Recorded pictures look white.
- Lens is dirty (fingerprints, etc.).
→ Turn the camera on to extract lens barrel, and clean lens surface with a soft, dry cloth.
Recorded pictures are too bright/too dark.
- AE Lock ( 105) is set incorrectly.
Multiple pictures are taken when I press the shutter button just once.
Check the following settings. If any of them apply, multiple pictures will be taken.
- Drive Mode is set to other than [Single].
→ Set the Drive Mode to [Single]. (→113) - Bracket recording is set.
→ If any of theT] icons (ex. [BKT ±0], [F2.8], [AFS], [AWB], etc.) is displayed on the screen, bracket recording is set. Under [Bracket] in the [Rec] menu, set [Bracket Type] to [OFF]. (→138)
Focus not aligned correctly.
- Subject outside of focus range.
• [Focus/Release Priority] is set to [RELEASE]. (→192)
• [Shutter AF] is set to [OFF]. (→190) - AF Lock ( 105) is set incorrectly.
- If there are fingerprints or dirt on the lens, the focus may be set to the lens and not the subject.
Recorded pictures are blurred. The stabilizer function is ineffective.
- Shutter speed is slower in dark locations and the stabilizer function is less effective.
→ Use a tripod and the self-timer ( 137) when using a slower shutter speed.
Recorded pictures appear coarse, or there is interference.
- We recommend trying the following methods.
→ Lower ISO sensitivity ( 107).
→ Either adjust [Noise Reduction] of [Photo Style] to a higher setting or set each item other than [Noise Reduction] to a lower setting. (→174)
→ Set [Long Shtr NR] to [ON]. (→180)
Subject appears skewed in pictures.
- If you take a picture of a moving subject in the electronic shutter mode, video recording mode, or 4K photo recording mode, the subject in the picture may be skewed in some cases. This is characteristic of MOS sensors which serve as the camera's pickup sensors. This is not a malfunction.
Brightness or coloring of recorded picture different from real life.
- When recording under fluorescent or LED lighting fixture etc., increasing the shutter speed may introduce slight changes to brightness and color. These are a result of the characteristics of the light source and do not indicate a malfunction.
- When recording subjects in extremely bright locations or recording under fluorescent lighting, LED lighting, mercury lamp, sodium lighting etc., the colors and screen brightness may change or horizontal striping may appear on the screen.
4K photo recording stops before finishing.
- When the ambient temperature is high or recording of the 4K Photo function is performed continuously, the camera may display [△] and stop recording. Wait until the camera cools down.
Video
Cannot record video.
- When a large capacity card is used, you may not be able to take a picture for a while after you turn on the camera.
Video recording stops midway.
- When the ambient temperature is high or video is recorded continuously, the camera may display [ ] and stop the recording. Wait until the camera cools down.
- The speed class of a required card varies depending on [Rec Quality] of a video. Be sure to use a card of the recommended speed class (→25).
Sometimes focus adjustment with Auto Focus mode is difficult while recording 4K video.
- This may occur when taking a picture by reducing the Auto Focus speed in order to adjust the focus at high precision. This is not a malfunction.
A noise, such as a clicking or buzzing noise, is recorded on a video. Audio is recorded at low volumes.
- With recording in a quiet environment, the sound of aperture, focus and other actions may be recorded in video. This is not a malfunction. The focus operation during recording of video can be set to [OFF] in [Continuous AF] (→156).
- If you block the microphone with your fingers while video is being recorded, the audio may be recorded at a low volume or may not be recorded at all. In this case, the camera may pick up the lens operating sounds more easily.
Operating sounds are recorded in a video.
- We recommend recording video in Creative Video Mode if you are concerned about operating noise. (→81)
Flash
No flash emitted.
- The flash becomes unavailable in the following cases.
- The flash is closed.
- Flash set to [2] (Forced Flash Off). (→147, 151)
- Set Shutter Type to [AUTO] or [MSHTR]. (→182)
- Set [Silent Mode] to [OFF]. (→181)
Monitor/viewfinder
The monitor/viewfinder is off although the camera is turned on.
- If no operations are performed during the set time period [Auto EVF/Monitor Off] (→207) is activated, and the monitor/viewfinder turns off.
- When a hand or an object is close to the eye sensor, the monitor display mode could be switched to viewfinder display mode. ( 34)
It may flicker for an instant or the brightness of the screen may change significantly for an instant.
- This occurs due to the aperture of the lens changing when the shutter button is pressed halfway, or when the brightness of the subject changes. This is not a malfunction.
Cannot switch between the monitor and viewfinder when pressing [EVF] button.
- When it is connected to a computer or printer, the camera can display pictures on the monitor only.
The color saturation in the viewfinder appears differently than in the actual picture.
- Being a characteristic of the viewfinder of this unit, this phenomenon is not a problem. Recorded images are not affected.
Playback
Cannot view pictures. There are no recorded pictures.
- A card is not inserted in the camera.
- Has the file name of the picture been changed on a computer? If so, it cannot be played back on the camera.
→ It is recommended to use the software available for downloading after registering your camera on the Leica Camera AG homepage to write pictures from PC to card. - Set [Playback Mode] to [Normal Play]. (→217)
Red areas in pictures appear blackened.
- When the digital red-eye correction (☐), [☐] is operating, red areas may be blackened.
→ We recommend closing the built-in flash, setting the flash mode to [⚡], or setting [Red-Eye Removal] to [OFF] before recording. (→179)
Wi-Fi function
A Wi-Fi connection cannot be established. Radio waves get disconnected. Wireless access point is not displayed.
General tips for using a Wi-Fi connection
- Use within the communication range of the wireless LAN network.
- Is any device, such as a microwave oven, cordless phone, etc., that uses 2.4 GHz frequency operated nearby?
→ Radio waves may get interrupted when used simultaneously. Use them sufficiently away from the device. - When the battery indicator is flashing red, the connection with other equipment may not start or the connection may be disrupted. (A message such as [Communication error] is displayed.)
- When this unit is placed on a metal table or shelf, the connection may not be established easily. Use the camera away from metal surfaces.
About a wireless access point
- Check if the wireless access point to connect is in operating state.
- Check the radio wave condition of the wireless access point.
→ Perform the connection closer to the wireless access point.
→ Move the location or change the angle of the wireless access point.
- It may not display even if the radio waves exist depending on the setting of the wireless access point.
→ Turn off the wireless access point and then turn it back on.
- Is the network SSID of the wireless access point set not to broadcast?
→ It may not be detected when it is set not to broadcast. Enter and set the network SSID.
Alternatively, set the network SSID of the wireless access point to broadcast.
This unit is not displayed in the Wi-Fi setting screen of the smartphone.
- Try switching the ON/OFF of the Wi-Fi function in the Wi-Fi settings of the smartphone.
Transmission of the image fails midway. There is an image that could not be transmitted.
• Is the size of the image too large?
→ Transmit after dividing the video with [Video Divide] (→229).
→ Reduce the image size at [Size], and then send.
- It may take longer time to transmit when distance to the wireless access point is far.
→ Transmit closer to the wireless access point. - Check the file format of the image to send.
I have forgotten the password for the Wi-Fi.
→ Execute the [Reset Network Settings] in the [Setup] menu. (→213)
However, the information you have set on the [Wi-Fi Setup] or [Bluetooth] will be reset.
No image appears on TV. Image blurred or not colored.
- Not connected correctly ( 238) .
- The television has not been switched to auxiliary input.
HDTV Link (HDMI) is not working.
- Is the camera's [HDTV Link] setting set to [ON]? ( 210)
→ Check the HDTV Link (HDMI) settings on the device you are connecting to.
→ Turn the camera off and on again.
Cannot communicate with the computer.
- Set [USB Mode] to [PC(Storage)] (→209, 241).
- Turn the camera off and then on again.
Computer does not recognize card. (When using an SDXC Memory Card)
- Check whether your computer is compatible with SDXC Memory Cards.
- A message prompting you to format the card may appear when you connect it. Do not format the card.
- If the [Access] indicator on the screen does not go off, turn the camera off before disconnecting the USB cable (supplied).
Cannot print when connecting to printer.
- Printer not compatible with PictBridge.
- Set [USB Mode] to [PictBridge(PTP)] (→209, 244).
The edges of pictures are cut off when printing.
- Release any trimming or edgeless printing settings on printer before printing.
- The aspect ratio of pictures is different from that of paper used for printing.
→ If printing in shop, check if 16:9 sizes can be printed.
Q&A Troubleshooting
Others
The lens makes a clicking noise.
- When the camera is turned on or off, the lens is moved, or an aperture operation is performed, such a noise may be heard. This is not a malfunction.
- When the brightness changes after a zooming operation or moving the camera, the lens may make a noise while adjusting the aperture. This is not a malfunction.
Zooming stops instantaneously.
- When using the Extended optical zoom, the zooming action will stop temporarily. This is not a malfunction.
Red lamp illuminated when pressing shutter button halfway in dark locations.
• AF Assist Lamp is set to [ON] ( 191).
Camera is hot.
- Camera may become a little warm during use, but this does not affect performance or quality.
Clock is incorrect.
- If you do not use the camera for a long time, the clock may be reset. → Reset the clock (→32).
Restrictions on use and additional notes
When in use
Keep this camera as far away as possible from electromagnetic equipment (such as microwave ovens, TVs, video games etc.).
- If you use this camera on top of or near a TV, its pictures and/or sound may be disrupted by electromagnetic wave radiation.
- Do not use this camera near cell phones because doing so may result in noise adversely affecting the pictures and/or sound.
- Recorded data may be damaged, or pictures may be distorted, by strong magnetic fields created by speakers or large motors.
- Electromagnetic wave radiation may adversely affect this camera, disturbing the pictures and/or sound.
- If this camera is adversely affected by electromagnetic equipment and stops functioning properly, turn it off and remove the battery or disconnect AC adaptor. Then reinsert the battery or reconnect AC adaptor and turn it on again.
Do not use this camera near radio transmitters or high-voltage lines.
- If you record near radio transmitters or high-voltage lines, the recorded pictures and/or sound may be adversely affected.
Do not extend the supplied cord or cable.
Do not allow the camera to come into contact with pesticides or volatile substances (can cause surface damage or coating to peel).
Do not keep objects such as credit cards that may be influenced magnetically close to this unit. The data on these objects may become corrupted and unusable.
Never leave the camera and the battery in a car or on a car hood in the summer. Doing so may cause leakage of the battery electrolyte, overheating, fire or a battery explosion due to high temperature.
Caring for your camera
To clean your camera, remove the battery, and/or disconnect the power plug from the outlet, and wipe with a soft, dry cloth.
Use a damp cloth to remove stubborn stains, before wiping with a dry cloth.
Do not use benzine, thinners, alcohol or kitchen detergent, as these may damage the outer casing and finish of the camera.
If using a chemically-treated cloth, read the supplied instructions carefully.
For care of the viewfinder/Eye cup
- As the eye cup cannot be removed, blow away the dust on the viewfinder surface with a blower (commercially available), gently wipe it with a dry and soft cloth, and be careful not to remove it.
- If you wipe the eye cup too hard and it is removed, consult the dealer or your nearest Leica Customer Care center.
When not using for a while
Turn off the camera before removing the battery and card.
- Ensure that battery is removed to prevent damage through over-discharge.
- Clock settings will be saved for approx. 3 months after the battery is removed, provided a fully charged battery was installed in the camera for 24 hours beforehand.
Do not leave in contact with rubber or plastic bags.
Store together with a drying agent (silica gel) if leaving in drawer, etc. Store batteries in cool (15 °C to 25 °C (59 °F to 77 °F)) places with low humidity (40%RH to 60%RH) and no major temperature changes.
Charge battery once per year and use completely before storing again.
Check all the parts before taking pictures when you have not used the camera for a long period of time.
Monitor/viewfinder
Avoid excessive pressure on the monitor. This may cause uneven display and damage the monitor.
In cold climates or other situations when the camera becomes cold, the monitor or the viewfinder may appear slightly darker than normal immediately after the camera is turned on. Normal brightness will return once the internal components have warmed up.
The monitor and viewfinder are made with extremely high precision technology.
However, there may be some dark or bright spots (red, blue or green) on the screen.
This is not a malfunction. The monitor and viewfinder screens are controlled with extremely high precision, but some pixels may be inactive. The spots will not be visible on the recorded pictures.
Lens
Avoid excessive pressure on the lens.
Images may appear slightly white if the lens is dirty (fingerprints, etc.). Turn the camera on, hold the extracted lens barrel with your fingers and gently wipe the lens surface with a soft, dry cloth.
Do not leave the camera with the lens facing the sun as rays of light from the sun may cause it to malfunction. Also, be careful when placing the camera outside or near a window.
Battery
The battery is a rechargeable lithium ion battery.
This battery is easily affected by temperature and humidity, and is affected more when the temperature is high or low.
Remove the battery from camera after use.
- Keep the battery in a plastic bag, making sure that it is kept away from metallic objects (such as clips) when carrying or storing it.
The time required for charging varies depending on the conditions of battery usage. Charging takes longer at high or low temperatures and when the battery has not been used for some time.
The battery will be warm during charging and for some time thereafter.
Battery will run out if not used for long periods of time, even after being charged.
Do not leave any metal items (such as clips) near the contact areas of the power plug. Otherwise, a fire and/or electric shocks may be caused by short-circuiting or the resulting heat generated.
It is not recommended to charge the battery too frequently.
(Frequently charging battery reduces maximum usage time and can cause battery to expand.)
The battery will be close to the end of its lifespan if it discharges very quickly. Please purchase a new battery.
When charging:
- Wipe dirt from the battery terminal with a dry cloth.
- Keep at least 1 m (3.3 feet) away from AM radio (may cause radio interference).
Do not use a damaged or dented battery (especially connectors), e.g. by dropping (can cause faults).
AC adaptor (supplied)
Keep at least 1 m (3.3 feet) away from AM radio (may cause radio interference).
The AC adaptor (supplied) may generate whirring sounds when in use. This is not a malfunction.
After use, be sure to disconnect the AC adaptor from the electrical outlet. (A very small amount of current is consumed if it is left connected.)
Memory cards
To prevent damage to cards and data
- Avoid high temperatures, direct sunlight, electromagnetic interference, and static electricity.
- Do not bend, drop, or expose to other physical forces.
- Put the card in the card case or the storage bag after use and when storing or carrying the card.
- Do not touch terminals on reverse of the card or allow them to become dirty or wet.
Recorded data may be damaged or lost if the camera malfunctions due to inappropriate handling. Leica Camera AG will not be liable for any damage caused due to loss of recorded data.
Disposing of/transferring memory cards
- The “format” or “delete” functions on your camera or computer only changes the file management information and does not fully erase the data stored on the memory card. When disposing of or transferring your memory cards, we recommend physically destroying them or using commercially available computer data erasing software to completely remove the data from the card. Data stored on memory cards should be managed responsibly.
When using a tripod or unipod
Do not apply excessive force or tighten screws when they are not threaded correctly. (This may damage the camera, screw hole, or label.)
Ensure that the tripod is standing securely. (Refer to the tripod instructions.)
You may not be able to remove the card or the battery when using a tripod or unipod.
Personal Information
We recommend setting up a Wi-Fi password or a Wi-Fi function lock to protect your private information.
If names or birthdays are set in [Profile Setup] or in the [Face Recog.] function, keep in mind that the camera and recorded pictures will contain personal information.
Be sure to pay special attention to the privacy, likeness rights, etc. of a subject and use the [Silent Mode] and other functions like writing location information or changing the shutter sound responsibly.
Disclaimer
- Data containing personal information can be altered or lost due to malfunction, static electricity, accidents, breakdowns, repairs, or other operations.
Leica Camera AG will not be liable for any damage that occurs, direct or indirect, as a result of the alteration or loss of data containing personal information.
When ordering repairs or transferring/disposing of the camera
- After you make a note of the personal information, perform [Reset Network Settings] to delete data containing personal information such as wireless LAN connection settings that you registered or set in this unit. (→213)
- To protect your personal information, please reset the settings. (→213)
- Remove the memory card from the camera.
- When ordering repairs, settings may be returned to the initial purchase state.
- If the above operations cannot be performed because of a camera malfunction, consult your dealer or the nearest Leica Customer Care department.
When transferring or disposing of your memory card, see “Disposing of/ transferring memory cards” in the previous section. ( 267)
Uploading pictures to WEB services
- Pictures may contain personal information that can be used to identify the user, such as titles, recording dates and times, and location information. Before uploading the pictures to WEB services, check the pictures carefully for information that should not be disclosed.
Wi-Fi function
Use the camera as a wireless LAN device
When using equipment or computer systems that require more reliable security than wireless LAN devices, ensure that the appropriate measures are taken for safety designs and defects for the systems used. Leica Camera AG will not take any responsibility for any damage that arises when using the camera for any purpose other than as a wireless LAN device.
Use of the Wi-Fi function of this camera is presumed to be in countries where this camera is sold
There is the risk that the camera violates radio frequency regulations if used in countries other than those where this camera is sold, and Leica Camera AG takes no responsibility for any violations.
There is the risk that data sent and received wirelessly may be intercepted
Please note that there is the risk that data sent and received wirelessly may be intercepted by a third party. We strongly recommend that you enable encryption in the settings of your wireless access point to ensure data security.
☐ no not use the camera in areas with magnetic fields, static electricity or interference
- Do not use the camera in areas with magnetic fields, static electricity or interference, such as near microwave ovens. These may interfere with the wireless capability of the camera.
- Using the camera near devices such as microwave ovens or cordless telephones that use the 2.4 GHz radio wave band may cause a decrease in performance in both devices.
■No not connect to any wireless network you are not authorized to use
When the camera utilizes its Wi-Fi function, wireless networks will be searched automatically. When this happens, wireless networks that you are not authorized to use (SSID*) may be displayed. Do not attempt to connect to these networks as this action may be considered unauthorized access.
* SSID refers to the name that is used to identify a network over a wireless LAN connection. Transmission is enabled if the SSID matches for both devices.
Restrictions on use and additional notes
SDXC Logo is a trademark of SD-3C, LLC.
The terms HDMI and HDMI High-Definition Multimedia Interface, and the HDMI Logo are trademarks or registered trademarks of HDMI Licensing Administrator, Inc. in the United States and other countries.
Leica is a registered trademark of Leica Microsystems IR GmbH.
ELMARIT is a registered trademark of Leica Camera AG.
Adobe is a trademark or registered trademark of Adobe Systems Incorporated in the United States and/or other countries.
Windows is a registered trademark or trademark of Microsoft Corporation in the United States and/or other countries.
iMovie, Mac, OS X and macOS are trademarks of Apple Inc., registered in the U.S. and other countries.
iPad, iPhone, iPod, and iPod touch are trademarks of Apple Inc., registered in the U.S. and other countries.
App Store is a service mark of Apple Inc.
Google, Android and Google Play are trademarks of Google LLC.
The Bluetooth ^® word mark and logos are registered trademarks owned by Bluetooth SIG, Inc. and any use of such marks by Leica Camera AG is under license. Other trademarks and trade names are those of their respective owners.
The Wi-Fi CERTIFIED™ Logo is a certification mark of Wi-Fi Alliance®.
The Wi-Fi Protected Setup™ Logo is a certification mark of Wi-Fi Alliance®.
"Wi-Fi®" is a registered trademark of Wi-Fi Alliance®.
"Wi-Fi Protected Setup™", "WPA™", and "WPA2™" are trademarks of Wi-Fi Alliance®.
QR Code is a registered trademark of DENSO WAVE INCORPORATED.
This product uses “DynaFont” from DynaComware Corporation. DynaFont is a registered trademark of DynaComware Taiwan Inc.
Other names, company names, and product names mentioned in these instructions are trademarks or registered trademarks of their relevant owners.
Restrictions on use and additional notes


CERTIFIED


This product is licensed under the AVC Patent Portfolio License for the personal use of a consumer or other uses in which it does not receive remuneration to (i) encode video in compliance with the AVC Standard (“AVC Video”) and/or (ii) decode AVC Video that was encoded by a consumer engaged in a personal activity and/or was obtained from a video provider licensed to provide AVC Video. No license is granted or shall be implied for any other use. Additional information may be obtained from MPEG LA, L.L.C.
See http://www.mpegla.com
This product incorporates the following software:
(1) the software developed independently for Leica Camera AG,
(2) the software owned by third party and licensed to Leica Camera AG,
(3) the software licensed under the GNU General Public License, Version 2.0 (GPL V2.0),
(4) the software licensed under the GNU LESSER General Public License, Version 2.1 (LGPL V2.1), and/or
(5) open source software other than the software licensed under the GPL V2.0 and/or LGPL V2.1.
The software categorized as (3) - (5) are distributed in the hope that it will be useful, but WITHOUT ANY WARRANTY, without even the implied warranty of MERCHANTABILITY or FITNESS FOR A PARTICULAR PURPOSE. Please refer to the detailed terms and conditions thereof displayed by selecting [MENU/SET] → [Setup] → [Version Disp.] → [Software info].
Leica service addresses
LEICA CUSTOMER CARE
Please contact the Customer Care department of Leica Camera AG for the maintenance of your Leica equipment and for help and advice regarding Leica products and how to order them. You can also contact the Customer Care department or the repair service provided by your regional Leica subsidiary for repairs or warranty claims.
Leica Camera AG
Leica Customer Care
Am Leitz-Park 5
35578 Wetzlar
Germany
Phone: +49 (0)6441 2080-189
Fax: +49 (0)6441 2080-339
Email: customer.care@leica-camera.com
www.leica-camera.com
LEICA ACADEMY
Have a look at our full seminar program with many interesting workshops on the topic of photography at:
us.leica-camera.com/Leica-Akademie/Global-Leica-Akademie

DAS WESENTLICHE.
Leica Camera AG | Am Leitz-Park 5
The camera can be controlled remotely using a smartphone/tablet PC. This will require an installation of the Leica FOTOS app on the mobile device.
▶ Scan the following QR code with the mobile device

or
The app is available from Apple App Store™/Google Play Store™
CONNECTION
FIRST-TIME CONNECTION TO A MOBILE DEVICE
The connection is established via Bluetooth. A pairing of the camera and the mobile device is required for a first-time connection to a mobile device.
CONNECTION WIZARD
The connection wizard appears at initial startup of the camera or after a camera reset. These settings are also available via the menu item .
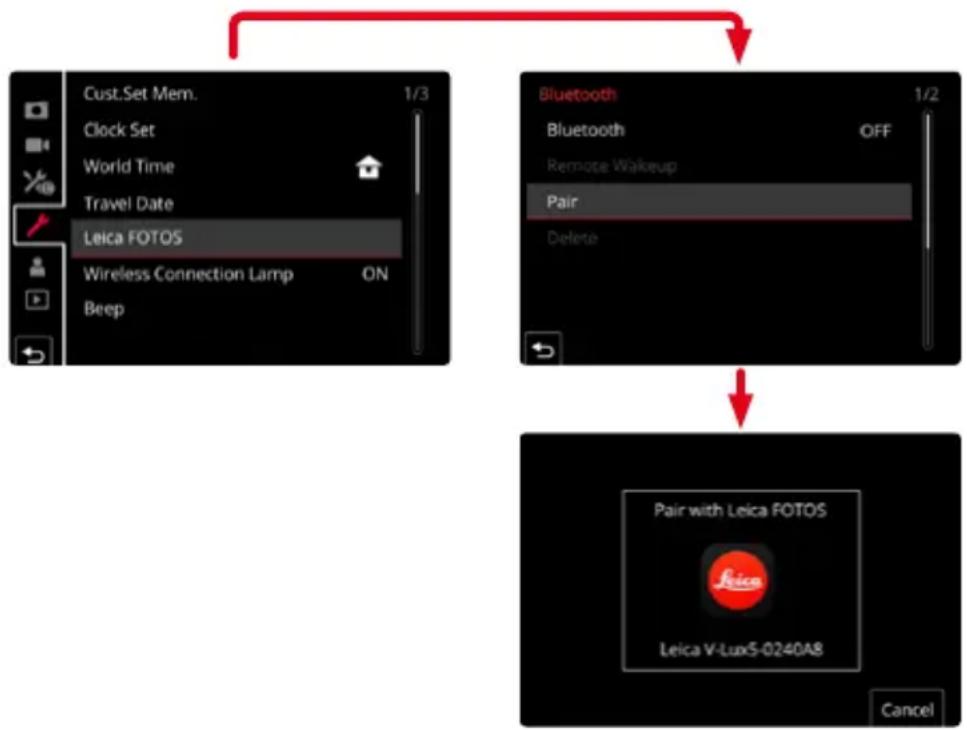
flowchart
graph TD
    A["Cust.Set Mem. 1/3"] --> B["Leica FOTOS"]
    C["Clock Set"] --> B
    D["World Time"] --> B
    E["Travel Date"] --> B
    F["Wireless Connection Lamp ON Beep"] --> B
    B --> G["Bluetooth 1/2"]
    G --> H["Bluetooth OFF Remote Wakeup Pair Delete"]
    H --> I["Pair with Leica FOTOS Leica V-Lux5-0240A8 Cancel"]
USING THE MENU TO
ON THE MOBILE DEVICE
▶ Activate Bluetooth
▶ Launch the Leica FOTOS app
▶ Select the camera model
IN THE CAMERA
▶ Select Leica FOTOS in the main menu
▶ Select Bluetooth
- Bluetooth is activated.
▶ Follow the Leica FOTOS instructions
- The relevant icons appear on the LCD panel and the status LED lights in blue once a connection is established successfully.
Notes
- The pairing process may take a few minutes to complete.
- Each mobile device only needs to be paired with the camera once. The process adds the device to the list of known devices.
- GPS data will be automatically determined and written to the Exif data when pictures are taken while the camera is connected to the Leica FOTOS app.
CONNECTING TO KNOWN DEVICES
▶ Select Leica FOTOS in the main menu
▶ Select Bluetooth
▶ Select
- Activate the Bluetooth function.
- The camera connects to the mobile device automatically.
Notes
- Should there be more than one known device in the vicinity of the camera, then it will automatically connect to the first device responding. A favorite mobile device cannot be specified.
- We recommend removing rarely used devices from the list of known devices to prevent unwanted connections.
- Disconnect and reconnect (i.e. deactivating and reactivating Bluetooth in the camera) if the wrong device was connected.
REMOVING DEVICES FROM THE LIST OF KNOWN DEVICES
▶ Select Leica FOTOS in the main menu
▶ Select
▶ Select the relevant device
- A security prompt appears on the LCD panel.
▶ Select
Note
- The pairing process will have to be repeated to reconnect a deleted device to the camera.
REMOTE CAMERA CONTROL
You can take pictures and record video remotely via the mobile device, and can also change image settings or transfer data to the mobile device. A list of available functions and instructions for their use can be found in the Leica FOTOS app.
REMOTE CAMERA ACTIVATION
The camera can be activated remotely from off or standby if this function is activated in the camera. The Bluetooth function must be active.
▶ Select Leica FOTOS in the main menu
▶ Select Remote Wakeup
▶ Select
- The camera will scan for known devices and automatically establishes a connection.
Important information
- Remote activation will activate the camera even if it was switched off via the main switch.
- Accidental remote camera activation may result in unwanted pictures taken and excessive power consumption.
- A third-party device can – provided is has been paired with the camera – access the camera remotely if your own mobile device is not currently connected or its Bluetooth function is deactivated. This poses a danger of unauthorized access to your data or camera functions.
Solution
- Only activate this function just before you want to use it.
- Disable the function as soon as it is no longer needed.
- Finding the information you need
- Icons in picture/recording mode
- Recording mode: A A P A S M □ SCN COL
- About the icons in the text
- General information
- Preparation
- Basics
- Recording mode
- Taking pictures with automatic settings
- Taking pictures with automatic aperture value and shutter speed settings
- Taking pictures with manual settings for aperture value and shutter speed 63
- Recording panorama pictures (Panorama Shot Mode)....69
- Taking scene pictures (Scene Guide Mode) 72
- Taking pictures with creative effects (Creative Control Mode)....75
- Recording video by setting the aperture/ shutter speed/ISO sensitivity (Creative Video Mode) 81
- Configuring custom recording settings (Custom Mode)....85
- Focus, Brightness (Exposure) and Color Settings
- Taking Pictures with Auto Focus.....87
- Taking close-up pictures (Macro recording) 101
- 4K Photo and Drive Settings
- Stabilizer, Zoom and Flash
- Recording video
- Playing Back and Editing Pictures
- Using Menu Functions
- Wi-Fi/Bluetooth
- Connecting with other devices
- Others
- Recording
- 4K Photo
- Focus (AF/MF)
- Drive
- Exposure
- Picture Quality and Color Tone
- Flash
- Monitoring
- Audio
- Screen settings
- Setup/Custom
- Basic settings
- Customization
- Playback
- Edit
- Image settings
- Leica FOTOS
- PC
- TV
- Recorder
- Printer
- Camera handling
- Protect the camera against vibration, impact or pressure.
- The camera is not dust resistant, splash resistant, or waterproof.
- Avoid using the camera in places with excessive dust or sand, or where water can come into contact with the camera.
- If sand, dust, or liquids such as water droplets adhere to the monitor, wipe them off with a dry soft cloth.
- ●ondensation (When the lens, the monitor, or viewfinder, is fogged up)
- Always take test shots
- No compensation for missed shots
- Copyright
- Scope of delivery
- Replacement parts/Accessories
- ■Removing the Hot Shoe Cover
- Notes:
- Attaching the Lens Cap/Shoulder Strap
- Attaching the Lens Cap
- Use the lens cap string (supplied) to attach the lens cap to the camera
- Attaching the lens cap
- Attaching the Shoulder Strap
- Charging the Battery
- Batteries to be used with this camera
- Inserting the battery
- Charging indicators
- Charge indicator (Red)
- Notes on charging time
- Remaining battery charge
- Estimated number of recordable pictures and operating time
- Recording stills (using the viewfinder (EVF))
- The operating times and number of recordable pictures will differ depending on environmental and operating conditions.
- Inserting and removing the memory card
- Slide the release lever to the [OPEN] position and open the card/battery compartment
- Insert the memory card fully
- Close the card/battery compartment and slide the release lever to the [LOCK] position
- About the Memory Card
- About video/4K photo recording and speed class ratings
- Accessing the memory card
- Formatting the Memory Card (initialization)
- MENU → [Setup] → [Format]
- Estimated recording capacity (number of pictures/recording time)
- Still image capacity
- Recording time capacity (Video)
- Attaching the Lens Hood
- Opening out the monitor
- Free angle shooting
- Setting the Date and Time
- Changing time settings
- Handling the camera correctly
- Orientation detection
- Basic operation
- [EVF] button (Taking pictures via the viewfinder)
- Press the [EVF] button
- Automatic switchover between viewfinder and monitor
- ■iopter adjustment
- Zoom Lever (Use Zoom)
- [Zoom Compose Assist] button
- (Using the Zoom Compose Assist function)
- Press and hold [☐] ([Zoom Compose Assist]) button
- Align the frame with the subject and release your finger from the button
- Setting how much the camera zooms out
- MENU → ⚫ [Custom] → Ⓞ [Operation] → [Zoom Compose Assist]
- Settings: [L] / [S]
- Shutter button (Taking pictures)
- Press the shutter button halfway (first pressure point) to focus on the subject
- Press the shutter button fully (second pressure point) and take the picture
- Focus range
- Video button (recording video)
- Mode dial (recording mode selection)
- Front Dial/Rear Dial
- Rotating:
- Temporarily changing the operation of the front/rear dials ([Dial Operation Switch])
- Press the function button
- Turn the front/rear dials while the guide is displayed
- Press [MENU/SET] to confirm the setting
- Control ring
- Changing the function assigned to the control ring
- Cursor button / [MENU/SET] button (Selecting/setting items)
- [DISP] button (Switching the display information)
- During recording
- Using the horizon line
- Tilting up or down
- Tilting left or right
- During playback
- Touch screen (touch functions)
- Touch
- Drag
- Pinch (spread/pinch)
- Taking pictures using the touch function
- Focusing on the subject (Touch AF, Touch Shutter)
- Touching an icon
- (When any other setting than OFF is selected) Touch the subject
- Matching the brightness to the touched position ([Touch AE])
- Recording mode: A A P A S M M SCN COL
- - Canceling the [Touch AE] function Touch [图标]
- Menu Settings
- Press [MENU/SET] to bring up the menu
- Switch the menu type
- Press ▲ to select a menu item and press [MENU/SET]
- - Using touch screen operations enabled Touch the menu item
- Press ▲ to select a setting and press [MENU/SET]
- - Using touch screen operations enabled Touch the setting to set
- Press the [→] button repeatedly until the recording or playback screen appears
- - Using touch screen operations enabled Touch [◀]
- Accessing frequently used menu items (Quick Menu)
- Press the [Q MENU] button
- Turn the front dial to select the menu item
- Turn the rear dial to select the setting
- Press the [Q MENU] button to exit the Quick Menu
- Configuring the Quick Menu
- Assigning frequently used button functions
- (Function buttons)
- Set the menu
- Press ▲ to select the function button you want to assign a function to and press [MENU/SET]
- Press ▲ to select the function you want to assign and press [MENU/SET]
- Configuring the function button settings from the monitor recording information screen
- Quick function assignment
- Using the function buttons during recording
- Using function buttons with touch operations
- Available function assignments in [Setting in REC mode]
- Assigning frequently used button functions (Function buttons)
- Using the function buttons during playback
- Functions that can be assigned in [Setting in PLAY mode]
- Entering text
- Use ▲▼ to select characters
- Press [MENU/SET] several times until the desired character is displayed
- change the character type
- continue entering characters
- edit text
- When you are finished entering text, use ▲▼ to select [Set] and press [MENU/SET]
- Taking pictures with automatic settings (Snapshot Modes)
- Recording mode: A A
- Set mode dial to [A]
- Point the camera at the subject
- Toggling between Snapshot Plus Mode and Snapshot Mode
- MENU → A [Snapshot Mode] → [Snapshot Mode]
- Settings: [A] (Snapshot Mode) / [A](Snapshot Plus Mode)
- Auto Focus, Face/Eye Detection, and Face Recognition
- Automatic Scene Detection
- About Backlight Compensation
- [Snapshot Mode] menu
- Taking pictures using a handheld camera ([iHandheld Night Shot])
- MENU → A [Shot Mode] → [iHandheld Night Shot]
- Settings: [ON] / [OFF]
- Combining pictures into a single still with rich gradation ([iHDR])
- Taking pictures with custom color saturation, focus and brightness settings
- Recording mode: A
- Color saturation settings
- Defocusing the background (Defocus control function)
- Brightness settings
- Touch screen settings
- Taking pictures with automatic aperture value and shutter speed settings (Program AE Mode)
- Recording mode: P
- About Program Shift
- Taking pictures with manual settings for aperture value and shutter speed
- Recording mode: ASM
- Taking pictures with only the aperture value set manually (Aperture-Priority AE Mode)
- Turn the rear or front dial to set the aperture value
- Taking pictures with only the shutter speed set manually (Shutter-Priority AE Mode)
- Set mode dial to [S]
- Turn the rear or front dial to set the shutter speed
- Taking pictures with manual settings for aperture value and shutter speed (Manual Exposure Mode)
- Set mode dial to [M]
- Turn the rear dial to set the shutter speed, and turn the front dial to set the aperture value
- Optimizing the ISO sensitivity for the aperture value and shutter speed
- Manual exposure assist (estimate)
- [B] (Bulb) (Approximately up to 120 seconds)
- Checking the effects of the aperture value and shutter speed (Preview Mode)
- Recording mode: A A P A S M ▶ M □ SCN COL
- Press the [FN7] button to toggle the confirmation screen
- Setting the aperture value / shutter speed for suitable exposure (One Push AE)
- How to tell if the exposure is not adequate
- Ⓐ Blinks red
- (When exposure is not adequate) Press the function button
- Recording panorama pictures (Panorama Shot Mode)
- Recording mode:
- Press the shutter button fully again to end recording
- Changing the recording direction and angle of view (image size) of panorama pictures
- MENU → [Panorama Shot] → [Direction] / [Picture Size]
- Tips
- About panorama picture playback
- Taking scene pictures (Scene Guide Mode)
- Recording mode: SCN
- Set the mode dial to [S]CN
- Press ◀ to select the scene and press [MENU/SET]
- Displaying the description of each scene and recording tips
- Press the [DISP] button while the scene selection screen is displayed
- 1: [Clear Portrait]
- 2: [Silky Skin]
- 3: [Backlit Softness]
- 4: [Clear in Backlight]
- 5: [Relaxing Tone]
- 6: [Sweet Child's Face]
- 7: [Distinct Scenery]
- 8: [Bright Blue Sky]
- 9: [Romantic Sunset Glow]
- 10: [Vivid Sunset Glow]
- 11: [Glistening Water]
- 12: [Clear Nightscape]
- 13: [Cool Night Sky]
- 14: [Warm Glowing Nightscape]
- 15: [Artistic Nightscape]
- 16: [Glittering Illuminations]
- 17: [Handheld Night Shot]
- 18: [Clear Night Portrait]
- 19: [Soft Image of a Flower]
- 20: [Appetizing Food]
- 21: [Cute Dessert]
- 22: [Freeze Animal Motion]
- 23: [Clear Sports Shot]
- 24: [Monochrome]
- Taking pictures with creative effects (Creative Control Mode)
- Recording mode: COL
- Set mode dial to [CDL
- Press ▲ to select the picture effect (filters) and press [MENU/SET]
- Displaying the description of each picture effect (Filter)
- Press [DISP] button while the picture effect selection screen is displayed
- Adjusting the picture effects according to your preferences
- Setting the type of defocus ([Miniature Effect])
- Selecting the color to be retained ([One Point Color])
- Setting the position and size of the light source ([Sunshine])
- Tips on positioning the center of the light source
- Taking pictures with different degrees of blurriness and brightness
- Setting the brightness
- Touch screen operation
- Recording video by setting the aperture/shutter speed/ISO sensitivity (Creative Video Mode)
- Recording mode: ▶M
- Set mode dial to [▶M]
- Set the menu
- Press the video button (or shutter button) to start recording
- Press the video button (or shutter button) to stop recording
- Recording slow motion video ([High Speed Video])
- Pan or zoom while recording with the camera in a fixed position ([4K Live Cropping])
- Set the crop start frame and press [MENU/SET] to set
- Repeat step 3, and then set the crop end frame
- Press the video button (or shutter button) to start recording
- Changing the position and size of a crop frame
- ▶ cancel [4K Live Cropping] recording
- Configuring custom recording settings (Custom Mode)
- Recording mode: C
- Configuring custom recording settings ([Cust.Set Mem.])
- MENU → [Setup] → [Cust.Set Mem.] → Memory location for custom settings.
- Recording with profiles
- Set mode dial to [☐]
- Switching profiles
- Modifying a saved profile
- Taking Pictures with Auto Focus
- Set the focus mode lever to [AFS/AFF] or [AFC]
- Press the [button ( )
- Press ◀▶ to select AF Mode and then press [MENU/SET]
- Press the shutter button halfway
- Selecting a Focus Mode (AFS, AFF, AFC)
- Recording mode: A P A S M M □ SCN COL
- Recording in [AFF]/[AFC] mode
- Setting the tracking sensitivity of the focus position
- MENU → [Rec] → [AF Sensitivity(Photo)]
- Switching [AF Mode]
- Recording mode: A A P A S M M □ SCN COL
- Portrait photography (Face/Eye Detection)
- Changing the eye to be in focus
- Touch the eye you wish to focus on
- Focusing on a moving subject (tracking)
- With button operation
- Align the AF Tracking area with the subject and press the shutter button halfway
- Ⓐ AF Tracking area
- With touch screen operation
- Touch the subject
- Subject not centered in picture 49-area-focusing)
- Setting the shape of an AF area etc. (Custom Multi)
- Press ▼
- Select the AF area
- When selecting [□/ [ □] ]
- When selecting [C] / [Φ] [C3]
- Saving the set AF area in [C1], [C2] and [C3] (Custom)
- Determined position for focus □-area-focusing) / + (Pinpoint-focusing)
- (1-area-focusing)
- + (Pinpoint-focusing)
- Changing the position and size of the AF area
- Recording mode: A A P A S M ▶ M □ S C N C O L
- When selecting [ˈɑːl] / [ˈɜːl] / [ˈɑːl]
- When selecting [ ]
- When selecting [+]
- Setting the AF area position with the touch pad
- Recording mode: A P A S M ▶ M □ SCN COL
- Optimizing the focus and brightness for a touched position
- Recording mode: A P A S M M SCN COL
- Touch the subject you want to optimize the brightness for
- Touch [Set]
- Taking close-up pictures (Macro recording)
- Press the [A] Button ( ) ▼
- Press ◀▶ select the item and press [MENU/SET]
- Taking pictures with Manual Focus
- Set the focus mode lever to [MF]
- Press ▲▼▶adjust the focus position, and press [MENU/SET]
- Turn the control ring to adjust focus
- Press the shutter button halfway
- Quickly adjusting the focus using Auto Focus
- Touch [ ]
- Taking pictures by locking the focus and/or exposure (AF/AE Lock)
- Taking pictures with Exposure Compensation
- Press the [+ button
- Turn the rear or front dial to compensate the exposure
- Press the [+] button to set
- Setting the ISO Sensitivity
- Press the [IS]button ( )▲
- Select the ISO sensitivity by turning the rear or front dial
- Press [MENU/SET] to set
- Adjusting the White Balance
- Press the [W]button ( ▶
- Turn the rear or front dial to select the White Balance
- Auto White Balance
- Performing White Balance fine adjustments
- Bracketing with White Balance
- Selecting a Drive Mode
- Turn the drive mode dial
- Burst function
- Focus on the subject and take pictures
- About the maximum number of pictures that can be taken continuously
- Focusing in burst mode
- Recording with the 4K Photo function and selecting pictures to save
- Recording with the 4K Photo function
- Recording mode: A A P A S M ▶M □ SCN COL
- Set the drive mode dial to [
- Select the recording method
- Press the shutter button halfway to exit the menu
- Battery discharge and camera temperature
- Selecting pictures from 4K burst file and saving
- Select a picture with the [▲] on the playback screen, and press ▲
- Drag the slide bar to perform rough scene selection
- Drag to select the frame you want to save as a picture
- Touch [☐] to save the picture
- Selecting and saving pictures on the TV screen
- Marker
- Skip to the marked positions
- Auto Marking function
- Select markers to be displayed
- Notes on the 4K Photo function
- Changing the aspect ratio
- Recording a the subject with reduced blur
- Preventing camera shake when you are recording pictures
- Shutter sound for 4K photo recording
- Scenes not suitable for the 4K Photo function
- Recording indoors
- Fast-moving subjects
- The camera's setup for the 4K Photo function
- Adjusting the focus after recording
- Recording using [Post Focus]
- Set the drive mode dial to
- Determine the composition and press the shutter button halfway
- Adjusting the focus after recording ([Post Focus]/[Focus Stacking])
- Press the shutter button fully to start recording
- About camera temperature
- Select the focus point and save the picture ([Post Focus])
- On the playback screen, select the image with the [icon and press]
- Touch the focal point
- Touch [+] to save the picture
- Select the focus range to combine and create a single picture ([Focus Stacking])
- Touch [icon] on the screen in step 2 of “Select the focus point and save the picture ([Post Focus])” (→129)
- Choose a stacking method and touch to select it
- (When selecting [Range Merging])
- Touch the focal point
- Touch [+] to combine and save the picture
- Notes on the [Post Focus]/[Focus Stacking]
- The camera's setup for recording in [Post Focus]
- Taking pictures with Time Lapse Shot/Stop Motion Animation
- Taking pictures automatically at set intervals [Time Lapse Shot]
- Focus on the subject and take a picture
- Select the video creation method
- Press ▲ to select [OK] and press [MENU/SET]
- Creating stop motion animation [Stop Motion Animation]
- How to create stop motion animation effectively
- Touch [☐] to stop recording
- Select a method to create a stop motion animation
- Press ▲ to select [OK] and press [MENU/SET]
- Adding pictures to an already recorded stop motion animation group
- Taking pictures with self-timer
- Set the drive mode dial to [💡]
- Press the shutter button halfway to focus and then press it fully to take a picture
- Setting the self-timer operation
- Taking pictures while adjusting a setting automatically (Bracket Recording)
- Press ▼ to select [More Settings] and then press [MENU/SET]
- Focus on the subject and take a picture
- Exposure Bracket
- [Step]: [3],1[Sequence]: [0/-/+]
- Aperture Bracket
- Recording mode: AM
- About [More Settings] (step 2 in (→138))
- Example:
- Focus Bracket
- Correcting jitter
- To prevent jitter
- (Panning):
- Using Zoom
- Zoom types and use
- Optical Zoom
- Maximum magnification: 16x
- Extended optical zoom
- [i.Zoom]
- [Digital Zoom]
- MENU → [Rec] / [Motion Picture] → [Digital Zoom]
- Using the zoom by performing touch operations (Touch zoom)
- Touch [◀]
- Touch [T]
- Perform zoom operations by dragging the slide bar
- Taking pictures with flash
- Open/Close the built-in flash
- The available flash range
- Using the flash skillfully
- Setting the flash functions
- Changing the firing mode (Manual flash)
- Setting the flash ratio (When [MANUAL] is selected)
- MENU → [Rec] → [Flash] → [Manual Flash Adjust.]
- Changing Flash Mode
- MENU → [Rec] → [Flash] → [Flash Mode]
- The flash is activated twice. The interval between the first and second flash is longer when [∅] or [ ] is set. The subject should not move until the second flash is activated.
- Setting the 2nd curtain sync
- MENU → [Rec] → [Flash] → [Flash Synchro]
- Adjusting the flash output
- Press ◀ to set the flash output and press [MENU/SET]
- Synchronizing the flash output with the camera during Exposure Compensation
- Recording Video/4K Video
- Press the video button to start recording
- Press the video button again to end recording
- About operation sound when recording ends
- Recording video in Creative Video Mode
- Setting the resolution and the frame rate
- MENU → Motion Picture] → [Rec Quality]
- ■ About the compatibility of the recorded video
- Adjusting the focus while recording video ([Continuous AF])
- Taking stills while recording video
- Press the shutter button fully while video is recording
- Setting the video priority or stills priority mode
- otion Picture] → [Picture Mode in Rec.]
- Recording Snap Movies
- MENU → Motion Picture] → [Snap Movie] → [ON]
- ■Reactivating Snap Movie
- Setting up [Pull Focus]
- Touch operation
- Button operation
- Viewing your pictures
- Press the [▶] (Playback) button
- Press ◀▶ to select a picture to be displayed
- Ending Playback
- Viewing video
- Press ▲ to start playback
- Capturing stills from video
- Display the picture that you want to capture as a still by pressing ▲to pause a video being played back on the camera
- Press [MENU/SET]
- Switching the playback method
- Zooming in and viewing "Playback Zoom"
- Move the zoom lever toward T side
- Viewing a list of pictures "Multi Playback"
- Move the zoom lever toward W side
- Viewing pictures by their recording date "Calendar Playback"
- Move the zoom lever toward the W side to display the calendar screen
- Use ▲▼ to select recording date and press [MENU/SET]
- Viewing group pictures
- Playing back group pictures consecutively
- Press ▲
- Playing back group pictures one by one
- Press ▼
- Use ◀ to scroll through the pictures
- Deleting pictures
- [Delete Single]
- To delete multiple (up to 100 * )/To delete all pictures
- Menu list
- Menus to be displayed in each recording mode
- A [Snapshot Mode]
- M [Creative Video]
- C [Custom Mode]
- [Panorama Shot]
- SCN [Scene Guide]
- [Creative Control]
- [Rec]
- [Aspect Ratio]
- MENU → [Rec] → [Aspect Ratio]
- [Picture Size]
- [Quality]
- Recording mode: A PASM M SCN COL
- About the RAW file format
- [Photo Style]
- In Snapshot Plus Mode:
- Adjusting the picture quality
- Registering the setting for the adjusted picture quality to [Custom]
- [Filter Settings]
- With touch screen operations
- Taking two stills with and without picture effects
- ([Simultaneous Record w/o Filter])
- [Color Space]
- [Metering Mode]
- [Highlight Shadow]
- Turn the front dial to adjust the brightness of the highlighted areas and turn the rear dial to adjust the brightness of the shadowed areas
- Press [MENU/SET]
- [i.Dynamic]
- MENU → [Rec] / [Motion Picture] → [i.Dynamic]
- Settings: [AUTO] / [HIGH] / [STANDARD] / [LOW] / [OFF]
- [i.Resolution]
- MENU → [Rec] / [Motion Picture] → [i.Resolution]
- [Red-Eye Removal]
- MENU → [Rec] → [Red-Eye Removal]
- [ISO Auto Upper Limit (Photo)]
- Recording mode: A A P A S M ▶M □SCN COL
- MENU → [Rec] → [ISO Auto Upper Limit (Photo)]
- Settings: [AUTO] / [200] / [400] / [800] / [1600] / [3200] / [6400] / [12500]
- [Min. Shtr Speed]
- MENU → [Rec] → [Min. Shtr Speed]
- Settings: [AUTO] / [1/16000] to [1/1]
- [Long Shtr NR]
- MENU → [Rec] → [Long Shtr NR]
- [Diffraction Compensation]
- Settings: [AUTO] / [OFF]
- [Silent Mode]
- [Shutter Type]
- MENU → [Rec] → [Shutter Type]
- [HDR]
- [Multi Exp.]
- MENU → [Rec] → [Multi Exp.]
- Press ▲ to select [Start] and press [MENU/SET]
- Decide on your composition and take the first picture
- Record the second, third, and fourth pictures
- Press ▼ to select [Exit] and press [MENU/SET]
- Changing the settings
- [Motion Picture]
- [Flkr Decrease]
- [Level Shot]
- MENU → Motion Picture → [Level Shot]
- [Sound Rec Level Disp.]
- MENU → Motion Picture] → [Sound Rec Level Disp.]
- [Sound Rec Level Adj.]
- MENU → Motion Picture] → [Sound Rec Level Adj.]
- [Sound Rec Level Limiter]
- [Wind Noise Canceller]
- Settings: [HIGH] / [STANDARD] / [OFF]
- [Wind Cut]
- Settings: [HIGH] / [STANDARD] / [LOW] / [OFF]
- [Zoom Mic]
- MENU → Motion Picture] → [Zoom Mic]
- [Custom]
- [Exposure]
- [Focus / Release Shutter]
- [Operation]
- [Monitor / Display]
- [Lens / Others]
- [ISO Increments]
- [Extended ISO]
- [Exposure Comp. Reset]
- [AF/AE Lock Hold]
- [Shutter AF]
- [Half Press Release]
- [Quick AF]
- MENU → Custom] → [Focus / Release Shutter]
- [Eye Sensor AF]
- [AF Assist Lamp]
- [Direct Focus Area]
- [Focus/Release Priority]
- [Focus Switching for Vert / Hor]
- [Loop Movement Focus Frame]
- [AF Area Display]
- [AF+MF]
- [MF Assist]
- [MF Assist Display]
- [ISO Displayed Setting]
- [Front/Rear Dials]
- [Exposure Comp. Disp. Setting]
- [Cursor Buttons (Up/Down)]
- [Operation Lock Setting]
- [Video Button]
- [Touch Settings]
- [Zoom lever]
- [Monochrome Live View]
- [Constant Preview]
- [Peaking]
- [Histogram]
- [Guide Line]
- [Center Marker]
- MENU → [Custom] → [Monitor / Display]
- [Highlight]
- [Zebra Pattern]
- [Expo.Meter]
- [MF Guide]
- [Rec Area]
- [Remaining Disp.]
- [Menu Guide]
- [Lens Position Resume]
- [Lens Retraction]
- [Face Recog.]
- Settings: [ON] / [OFF] / [MEMORY]
- How the Face Recognition function works
- MENU → [Custom] → [Lens / Others]
- Saving faces
- Editing or deleting information about saved persons
- Recording tips when saving faces
- If the camera seems to have difficulty recognizing faces when recording
- [Face Recog.] functions only when Auto Focus mode is set to [S]
- [Profile Setup]
- Setting the name and age in months/years
- Canceling the display of the name and age in months/years
- [Setup]
- [World Time]
- to set daylight savings
- When you come back from your travel destination
- [Travel Date]
- [Travel Setup]
- record [Location]
- [Wi-Fi]
- [Bluetooth]
- [Wireless Connection Lamp]
- [Beep]
- [Economy]
- [Sleep Mode]
- [Sleep Mode(Wi-Fi)]
- [Auto EVF/Monitor Off]
- [Monitor Display Speed] / [EVF Display Speed]
- [Monitor Display] / [Viewfinder]
- [Monitor Luminance]
- [m/ft]
- [USB Mode]
- [TV Connection]
- [HDMI Mode (Play)]
- [HDMI Info Display (Rec)]
- [HDTV Link]
- [Language]
- [Version Disp.]
- [Folder / File Settings]
- MENU → [Setup]
- [No.Reset]
- [Reset]
- [Reset Network Settings]
- [Level Gauge Adjust.]
- [Adjust.]
- Level Gauge Value Reset]
- [Approved Regulations]
- [My Menu]
- [My Menu Setting]
- [Playback]
- How to select an image(s) after selecting [Single] or [Multi]
- [Single]
- [Multi]
- [Slide Show]
- MENU → [Playback] → [Slide Show]
- Use ▲ to select the item and press [MENU/SET]
- Use ▲ to select [Start] and press [MENU/SET]
- change settings
- [Playback Mode]
- [Protect]
- [Rating]
- [Title Edit]
- MENU → [Playback] → [Title Edit]
- Select a still ( → 215)
- Enter characters
- [Face Rec Edit]
- MENU → [Playback] → [Face Rec Edit] → [REPLACE] or [DELETE]
- [RAW Processing]
- MENU → [Playback] → [RAW Processing]
- Press ◀▶ select RAW file and press [MENU/SET]
- Press ▲ to select the item and then press [MENU/SET] to set
- Press [MENU/SET] to finalize the setting
- Press ▲ to select [Begin Processing] and press [MENU/SET]
- Setting each item
- [4K PHOTO Bulk Saving]
- MENU → [Playback] → [4K PHOTO Bulk Saving]
- Use ▶▶ select the 4K burst files and press [MENU/SET]
- Select the first frame to be bulk saved as a picture ( → 120, 121)
- [Light Composition]
- MENU → [Playback] → [Light Composition]
- [Sequence Composition]
- MENU → [Playback] → [Sequence Composition]
- Tips for [Sequence Composition]
- [Clear Retouch]
- MENU → [Playback] → [Clear Retouch]
- Erasing details (enlarging the display)
- [Text Stamp]
- Do not request date printing in store or make date printing on printer for stills with date stamps. (Date printing may be overlapped.)
- [Resize]
- Select a still and size
- [Multi] (up to 100 pictures)
- Picture quality is reduced after resizing.
- [Cropping]
- MENU → [Playback] → [Cropping]
- [Rotate]
- MENU → [Playback] → [Rotate]
- [Video Divide]
- [Time Lapse Video]
- [Stop Motion Video]
- [Rotate Disp.]
- [Picture Sort]
- [Delete Confirmation]
- The Wi-Fi®/Bluetooth® function
- Camera operation via smartphone
- Expanding the scope of applications by connecting the camera to a smartphone compatible with Bluetooth Low Energy
- Connecting the camera to a smartphone
- Installing the smartphone/tablet app "Leica FOTOS"
- Connection
- First-time connection to a mobile device
- In the camera
- On the mobile device
- Connecting to known devices
- Enable the Bluetooth function
- Follow the Leica FOTOS in-app instructions
- Removing devices from the list of known devices
- Select the smartphone you want to delete
- Remote camera control
- Remote camera activation
- Important information
- Solution
- 4K video
- Viewing on TV screen
- Viewing 4K video on a PC screen
- Storing 4K video
- Storing 4K video on your PC
- Viewing on a TV screen
- Connect camera to TV
- Ⓐ HDMI micro cable
- Turn on the TV and switch the TV input source to match the connection jack
- Turn on the camera and press the [▶] (Playback) button
- Recording while monitoring camera images
- Switching the information displayed
- HDTV Link (HDMI)
- What is HDTV Link (HDMI)?
- Turning the camera OFF
- Automatic input select
- Copying the recorded image data to a computer
- Copying stills and video
- Connect camera to computer
- Use ▲ to select [PC(Storage)] and press [MENU/SET]
- Copy the images to the computer using the software available for downloading after registering your camera on the Leica Camera AG homepage
- Copying to your computer without using software
- Storing recorded stills and video in the recorder
- Connect camera to recorder
- Dub by operating the recorder
- Printing
- Connect camera to printer
- Printing multiple pictures
- Use ▲ to select [Print start] and press [MENU/SET]
- Print settings on the camera
- Printing with date and text
- Printing date without [Text Stamp]
- Printing in store:
- Using printer:
- List of monitor/viewfinder displays
- 1
- ②
- 3
- 4
- Message displays
- Memory cards
- [Memory Card Error] / [Format this card?]
- [Read Error] / [Write Error] / [Please check the card]
- [Recording was cancelled due to the limitation of the writing speed of the card]
- [Memory Card Error] / [This memory card cannot be used]
- Battery
- [This battery cannot be used]
- Wi-Fi function
- [Failed to connect wireless access point] / [Connection failed] / [No destination found]
- [Connection failed. Please retry in a few minutes.] / [Network disconnected. Transfer stopped.]
- [Connection failed]
- [Some pictures cannot be deleted] / [This picture cannot be deleted]
- [Cannot be set on this picture]
- [A folder cannot be created]
- [Please turn camera off and then on again] / [System Error]
- Q&A
- Troubleshooting
- Battery, power
- The battery charge indicator is flashing.
- The camera is not working after it is turned on.
- The camera turns off automatically after it is turned on.
- The camera turns off automatically.
- The battery depletes too quickly.
- Striping or flicker may appear in fluorescent lighting and LED lighting.
- Cannot record pictures. The shutter will not operate immediately when the shutter button is pressed.
- Recorded pictures look white.
- Recorded pictures are too bright/too dark.
- Multiple pictures are taken when I press the shutter button just once.
- Check the following settings. If any of them apply, multiple pictures will be taken.
- Focus not aligned correctly.
- Recorded pictures are blurred. The stabilizer function is ineffective.
- Recorded pictures appear coarse, or there is interference.
- Subject appears skewed in pictures.
- Brightness or coloring of recorded picture different from real life.
- 4K photo recording stops before finishing.
- Video
- Cannot record video.
- Video recording stops midway.
- Sometimes focus adjustment with Auto Focus mode is difficult while recording 4K video.
- A noise, such as a clicking or buzzing noise, is recorded on a video. Audio is recorded at low volumes.
- Operating sounds are recorded in a video.
- No flash emitted.
- Monitor/viewfinder
- The monitor/viewfinder is off although the camera is turned on.
- It may flicker for an instant or the brightness of the screen may change significantly for an instant.
- Cannot switch between the monitor and viewfinder when pressing [EVF] button.
- The color saturation in the viewfinder appears differently than in the actual picture.
- Cannot view pictures. There are no recorded pictures.
- Red areas in pictures appear blackened.
- A Wi-Fi connection cannot be established. Radio waves get disconnected. Wireless access point is not displayed.
- General tips for using a Wi-Fi connection
- About a wireless access point
- This unit is not displayed in the Wi-Fi setting screen of the smartphone.
- Transmission of the image fails midway. There is an image that could not be transmitted.
- I have forgotten the password for the Wi-Fi.
- No image appears on TV. Image blurred or not colored.
- HDTV Link (HDMI) is not working.
- Cannot communicate with the computer.
- Computer does not recognize card. (When using an SDXC Memory Card)
- Cannot print when connecting to printer.
- The edges of pictures are cut off when printing.
- The lens makes a clicking noise.
- Zooming stops instantaneously.
- Red lamp illuminated when pressing shutter button halfway in dark locations.
- Camera is hot.
- Clock is incorrect.
- Restrictions on use and additional notes
- When in use
- Caring for your camera
- When not using for a while
- Lens
- AC adaptor (supplied)
- When using a tripod or unipod
- Personal Information
- Disclaimer
- When ordering repairs or transferring/disposing of the camera
- Uploading pictures to WEB services
- Use the camera as a wireless LAN device
- Use of the Wi-Fi function of this camera is presumed to be in countries where this camera is sold
- There is the risk that data sent and received wirelessly may be intercepted
- ☐ no not use the camera in areas with magnetic fields, static electricity or interference
- ■No not connect to any wireless network you are not authorized to use
- Leica service addresses
- LEICA CUSTOMER CARE
- Leica Camera AG
- LEICA ACADEMY
- CONNECTION WIZARD
- USING THE MENU TO
- Notes
- Note
Brand : LEICA
Model : V-LUX 5
Category : Camera